DIY RV Skirting: An Honest Look (and When the Kit Wins)

Key Takeaways
- Skirting works by sealing a still pocket of air against the ground — it traps heat by stopping wind, so it needs no R-value.
- DOE lists insulated skirting and a sealed, insulated underbelly among the top ways to cut floor heat loss and prevent pipe freezing.
- EZ Snap® skirting uses Diamond Weave™ built for extreme cold and can cut heating and propane use up to 40%.
- The patented no-drill Cap & Pin bonds with 3M™ VHB in about 60 seconds per stud; panels snap off and store flat between seasons.
If you've spent a cold night listening to the furnace run and run while the floor stayed icy, you already understand the problem skirting solves: the wind under your rig. The real question is whether you build the skirting yourself or buy a kit — and that deserves an honest answer, not a sales pitch.
Is DIY RV skirting worth it, or should you buy a kit?
DIY RV skirting is worth it if your site is permanent, your winters are mild, and you enjoy the build — materials like foam board or vinyl carry a cheaper sticker price. A kit wins if you move your rig or face hard winters, because it seals reliably, installs without drilling, and stores flat to reuse season after season.
DIY RV skirting is a genuinely good instinct. You're a capable person with a tape measure, you'd rather not pay for what you can make, and a roll of material plus a free weekend feels like the smart move. We respect that. So let's run the real comparison — material by material, winter by winter — and be clear about where DIY wins and where a kit quietly pulls ahead.

What DIY RV skirting actually costs
The sticker price of materials is the part everyone sees. The part that decides the project is everything around it.
- Foam board. Cheap per sheet and a real insulator. But rigid foam is bulky to store, it cracks and chips, wind loves to lever it loose, and cutting clean contours around wheel wells and stabilizers eats a Saturday. Most foam-board skirts are a one- or two-season affair — and when you tally up what foam board really costs you by the third winter, the cheap sticker price stops looking so cheap.
- Plywood or corrugated panels. Sturdy and wind-resistant, but heavy, awkward to set up and tear down, and unfriendly to anyone who actually moves their rig. Good for a permanent site, rough for a snowbird.
- Vinyl / tarp with grommets and screws. The classic DIY skirt. Affordable up front, but it flaps, it sun-rots, the grommets tear out, and screwing into your coach to anchor it is exactly the kind of hole you don't want in your siding.
- Hay bales or snow berms. Free and surprisingly effective for one winter — and a haven for mice, mold, and rot you'll regret by spring.
None of these are wrong. They're just honest about what they are: a cheaper sticker price in exchange for more of your weekend, more storage headache, and a shorter service life.
Where the DIY math gets quietly expensive
Here's the line that changes the whole calculation. Skirting doesn't need an R-value to work — it works by sealing a still pocket of air against the ground so the wind can't carry your heat away. The mechanism is the seal, not the thickness. That means the make-or-break question isn't "how insulating is my material," it's "how well does this thing seal, hold in a real winter gust, and go back up next November?"
A skirt that fails on a January night doesn't fail cheaply. It fails as a frozen water line, a propane tank you refill faster, and a repair bill that dwarfs whatever you saved on materials.
That's the case the value-hunter has to weigh honestly. The DIY skirt that sags, gaps, or blows loose isn't saving money in the season that matters most — and if your whole goal is keeping the cold out and your pipes from freezing, the way the skirt seals matters far more than the material it's cut from. The rebuild — re-cutting foam, re-grommeting vinyl, re-screwing panels — comes around again every couple of winters.

When the kit wins: the long view
A kit isn't magic — it's the same job done with engineered parts that survive repeated seasons of being put up and taken down. That's the whole pitch, and it's a real one.
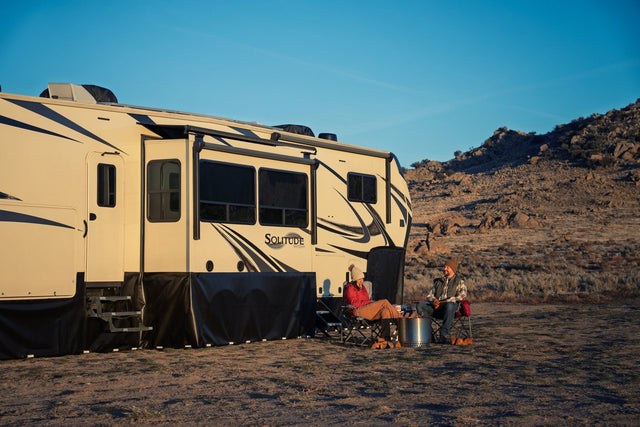
- The fabric is built for the cold. EZ Snap® skirting uses Diamond Weave™ built for extreme cold — it stays flexible when foam board is busy cracking, and it holds its seal against wind instead of flapping loose.
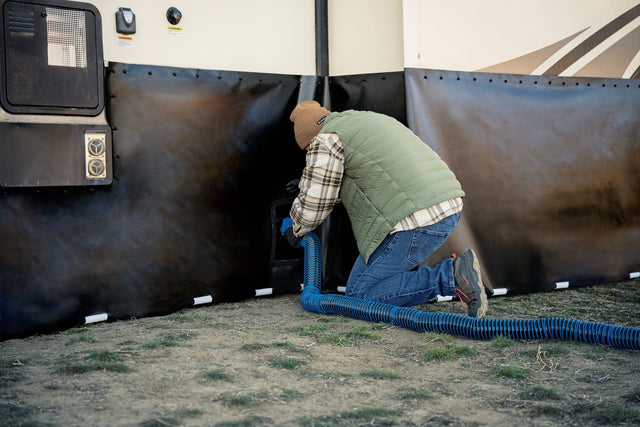
- No holes in your rig. The patented no-drill Cap & Pin bonds with 3M™ VHB to fiberglass, aluminum, vinyl, or gelcoat — about 60 seconds per stud, full strength in roughly 72 hours. The studs stay permanent; the panels are removable, so teardown is a snap, not a demolition. If the thing you most want to avoid is putting holes in your siding, a no-drill winterizing system is the whole reason this approach exists.
- It's a DIY install with household scissors — no drilling, at your own pace. Cut to fit on site, no special tools, no rush.
- It's built to be repeated. The reason the kit wins over the long run is that it doesn't get rebuilt. Snap it off in spring, store it flat, snap it back on in fall. The DIY skirt you'll redo several times, the kit you install once.
A properly sealed, insulated underbelly is also what keeps your plumbing from freezing through a hard winter, not just what trims the bill.2 And the payback isn't abstract: sealing that air pocket can cut heating and propane use up to 40%. Season after season, a skirt you never rebuild — that quietly trims the propane bill every one of those winters — is a different financial animal than a sheet of foam you re-cut every other year. That's the honest case for the kit: not flashier, just cheaper where it counts, measured across the life of the rig.
One scheduling note for winter installers
If you're skirting in the deep cold, plan ahead: the 3M™ VHB adhesive needs roughly 60°F to cure, which is why the big push for skirting happens in the fall, before the freeze. Setting up in winter? Use the Screw or Combo studs so you're never waiting on adhesive in sub-freezing weather. Either way, the studs stay; only the panels come and go.
So — build it yourself if your site is permanent, your winters are mild, and you enjoy the project. That's a legitimate call and we won't pretend otherwise. But if you move your rig, if your winters bite, or if you've already lived through one frozen line, the kit's case is the long-run case: install once, store flat, save every season. Backed factory-direct since 2006, 38,000+ customers, and a Limited Lifetime materials warranty — when you're ready to price the build, you can Build Your RV Skirting Kit and run the numbers against your own rig.
Sources
- DOE lists "Install insulated skirting" and "Add insulation to the belly" among the energy-efficiency improvements that substantially reduce heat loss in manufactured homes; it also recommends air sealing openings around plumbing and ducts. U.S. Department of Energy (Energy Saver), 2024 ↗
- DOE/NREL Weatherization job aid 15-1 directs installers to fill the entire belly cavity to the prescribed R-value 'while ensuring plumbing has sufficient insulation value to prevent condensation or freezing,' creating a 'consistent thermal boundary between conditioned and unconditioned space,' and to reinstall any removed skirting. U.S. Department of Energy / National Renewable Energy Laboratory (Weatherization Assistance Program, Job Aid 15-1), 2024 ↗