How to Measure & Install
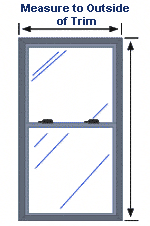 Measurements are taken on the outside of the house. We provide a measuring worksheet to not only determine the number and size of kits you will need to order, but it will give you a reference to follow when it comes time to install your EZ Snap shades.
Typically, you would cut the screen mesh 1/2″ oversized from the size of the window frame, and then you would place the fasteners about 1/2″ to 3/4″” from the outside edges of the screen. You may even want to mount the screen on the glass itself. In that case, you would have to use the 3M adhesive studs instead of the screw-in snap studs.
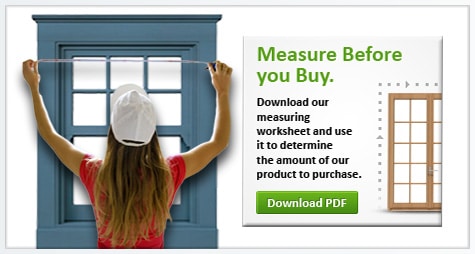
Tip: To get a quick estimate for pricing purposes, measure the approximate window sizes from the inside of your house.
 How to calculate how many feet of mesh you will need:
Using the “Cookie Cutter” method; fit your various window sizes into the 72″ wide mesh. (For oversized windows see below). This method will give you the most efficient use of the EZ-Snap mesh. For example, if you had two windows 3′ wide x 5′ tall you would only need one 5′ EZ-Snap kit since you could get both windows covered with just one kit.
Important: Make sure you draw out and count the number of fasteners you plan to use on your project. If you have many smaller windows, you may have to order additional EZ Snap fasteners to complete your project.
How to Install Residential and RV windows:

Before you start your project; review the initial sketch you made on the measuring worksheet you printed off to place your order with. This sketch should show all the windows you planned to cover and how you would use the “Cookie Cutter” method to get maximum usage of your EZ Snap mesh. You should also review how many EZ Snap fasteners you had planned on using for each window and ensure that you don’t use too many on one window causing you to run out before you are done. You will need a clean,
flat area to lay out your shading mesh. A copy of the install instructions are shipped with your order, but you can print off an extra copy by CLICKING HERE
*** The mesh comes with a natural curl from being rolled up and should be installed with the curl towards the glass for a more professional look.
Using a white pencil crayon and a straight edge, you can transfer your screen measurements on the backside of the mesh. (This will save you time cleaning the edges.) Cut mesh to size using a sharp pair of scissors or a sharp razor knife. Place the self-tapping screw studs into the window frame, do not over tighten! Place the EZ Snap pins over the screw studs. Take the mesh and place over the EZ Snap pins starting in a corner and moving from one pin to the next. Adjust the positioning of the mesh on the pins as needed to remove any wrinkles.
When you are satisfied with the look of the mesh, push on the female EZ Snap caps ensuring that you press them fully onto the pin. You have now finished your first window. Simply repeat the process above for each window and you are done.
If you find that you have a wavy look in part of your screen, it may be caused by what is know as the “Tiger Stripe” effect. This can happen if you have a bug screen on the window you have installed EZ Snap on. Simply removing the bug screen will solve this effect.
If you want to remove the screens in the future for storage or full sun, simply un-snap the black EZ Snap cap and pin from the metal screw stud, roll up and store. See the EZ SNAP VIDEO for a visual.
Fasteners should be placed a maximum of 10″ apart and if you live in an area with extreme winds or have windows that are over 30 sq/ft, then we recommend using a 5″ spacing.
Using the 3M adhesive studs:

 The procedure for using the adhesive studs is practically the same as described above. The main difference is that it is important that you do a thorough job of cleaning the surface. A good product for doing this is a small amount of alcohol on a cloth or a glass cleaner that dries without leaving any residue or film. These studs will work great on any flat, clean surface except porous surfaces like wood.
Click Here to See the Demo video on the strength of the 3M VHB adhesive we use. Do not use it on wooden surfaces!