RV Skirting Kits: What’s in the Box and How to Size Yours

Key Takeaways
- EZ Snap RV skirting kits run $899–$2,099 and ship factory-direct since 2006, free over $225 via FedEx.
- Each kit includes Diamond Weave™ fabric (built for extreme cold), patented no-drill Cap & Pin studs with 3M™ VHB, ground anchoring, and an install guide.
- Skirting works by trapping a sealed still-air pocket under the rig, driving heating and propane savings of up to 40% — no R-value required.
- Size by measuring perimeter and drop height; install studs in fall (VHB needs ~60°F, ~72h to cure) or use Screw/Combo studs for cold.
You found the kit. Now you want to know what actually arrives on the pallet, and which size you need before the first cold snap turns the crawlspace under your rig into a wind tunnel. This is the de-boxed answer.
EZ Snap® RV skirting kits have shipped factory-direct since 2006, and the box has been refined across 38,000+ customers. There is no mystery hardware, no proprietary tooling, and no drilling. What follows is exactly what is inside, how it works, and how to size yours so you order once and install it yourself — no drilling, at your own pace.
What's actually in an RV skirting kit
A skirting kit is a system, not a tarp. Every EZ Snap RV skirting kit is built around four parts that work together:
- Diamond Weave™ panels — the skirting fabric itself, built for extreme cold, so it holds through a Montana winter and a Texas summer alike. Cut to your run with household scissors.
- Patented no-drill Cap & Pin fasteners — the snap studs that hold the panels. They bond with 3M™ VHB adhesive to fiberglass, aluminum, vinyl, gelcoat, and glass. No holes in your rig.
- Ground-anchoring hardware — to seal the bottom edge against wind and pin the still-air pocket in place.
- Install guide and the snap tool — everything a first-timer needs. No special tools, no contractor.
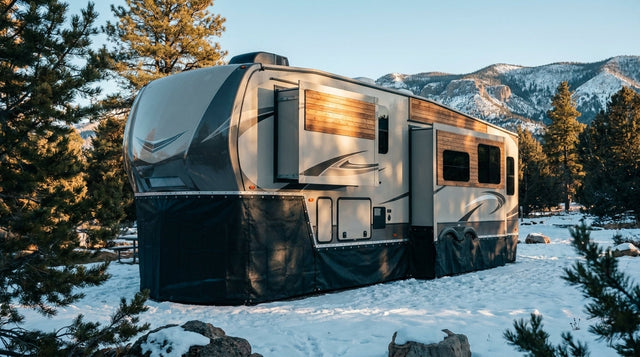
The mechanism is simple and worth understanding before you buy: skirting does not insulate by R-value. It works by trapping a sealed pocket of still air under the rig, so the ground's stable temperature buffers the floor instead of the wind stripping heat away.1 Sealing and insulating the underbelly enclosure this way is also what the Department of Energy credits with cutting floor heat loss and helping keep plumbing from freezing or sweating.2 That trapped-air pocket is why customers report heating and propane savings of up to 40% — and it's the same principle behind keeping the cold out and your pipes from freezing once temperatures drop.
Skirting doesn't add insulation under your RV — it stops the wind from stealing the heat the ground already gives you. That sealed still-air pocket is the whole game.
How to size your RV skirting kit
Sizing is a measurement, not a guess. You need two numbers and one choice.
1. Measure the perimeter
Walk the full distance around the base of your rig — both sides, the front, and the back — measuring the run where skirting will hang. That perimeter length tells you how much fabric you need. Measure the actual path, including any jogs around slide-outs and storage bays.
2. Measure the drop height
Measure from the point where the fasteners will sit on the lower body down to the ground. This is your panel height. Ground is rarely level, so measure at several points and size to your tallest gap — excess trims away in seconds. Fifth wheels add a wrinkle here: the front cap drop, the landing gear, and the king pin all change your numbers, which is why skirting a fifth wheel earns its own walkthrough.

3. Choose your install season
Here is the detail most buyers miss. The standard 3M™ VHB adhesive needs roughly 60°F to cure and reaches full strength in about 72 hours. If you are skirting in the cold — which is when most people finally do it — you'll want the Screw or Combo studs instead of relying on adhesive alone. The smarter move: install your studs in the fall, during the pre-season prep window, while it's still warm enough for the VHB to bond. The studs are permanent. The fabric snaps on when winter arrives and unsnaps in spring.
What a kit costs, and what's included in the price
EZ Snap RV skirting kits run $899 to $2,099, sized to the rig. That spread covers everything from a compact travel trailer to a full-length fifth wheel or motorhome — the price tracks your perimeter and drop height. Orders over $225 ship free via FedEx, and the fabric carries a Limited Lifetime materials warranty.
Because the snap studs bond rather than drill, the skirting is fully removable. The studs stay on the rig permanently; the panels come off for travel or storage and snap back on at the next site. You buy the kit once — which is exactly the trade-off worth weighing if you've been pricing out a DIY build versus when the kit wins.

Buy once, size it right
The whole point of a kit is that you stop sourcing parts. Measure your perimeter, measure your drop, pick warm-season VHB or cold-season screw studs, and the box arrives with the panels, the fasteners, and the guide ready to go. A pair of household scissors and a no-drill install at your own pace, and your crawlspace stops bleeding propane.
When you're ready to spec yours to your exact rig, Build Your RV Skirting Kit and lock in the size before the first freeze.
Sources
- DOE lists "Install insulated skirting" and "Add insulation to the belly" among the energy-efficiency improvements that substantially reduce heat loss in manufactured homes; it also recommends air sealing openings around plumbing and ducts. U.S. Department of Energy (Energy Saver), 2024 ↗
- DOE/NREL Weatherization job aid 15-1 directs installers to fill the entire belly cavity to the prescribed R-value 'while ensuring plumbing has sufficient insulation value to prevent condensation or freezing,' creating a 'consistent thermal boundary between conditioned and unconditioned space,' and to reinstall any removed skirting. U.S. Department of Energy / National Renewable Energy Laboratory (Weatherization Assistance Program, Job Aid 15-1), 2024 ↗