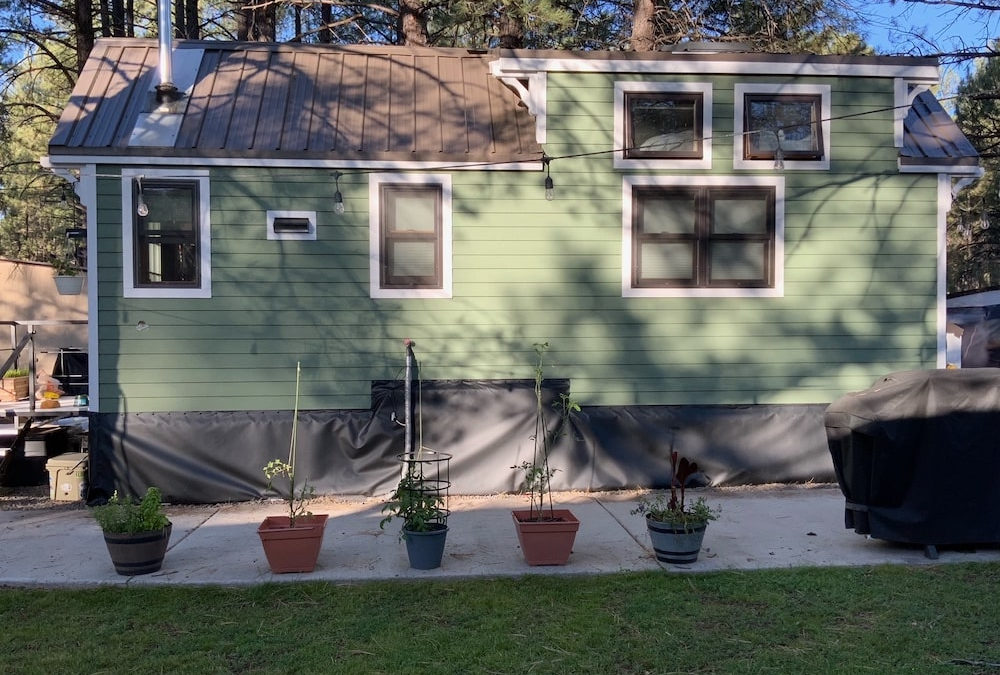
Boosting Your Home’s Curb Appeal Top Skirting Ideas for Houses

Boosting Your Home’s Curb Appeal Top Skirting Ideas for Houses

We all desire a house that warmly invites visitors and leaves a lasting impression. To achieve this, both interior and exterior aspects require attention. Enhancing your home’s curb appeal can improve first impressions and increase resale value.

A well-maintained and aesthetically pleasing exterior can attract more buyers, likely sell faster, and even command a higher price. This is because it looks fresh and reflects pride in ownership, making it appear as a worthy investment to the buyer.

One often-overlooked feature that can make a substantial difference is house skirting. Your choice in skirting can greatly affect both appearance and functionality.

More than merely concealing the crawl space or foundation, skirting is crucial for improving the exterior appearance, protection, and insulation. The right material can provide a clean, unified look that complements the architectural design.

This article explores the world of house skirting, offering top ideas to enhance curb appeal. We’ll investigate various options, along with their benefits and drawbacks, and guide you in choosing the right skirting, installation, maintenance, and replacement.

Understanding The Function of House Skirting

Image Credit: Gerd AltmannPixabay

Understanding House Skirting

House skirting, or underpinning, encloses the space between the ground and the exterior walls’ base. It’s available in diverse materials, each with unique benefits and aesthetic qualities. House skirting isn’t merely an aesthetic addition; it also creates a protective barrier that conceals and shields the crawl space or foundation.

Functional Role of House Skirting

House skirting plays a vital role in maintaining a home’s integrity.

  • Protection against Pests: Skirting serves as a defense mechanism, keeping pests like rodents and insects from accessing the crawl space and invading the foundation.
  • Barrier against Debris: It deters debris, leaves, and other outdoor elements from accumulating under the house, reducing the risk of moisture buildup and potential structural damage.
  • Weather Barrier: House skirting protects the foundation from excess rainwater and moisture, preventing water damage and mold growth, and thus preserving structural integrity.
  • Insulation Benefits: In areas with harsh weather conditions, skirting acts as insulation, protecting plumbing and other vulnerable components from freezing. This helps avoid costly winter repairs.
  • Concealing Unattractive Areas: Skirting covers unsightly parts of your home’s exterior, such as the crawl space or foundation. This results in a more polished and cohesive appearance.
  • Enhancing Energy Efficiency: Certain skirting materials, like insulated skirting, improve energy efficiency by acting as a barrier against cold air. This keeps the interior warmer in winter and cooler in summer, saving on energy costs.

The Aesthetic Importance Of House Skirting

Besides its functional benefits, house skirting also plays a significant role in enhancing the visual appeal of your property. It’s more than a practical addition; it’s a design choice that can transform the overall curb appeal of your home.

  • Elegant and Classic Appearance: Options like brick or stone skirting evoke an elegant and timeless vibe, elevating your home’s aesthetic appeal. It’s a touch of class and sophistication that remains perpetually stylish.
  • Polished Visual Impact: Neat and properly aligned skirting gives your home a sense of completeness and care. It accentuates the overall visual appeal, making the house appear well-maintained.
  • Increased Property Value: Selecting the right skirting can enhance curb appeal and attractiveness to potential buyers. A pleasing exterior contributes to the overall aesthetics, potentially increasing the property’s market value.
  • Personalization Options: House skirting offers the chance to add your unique style. Whether expressing individual preferences or aligning with existing architectural elements, skirting can be chosen to reflect your personality.
  • Exterior Cohesion: Skirting unifies various architectural elements of your home’s exterior, tying them together into one cohesive, polished appearance. It’s an essential tool in design that ensures a harmonious look.

Boost Your Home's Curb Appeal With A Skirting

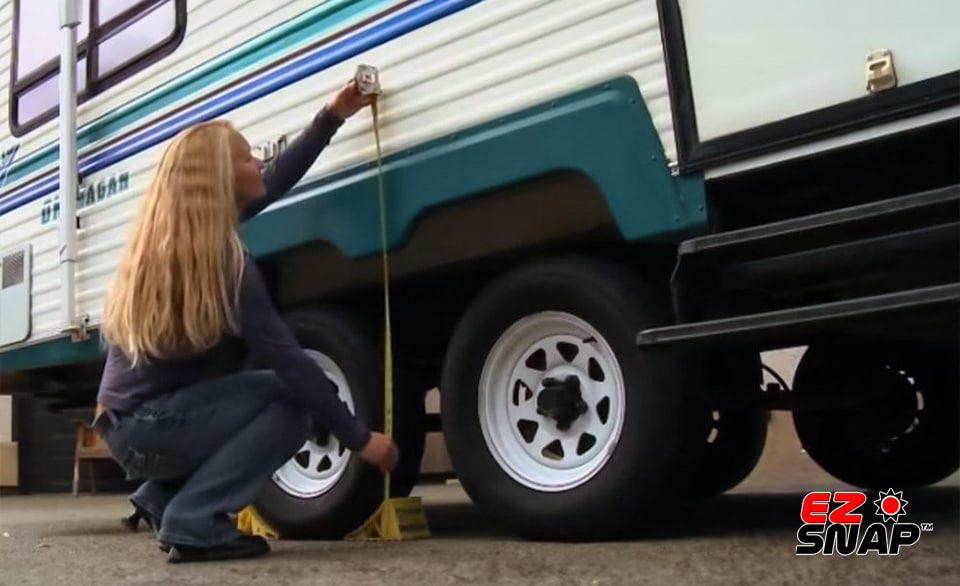
Image Credit: EZSnapDirect.com

Top Skirting Ideas to Boost Your Home’s Curb Appeal

Now that you understand the benefits of adding skirting to your home, are you ready to elevate its appearance? Choosing the right skirting is essential to reaping the full rewards. To assist you in this decision, here are some popular skirting ideas, starting with vinyl skirting.

Vinyl Skirting

Vinyl skirting consists of panels designed to cover the space between the ground and your home’s exterior walls. Available in various styles and colors, vinyl can be selected to complement your home’s architecture.

Benefits of Vinyl Skirting

Vinyl skirting offers several advantages that make it an appealing choice for many homeowners:

  • Aesthetic Improvement: Vinyl helps your home’s exterior look cleaner and more refined, potentially boosting your property’s value.
  • Durability: This material is resilient and long-lasting, resistant to sun damage, chipping, and cracking.
  • Easy Maintenance: Vinyl’s resistance to water and insects simplifies care and offers excellent protection against rodents and insect infestations.

Potential Drawbacks of Vinyl Skirting

While vinyl skirting has numerous advantages, there are some potential downsides to consider:

  • Lack of Natural Appeal: Some homeowners might find that vinyl doesn’t capture the natural appearance of materials like brick or stone.
  • Thermal Expansion or Contraction: Extreme temperatures may cause vinyl to expand or contract, resulting in fit and stability issues. Professional installation can mitigate these problems, ensuring a snug and secure fit.

Testimonial from a Homeowner:

“Before installing vinyl skirting, our home’s exterior looked incomplete and lacked the desired polished appearance. Vinyl skirting was the perfect solution as it offered a wide range of colors, and we found a perfect match for our house. Not only does it look fantastic, but it also keeps pests out, which was a persistent issue with our previous skirting. We are delighted with the improvement in our home’s curb appeal and highly recommend vinyl skirting to anyone looking for an affordable and durable solution.” – Emily, Homeowner.

Benefits of Metal Skirting

Image Credit: Gibraltar Building Products

Metal Skirting

Metal skirting, often crafted from aluminum or galvanized steel, adds a sleek, modern touch to a home’s exterior. It offers excellent protection against pests and harsh weather, making it a robust and resilient option..

Benefits of Metal Skirting

The appeal of metal skirting lies in its numerous advantages:

  • Durability: Designed to withstand even the harshest weather conditions and heavy impacts, metal skirting is an investment that can outlast other materials.
  • Pest Resistance: Termites and other insects don’t stand a chance against metal, enhancing its protective qualities.
  • Fire Resistance: An added bonus of metal skirting is its resistance to fire, providing an extra layer of safety for your home.

Potential Drawbacks of Metal Skirting:

While metal skirting offers many benefits, there are potential concerns to be aware of:

  • Susceptibility to Rust: Metal can be prone to rust, especially in humid or coastal environments. Modern advancements in coatings and finishes can mitigate this risk, but it’s still something to consider.
  • Aesthetic Compatibility: The sleek and contemporary appearance of metal skirting may not suit traditional or rustic-style homes, so it might not be the ideal choice for every property.

Testimonial from a Homeowner

“After considering various options, we settled on metal skirting for its modern look and durability. Our home now stands out in the neighborhood, and we appreciate the low maintenance it requires. Knowing it is resistant to pests and fire, the added peace of mind makes it a wise investment for our family.” – Sarah, Homeowner.

Benefits of Brick or Stone Skirting

Image Credit: CC BY-SA 3.0, / Wikimedia Commons

Brick or Stone Skirting

For those seeking a timeless and classic appearance, brick or stone skirting is an appealing choice. Crafted from genuine materials, this option exudes a sense of elegance and sophistication that can significantly enhance your home’s exterior aesthetics.

Benefits of Brick or Stone Skirting

Brick or stone skirting offers several compelling advantages:

  • Durability: Known for its robust nature, brick or stone can withstand harsh weather and resist fading. Its longevity ensures that your home maintains its attractive appearance for years to come.
  • Insulation: With superior insulation properties, brick or stone skirting aids in regulating the temperature within the crawl space, contributing to reduced energy consumption and a more comfortable living environment.

Potential Drawbacks of Brick or Stone Skirting

While the benefits are considerable, there are specific considerations to be mindful of with brick or stone skirting:

  • Cost: The genuine materials and professional installation required for brick or stone skirting can make it a more expensive option upfront.
  • Construction Requirements: The weight of brick or stone necessitates a solid foundation, potentially increasing both construction time and expenses. It’s essential to evaluate these factors in line with your budget and preferences.

Testimonial from a Homeowner

“We decided to invest in brick skirting for our home, and we couldn’t be happier with the result. The rich texture and timeless appeal have transformed our house into a stately residence. Not only does it look amazing, but we also noticed an improvement in temperature regulation inside our home. The investment was well worth it, and we always receive compliments from neighbors!” – John, Homeowner.

Benefits of Wood or Cedar SkirtingImage Credit: Douglas Neiner / flickr

Wood or Cedar Skirting

For homeowners looking to cultivate a rustic and traditional aesthetic, wood or cedar skirting offers natural charm and warmth. These materials can create a cozy and inviting appearance, making them an appealing choice for many.

Benefits of Wood or Cedar Skirting

Wood or cedar skirting provides unique benefits, adding to their allure:

  • Natural Beauty: Their inherent charm adds warmth and character to a home’s exterior, offering a timeless appeal.
  • Customization: The adaptability of wood allows for creativity and customization in design. Cedar’s natural oils enhance its pest resistance, making it a robust choice.

Potential Drawbacks of Wood or Cedar Skirting

While attractive, wood or cedar skirting requires careful consideration due to:

  • Maintenance Needs: These materials need consistent care to protect against moisture, rot, and insects. Regular staining or sealing is crucial for maintaining their appearance and durability.
  • Cost Considerations: Depending on the type and quality of wood, it may not be the most cost-effective option, especially for larger homes. It’s essential to weigh these factors when choosing wood or cedar for skirting.

Testimonial from a Homeowner

“We wanted our home to have a cozy and inviting feel, and wood skirting was the perfect choice. The wood’s natural grain and warm tones made our house a picturesque cottage. While we do invest some effort in maintaining it, the beauty and charm it adds to our home make it all worthwhile.” – David, Homeowner.

Insulated Skirting

Image by EZSnapDirect.com

Insulated Skirting

Insulated skirting is a modern and innovative option that combines aesthetics with energy efficiency. It consists of foam panels that offer thermal insulation while enhancing the exterior’s visual appeal.

Benefits of Insulated Skirting

Insulated skirting stands out for various advantages:

  • Energy Efficiency: By creating a thermal barrier, insulated skirting helps regulate the temperature within the crawl space, reducing both heating and cooling expenses. It’s an investment in long-term savings.
  • Protection Against Pests and Moisture: In addition to its thermal properties, insulated skirting offers reliable protection against common outdoor nuisances like pests and moisture, ensuring a safer and more comfortable living space.

Potential Drawbacks of Insulated Skirting

While offering many benefits, insulated skirting comes with specific considerations:

  • Upfront Cost: The initial investment in insulated skirting may be higher compared to other options. However, the energy-saving features often justify the cost over time, leading to significant savings on utility bills.
  • Maintenance Needs: The foam material used in insulated skirting may require regular care to prevent damage from rodents and insects. A consistent maintenance routine can ensure the skirting remains effective and visually appealing.

Testimonial from a Homeowner

“We were looking for a way to make our home more energy-efficient, and insulated skirting was an excellent choice. Our energy bills have noticeably decreased, and we appreciate the added protection it offers against pests and moisture. It’s a win-win for us, as it not only boosts our curb appeal but also saves us money in the long run.” – Lisa, Homeowner.

How to Choose the Right Skirting for Your Home

Image Credit: Arek SochaPixabay

How to Choose the Right Skirting for Your Home

Selecting the perfect skirting for your home is a critical decision, impacting both aesthetic appeal and functional benefits. Here are essential considerations to guide you through the process:

Understanding the Style and Design of Your Home

Matching the skirting to your home’s architectural style is vital to create a cohesive look. Whether your home exudes a traditional, rustic vibe where brick or stone skirting could shine, or a modern feel that calls for sleek vinyl or metal, understanding your home’s overall design will help you pick a complementary option.

Considering the Local Climate and Environmental Conditions

Your region’s climate and environmental conditions can significantly influence your skirting material choice. If you’re living in an area with extreme weather or harsh conditions, robust materials like metal or insulated skirting might be apt. For humidity or termite-prone locales, vinyl or brick, known for their resistance to moisture and pests, might be suitable.

Factoring in Budget and Maintenance Requirements

Your budget and maintenance preferences should play a crucial role in your selection. Materials like vinyl may be more budget-friendly, but always weigh cost against quality and long-term advantages. Also, consider the upkeep involved in your chosen material—some options like wood might need more regular care compared to others.

Deciding whether to Consult with Professionals

If you find the choice overwhelming or seek expert insights, consulting with skirting professionals or contractors might be beneficial. They can offer valuable recommendations, assess your specific needs, and provide cost estimates. However, this decision should align with your preferences and comfort level in handling the project. If you opt for professional guidance, they can also ensure correct installation and compliance with local building regulations, contributing to a high-quality and lasting finish.

Tips for House Skirting

Installation Tips for House Skirting

Installing house skirting is essential for its effectiveness and longevity. These tips, applicable to various materials like vinyl, metal, brick, stone, wood, or insulated skirting, can guide you to a perfect and lasting finish.

Preparing Measurements and Materials

Measure the house’s perimeter accurately before starting, and prepare all necessary materials to prevent delays.

Do’s During Installation

  • Do: Clear the area and level the surface before installation.
  • Do: Utilize the manufacturer-recommended fasteners and tools for stable installation.
  • Do: Ensure adequate ventilation under the house to avoid moisture and related problems.

Don’ts During Installation

  • Don’t: Over-tighten fasteners, as it may weaken the material.
  • Don’t: Place the skirting too near the ground; leave space for expansion and contraction.
  • Don’t: Neglect to seal the edges. Proper sealing keeps pests out and enhances weather resistance.
Hiring A Professional vs. DIY

Image Credit: LEEROY AgencyPixabay

Hiring A Professional vs. DIY

Installing home skirting is a task that requires attention to detail and an understanding of the specific materials and methods. The decision to hire a professional or do it yourself depends on various factors. Here’s an overview to help you decide:

Hiring a Professional:

  • Expertise and Experience: Professionals bring knowledge and experience, which can ensure a flawless finish.
  • Time and Effort Saved: A pro can complete the task efficiently, allowing you to focus on other things.
  • Potential for Avoiding Mistakes: Hiring a professional may minimize the chance of costly errors.
  • Cost: Professional services come at a price, which might be a significant consideration for some homeowners.

DIY Approach:

  • Cost Savings: Doing it yourself can save money if you already have the required tools and skills.
  • Personal Satisfaction: There’s a sense of accomplishment in completing a home improvement project on your own.
  • Potential Challenges: Without prior experience, you might encounter challenges that can lead to mistakes or an imperfect finish.
  • Time Commitment: DIY installation may take longer, especially if you are learning as you go.

The decision between hiring a professional and a DIY approach depends on your budget, skills, time availability, and preferences. A professional may provide a quick and high-quality installation but comes with a cost. In contrast, a DIY approach might be more satisfying and budget-friendly but could be more time-consuming and pose some risks if you’re inexperienced. Assessing your situation and weighing these factors will help you make the best choice for your home’s skirting installation.

Testimonial from a Homeowner who Hired a Professional to Install Skirting:

“I was unsure about the skirting process, so I preferred calling in a pro. It was the best decision ever! The expert made it look like a dream – perfect alignment and as secure as possible. Ultimately, I just had to walk into my home with the cool new skirting without any worries. I highly recommend getting a helping hand!” – Kristen, homeowner

Maintaining and Replacing House Skirting 

House skirting enhances your home’s appearance, but maintenance is key to its longevity. Occasionally, it may require replacement. Here’s a look at regular upkeep routines and indicators for replacement for various skirting types:

Regular Maintenance Routines

Different types of skirtings demand different levels of attention. So, what routine should you maintain for your particular type? Leave that to us. We’ll guide you about the basic ones. 

Here are some regular maintenance routines you should follow for various skirting types.

  • Vinyl Skirting: Requires occasional cleaning with mild detergent and water. Check for cracks or damage, repairing or replacing panels as needed.
  • Brick or Stone Skirting: May need periodic cleaning to remove debris and stains. Ensure bricks or stones are secure, fixing any loose or chipped pieces.
  • Metal Skirting: Generally rust-resistant, a soft brush and water keep it looking good. Inspect for dents or other damage, addressing issues promptly.
  • Wood or Cedar Skirting: Needs regular staining or sealing for protection from moisture and insects. Look for rot or termite damage, replacing wood as necessary.
  • Insulated Skirting: Typically low-maintenance, but inspect foam panels for damage, particularly at edges, and repair or replace as needed.

Indicators for When to Replace Your House Skirting

When should you take the hint that it’s time to replace the house skirting? Some signs can tell you to eliminate the old and worn-out skirtings. Here are a few such indicators.

  • Visible Damage: If you notice visible damage, such as cracks, holes, or significant wear and tear on your skirting, it may be time for a replacement.
  • Pest Infestations: An increase in pest activity, such as rodents or insects, around your home could indicate that your skirting has become compromised, and replacement may be necessary.
  • Moisture Issues: Water damage or signs of moisture inside the crawl space may indicate that your skirting is not providing adequate protection and should be replaced.
  • Aesthetic Decline: Fading, discoloration, or an overall decline in the skirting’s appearance can negatively impact your home’s curb appeal, prompting consideration for replacement.

Replacement Tips 

Understanding when and how to replace skirting is essential. Here are a few tips:

  • Inspect Regularly: Regularly check for significant damage or wear that might warrant a replacement.
  • Choose the Right Materials: If replacement is necessary, select materials that suit your home’s style and local weather conditions.
  • Consider Professional Help: If you’re unsure about the replacement process, professional assistance ensures proper installation.

Conclusion

House skirting not only enhances visual interest and curb appeal but also plays a vital functional role in protecting the home. By complementing the architectural style, the right skirting choice adds a finishing touch that elevates the property’s appearance.

From the classic elegance of brick or stone to the warmth of wood and the versatility of vinyl, various skirting options allow personalization to reflect individual tastes. Whether you prefer the durability of metal or the energy-saving benefits of insulated skirting, choices abound to suit your needs.

Considering your skirting options carefully can help enhance your home’s exterior, making it well-protected and inviting. Remember, achieving great curb appeal is within reach with the right skirting choice.

If you’re planning to install skirting in your home, explore the extensive range of options available at EZSnapDirect.com, where great selections await you.

Should you have any questions or concerns, feel free to comment below or subscribe to our blog for more insights on home renovation. For further information, visit EZSnapDirect.com today.

Don’t hesitate—take the first step in transforming your home’s exterior now!

References:

https://www.twotwentyone.net/15-deck-skirting-ideas-to-enhance-your-outdoor-space/#wood-and-stone-deck-skirting

https://homedecorbliss.com/11-front-porch-skirting-ideas/

https://anchorfoundationrepair.net/blog/skirting-options-crawlspace-home/

https://housing.com/news/skirting-design-ideas-for-your-home/

http://www.johnsonstimber.co.uk/news/the-advantages-of-skirting-boards

https://constrofacilitator.com/skirting-board-components-advantages-types-and-applications/

https://www.davidsavage.co.uk/6-benefits-of-using-skirting-board-styles-in-your-home/

https://blogs.tameerkaro.com/skirting-in-construction-10-different-types/

https://dailycivil.com/types-of-skirting-in-construction-what-is-skirting/

https://housing.com/news/skirting-design-ideas-for-your-home/

https://anchorfoundationrepair.net/blog/skirting-options-crawlspace-home/

https://www.periodmouldings.co.uk/advice-guides/guide-to-choosing-skirting-boards/

https://www.homebuilding.co.uk/buying-guides/skirting-boards

https://www.littlehouseonthecorner.com/how-to-choose-the-right-skirting-boards-for-your-home-and-how-to-upgrade-yours/

https://www.leistenshop-24.de/en/tips/avoid-mistakes-when-installing-skirting-boards-the-best-tips
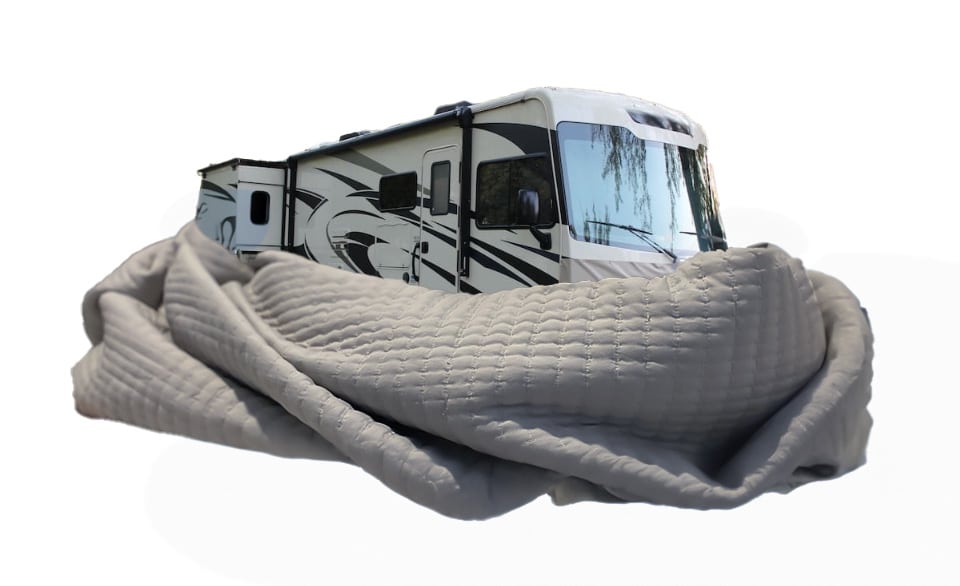
How to Choose the Right RV Skirting for Your Needs

How to Choose the Right RV Skirting for Your Needs

The space underneath your RV is a prime area for cold air to circulate and create freezing conditions that can, in turn, destroy the components that work to make your RV a comfortable home. In the winter, choosing the right RV skirting to fit your needs is an incredibly important task that needs to be considered far ahead of time.

With the right RV skirting, you can keep your RV warm and safe from the weather throughout the entire year, but getting the right skirting isn’t always that easy. You’ll need to consider your budget, the type of RV you have, the weather in which you hope to use it, and so much more.

This guide helps to first understand what skirting is, discuss some budget methods of creating skirting, and finally, how to choose the RV skirting that can help you get out in the cold weather, but avoid the chill that can so easily make its way inside. 


Understanding RV Skirting

Understanding RV Skirting

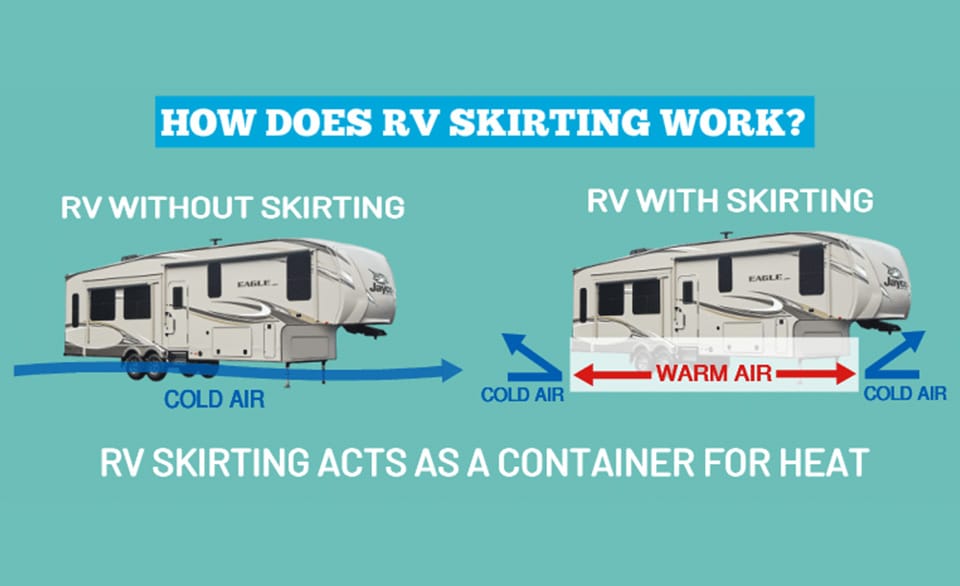
To begin with, it’s important to understand what RV skirting is and how it works. In its most simple form, RV skirting acts as a barrier between the ground and your RV to protect it from the cold air that comes along with winter. This cold air poses a threat to all of the plumbing that you rely on to make life comfortable and the skirting helps you to keep on living that way.

Not only does skirting help keep the cold air out, it helps keep the warm air you are producing with whatever heat method you use in. This can drastically reduce your cost of electric or gas consumption in order to save on money for future trips and living. 

This protection between the ground and RV provides protection against pests, reduces wind resistance and drafts, and helps climate control inside of the RV. For anyone that’s spent time living in an RV, these are all incredibly important for comfort and proper maintenance.

Different RV Skirting Materials

Different RV Skirting Materials

There are a few different materials that manufacturers use for their skirting, and each one has its own level of benefits and drawbacks. Starting by understanding each material will be a good way to begin finding out which will suit your needs best. 

Custom Vinyl- Custom vinyl skirting can be seen as the top tier of all RV skirting. It’s manufactured to fit your specific RV and is installed by the manufacturer to ensure the most secure fit. They fit to the RV via one of various different connection methods such as adhesive snaps, velcro, or T-style twist locks. While they are the best quality, they are also the most expensive to get. 

Self-Installed Vinyl- This vinyl skirting is the more affordable way to get a high quality material to use for your RV. The company will provide all of the materials, but you have to do all of the labor in order to install the skirting. This can be super helpful if you are wanting to save a bit of money, but are also handy enough to install it by yourself. 

Inflatable- Inflatable skirting is newer to the RV market, but is a great and easy solution to installing vinyl skirting. The skirting inflates and holds itself in place with the pressure formed from inflation rather than with any form of fastening, which makes it incredibly easy to install and take down by yourself. 

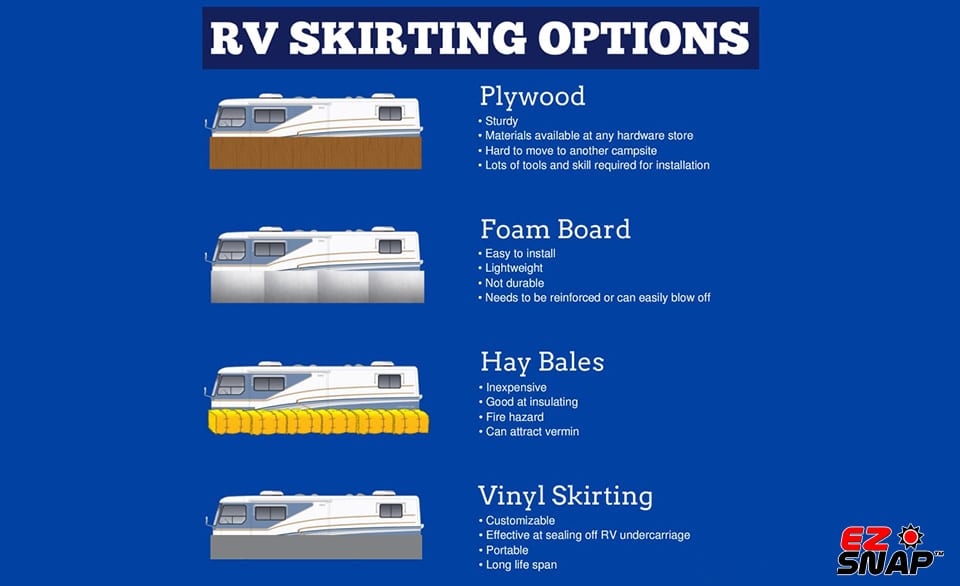
DIY Skirting- If you’re hoping to save a lot of money and feel up to the task, there are a lot of different ways that you can make your own skirting from different materials. There are choices from making your own vinyl skirting all the way down to using hay bales to create the barrier necessary. 

What is Homemade RV Skirting?

Making your own RV skirting is a feasible project for anyone with a little bit of DIY experience. As mentioned before, there are multiple forms of homemade RV skirting that span a wide range of difficulty and efficiency. 

Homemade RV skirting comes along with its own list of pros and cons. Depending on the style you go with, you can make the skirting fully customizable to fit your individual needs while also saving a lot of money on your budget. This can also be easily done with on-hand, affordable materials such as hay bales, foam insulation boards, nylon tarps, and even plywood or particle board. 

Pros of Homemade RV Skirting

  • Cost-effective
  • Customizable
  • Use of materials on hand

Cons of Homemade RV Skirting

  • Involved process
  • Easy to mess up
  • Lack of manufacturer warranty
  • Can be difficult to store

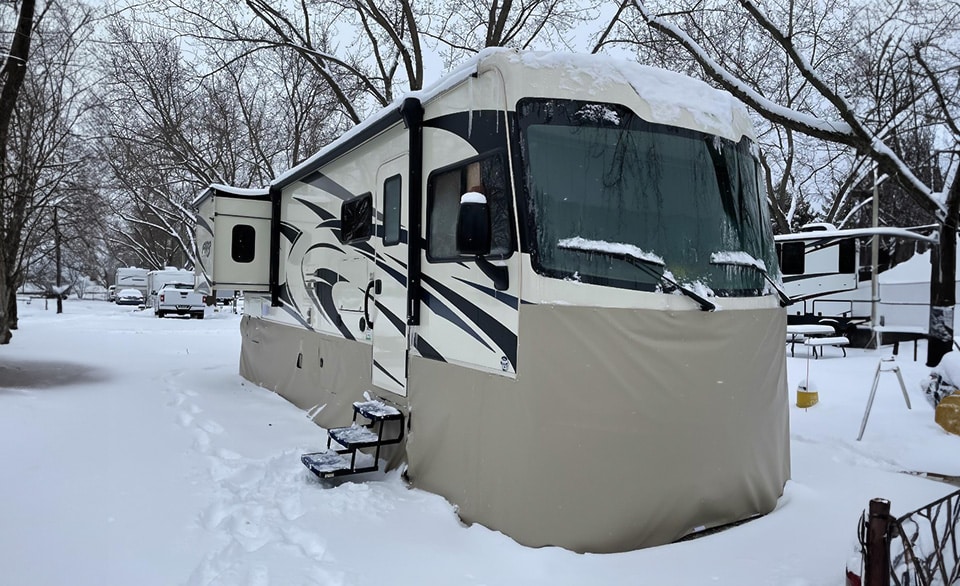
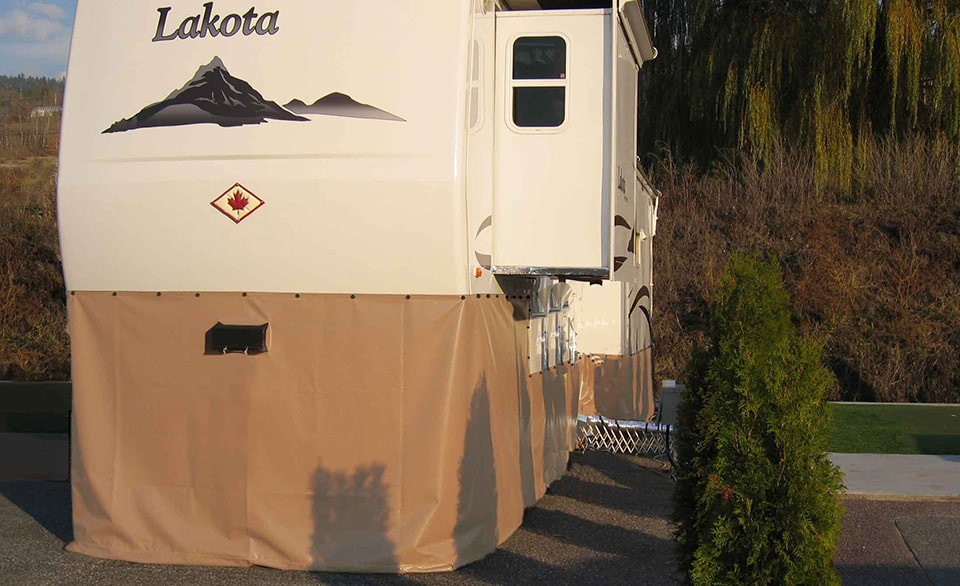
5th wheel skirting can be similar to traditional RV skirting

What is 5th Wheel Skirting?

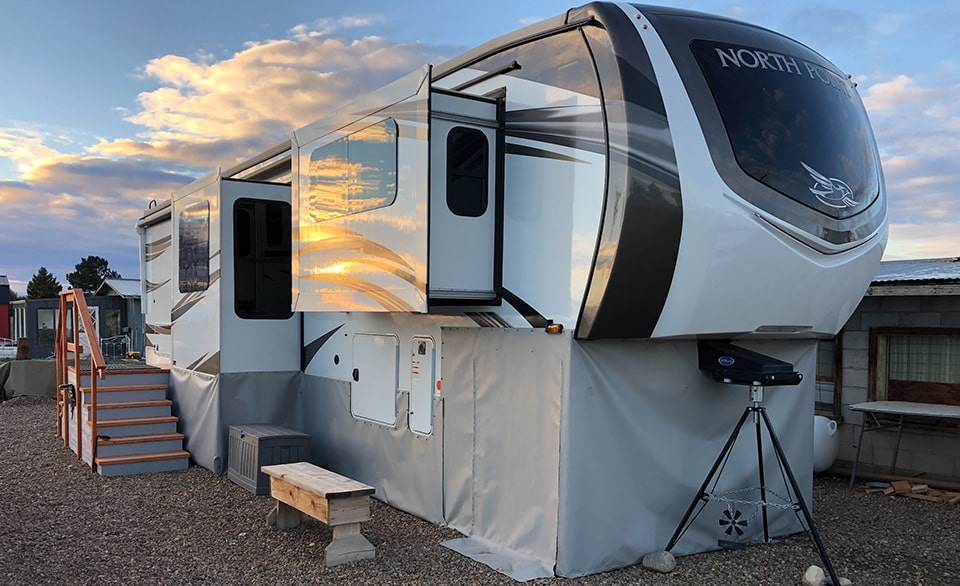
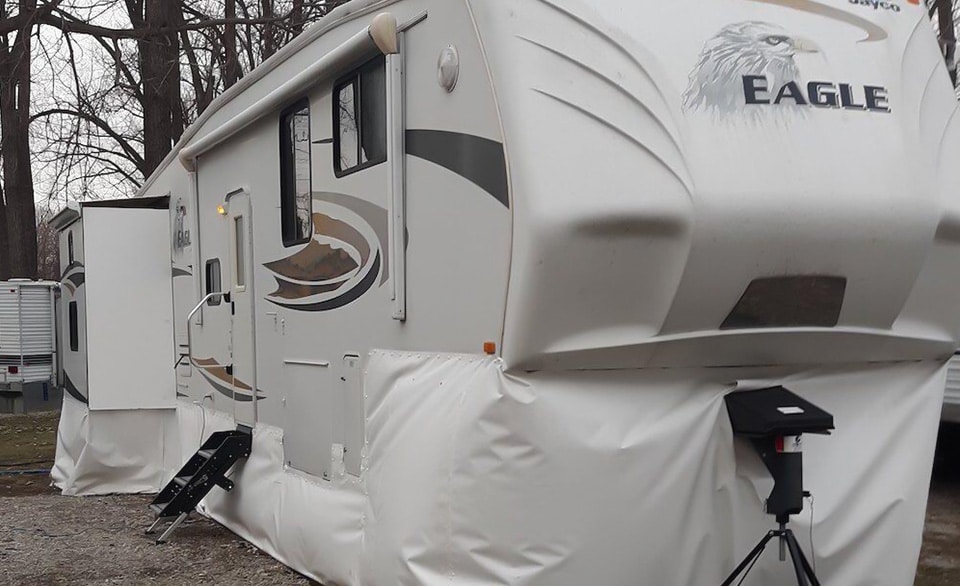
5th wheel skirting can be similar to traditional RV skirting, but it needs to be designed to accommodate the different shape of a 5th wheel camper. 5th wheel RVs are made to be on the move often and aren’t always disconnected from the truck that is hauling them. For that, the skirting needs to be fit to work around the truck bed, as well as be easily removable for when you are driving. 

5th wheel skirting is just as necessary as the skirting for a normal RV. Your pipes are at a great risk when the cold weather comes and skirting is exactly what’s necessary to protect them. 

How to Choose the Right RV Skirting for Your Needs

Climate

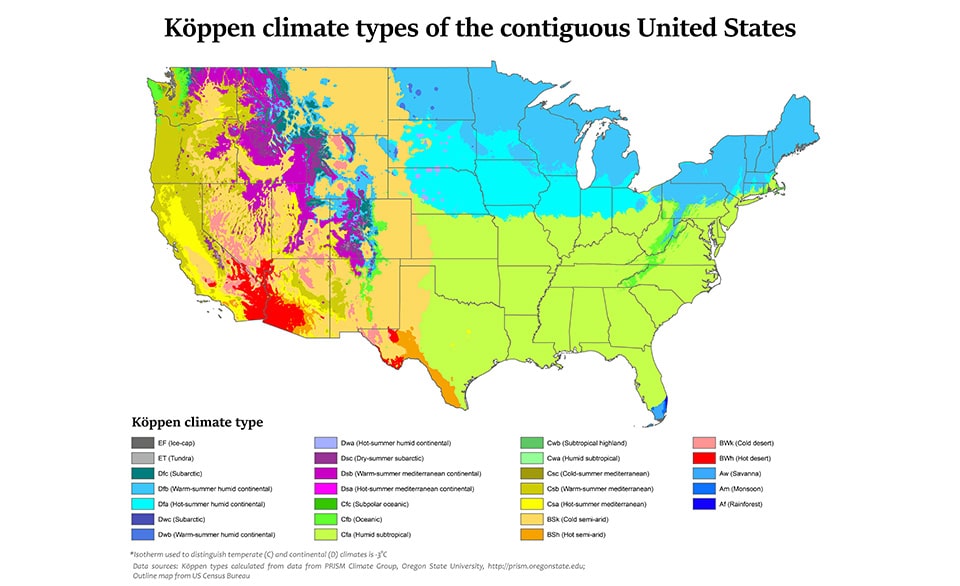
Knowing the climate that you’ll be in is one of the most important factors that plays into choosing the right RV skirting. For example, if the climate that you live in reaches drastically low temperatures, you need to consider higher end and more protective skirting. If you live in a more moderate environment, homemade skirting options may be enough to provide protection. 

Duration of Stay

If your RV is fixed to a position for a long time, or even permanently, you can opt for certain skirting options that you may not normally consider. Plywood skirting can offer a functional and aesthetic value to the RV, but it’s almost impossible to make it portable. Nylon and inflatable skirts are easy to take down and install when you are moving around almost every day. 

RV Type

The type of RV you have may influence the style of skirting that you can use. Most companies will make skirting for almost every RV type, but you may want to start by understanding the specific skirting necessary for your RV before shopping. 

Budget

Budget is unfortunately one of the biggest determining factors for many people shopping for an RV skirt. Custom-made nylon skirting can cost a lot of money but is a great investment. If your budget is significantly lower, you may need to consider a homemade option or be ready to do the installation yourself. 

RV Size

Various RV sizes can accommodate certain types of skirting more easily than others. With larger RVs, you will need more material, which means more to carry around and more material to pay for. Measuring your RV correctly will give you a good idea of what options are available for you. 

Installation Difficulty

If you’re installing the skirting on your own, you may want to try to understand how difficult it will be to install before purchasing. If you’re more mobile, then the installation difficulty will be incredibly important so you can get the skirting set up quickly each time you land at camp for the night. 

Making the Right Choice: Comparing Your Options

RV skirting, 5th wheel skirting, and homemade skirting are all great options for getting the right fit for your rig. Each model also has its own list of pros and cons that may not be to your personal benefit. Choosing the right model will take a lot of research and spending time to make sure your skirt matches your needs. 

Making the best choice means looking at all of your individual needs and circumstances.

For example, if you move around a lot, something that’s easy to set up and take down will be your best option.

If you’re staying put for a long time and are on a budget, you can build plywood skirts. If you have the money, custom-made nylon skirts are a great long-term option.

For certain 5th wheels, you may need to customize the skirting to fit your truck and protect the undercarriage of where the 5th wheel is hauled. Some skirts will only protect the lower portion, where your pipes are, and let in a lot of cold through other areas. \

Take all of your needs into consideration before making your choice and talk to others who have spent time in the process. 

Conclusion

All in all, RV skirting is an incredibly important piece of equipment to have ready for your rig when the winter hits. The type of skirting is important to understand in order to provide the best protection possible for all of the pipes and gear inside the RV itself.

When you take the time to carefully consider the options and make an informed decision for your RV skirting, the result is bound to be positive, leaving you with an overall more comfortable and hassle-free life on the road.

Your Complete Guide to RV Skirting:Understanding Materials, Styles, and Investment

Your Complete Guide to RV Skirting:Understanding Materials, Styles, and Investment

If you’re like most people who own an RV, chances are you put your rig away at the onset of cold weather. And it’s a perfectly sensible decision; after all, most RVs are not built to resist freezing temperatures. Staying in an RV can be extremely uncomfortable and even unsafe once the cold weather rolls in.

But if you would love to try winter RVing and maximize the use of your travel trailer or motorhome in the cold months, there’s an easy fix you can try — RV skirting! RV skirting is one of the best and most popular solutions that can make your RV camping comfortable and worry-free. 

Installing RV skirting works as the ultimate winter upgrade! It protects your vehicle from the weather by insulating it from the cold in the winter while also keeping the heat and sunlight out in the summer. It’s a simple solution that allows you to use your RV safely and comfortably for long road trips, weekend getaways, or as your year-round residence, regardless of the weather.

EZ Snap is a leading provider of RV skirting solutions that can help you find the best products in this segment. Our top-notch RV skirting products suit various purposes, allowing you to easily find what you need.

In this article, we take a deep dive into RV skirting, including its material types, styles, considerations, and maintenance tips. We also answer a few common questions that you may have about RV skirting and tell you what makes EZ Snap the industry leader in RV skirting solutions.

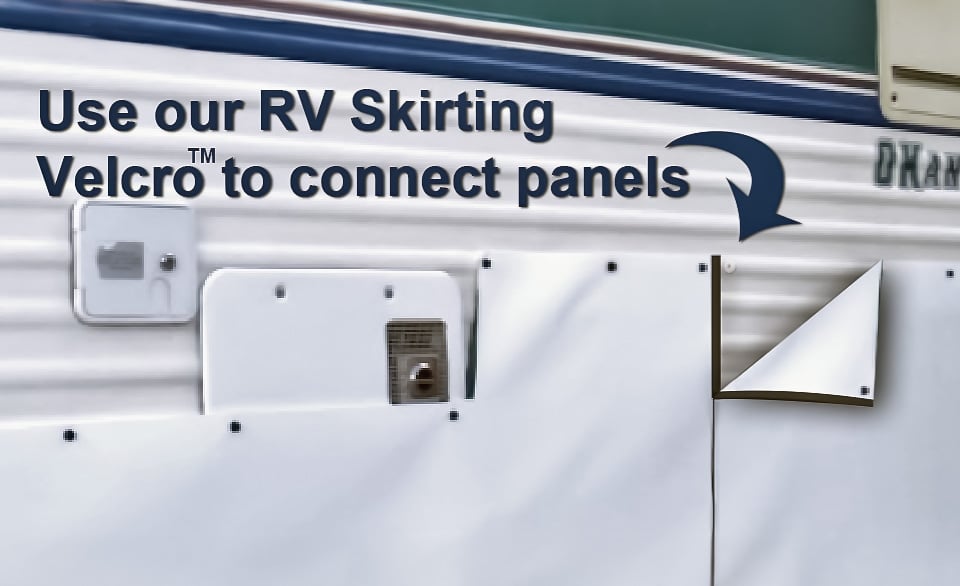
Use our RV Skirting Velcro to connect panels

Why EZ Snap?

EZ Snap is North America’s number-one seller of RV skirting solutions. And while there are various types of RV skirts available, our DIY RV skirting kits offer the simplest and most efficient solution to keep your RV safe. 

Here are six reasons you should choose us for all your rig needs:

1. Diamond-Weave RV Skirting

We use Diamond-Weave premium vinyl material in our winterizing “DIY” RV skirting kit. This triple-coated material has a diamond-shaped interlaced scrim base that makes it extremely strong and excellent at insulating and has a -40 cold weather rating.

Our skirting is long-lasting, durable, and can withstand up to -40-degree conditions in the winter, which is ideal for places with harsh winters such as Canada and Colorado. Our skirting has also been tested and proven to effectively deal with extreme heat, such as in Arizona or Florida. This material also inhibits harsh UV rays, moisture, mold, mildew, and fading, helping your rig stay hygienic and safe from external elements.

The Diamond-Weave vinyl material is also lightweight and takes up half the storage space compared to regular RV skirting, allowing for easy storage.

2. Non-Fray Fabric

Our RV skirting material is a specialized non-fray fabric that is specially created for skirting and underpinning. The base fabric has a built-in encapsulated yarn, so you can cut it on-site without having to hem its edges. You can install the skirting as it is or cut it into smaller panels for easy use and storage.

Simple Installation 3M Innovation

3. Simple Installation

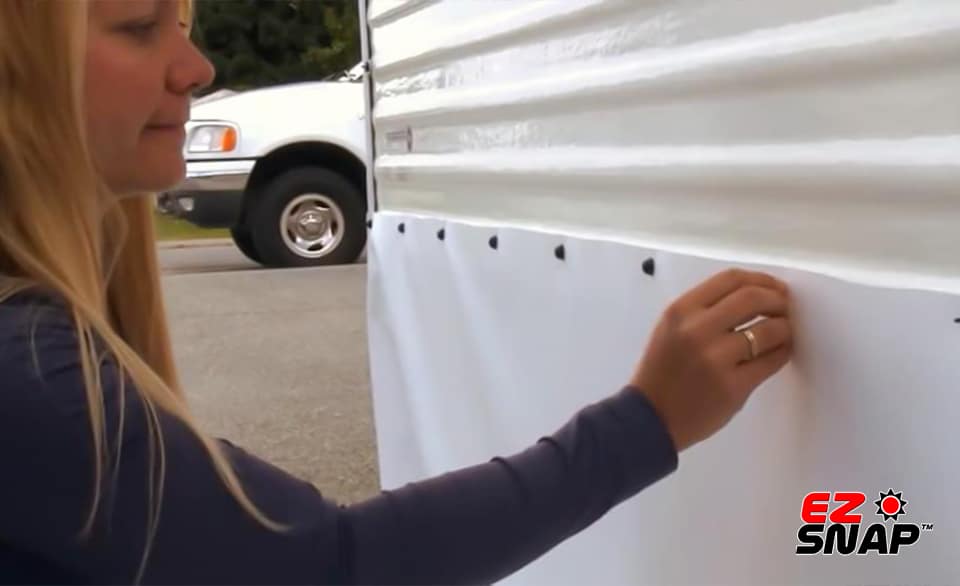
Our RV skirting solutions feature a “no-drill” fastening system with a breakthrough 3M® VHB adhesive. This patented fastener has superior holding power, ensuring it stays attached to your RV in extreme hot and cold temperatures without having to drill screw holes or other special tools.

All you must do is peel and stick it on the base of your RV walls. The 3M™ Extreme Hold Technology enables a quick and easy installation process and helps you use the skirting conveniently. You can also watch our tutorial videos or read our instructions to guide you in this process.

You can install the kit whenever you want without waiting for an upholsterer to visit your site, inspect your RV, measure, and install your custom RV skirting. It prevents delays as you can use your RV skirt as soon as it reaches your location.

4. Versatility

Our RV skirting kit is versatile and works well with any RV make, model, size, and style, including Class A and C motorhomes, fifth wheels, and travel trailers.

You can choose a customized skirting solution to suit your RV. You can also select the RV skirting length and the number of slide-outs you need to skirt. Plus, when shopping with us, you get to pick from four attractive colors to match your style and preferences.

5. Affordable Solutions with Quick Order Processing

And if all the benefits we’ve listed above weren’t reasons enough, our RV skirts are also incredibly affordable. We offer high-quality products at wholesale rates, which makes us cheaper than professionally installed options from upholstery shops. By choosing EZ Snap, you can save thousands of dollars and stay within your budget while getting professional results for your RV!

You also don’t have to worry about delays in securing your RV. Our shipping team processes all orders as a top priority and ensures quick and accurate order fulfillment. Ordering early in the fall or even late summer will help you receive your orders even faster.

Understanding the Basics of RV Skirting

Image Credit: EZSnapDirect.com

Understanding the Basics of RV Skirting

RV skirting is a type of protective material, commonly known as a “skirt,” that covers the base of the RV. It can be crafted from different materials and offers a range of uses. It closes the gap between the RV and the ground, offering greater insulation and enhancing the comfort and safety of the vehicle during both cold and scorching hot weather.

An essential for winter trips, skirting traps heat under the RV and works as a barrier to keep the cold air out. It helps the vehicle maintain a consistent temperature and protects the plumbing so that the tanks and exposed water lines or pipes do not freeze or burst. The insulating properties of the skirting also keep the interior of the RV warm and comfortable.

RV skirting is also necessary for the summer as it helps keep away the heat, too. Since it forms a barrier between the RV and the ground, it ensures that the cold air from your RV’s AC does not escape from the vehicle. This keeps your RV cool, saves on energy bills, and minimizes wear and tear on your cooling systems as they don’t have to work too hard to cool your RV.

Types of RV Skirting Materials

Types of RV Skirting Materials

You can find RV skirts in various materials to suit your needs. Popular materials include vinyl, insulated, plywood, canvas or heavy-duty fabric, and metal. Let’s delve into these five different materials and learn about their pros, cons, and prices to help you choose one for your needs:

1. Vinyl

Vinyl is a popular RV skirting material as it offers a high level of convenience and ease of use while being inexpensive. It looks great, suits various RV styles, and is highly customizable. You can also get heavy-duty options in vinyl that are durable and long-lasting.

Another major advantage of vinyl is that it’s easy to install and maintain, which is ideal for busy RV owners. Its lightweight and portable nature makes storage and transportation a hassle-free task. You can also reuse vinyl skirtings for other purposes, which makes them eco-friendly.

However, vinyl skirtings also have their downsides. Low-quality material can be flimsy and may not withstand strong winds, storms, or running water. Heavy vinyl skirtings also consume more storage space and add to an RV’s weight.

And while vinyl is easy to clean with a mild detergent and water, you need to ensure regular maintenance to help it look good as new and last for years. They do not take well to painting, and regular weeding is necessary to keep away grass and other vegetation.

Some high-end options may seem pricey upfront, but vinyl’s durability helps you save money in the long run.

Pros:

  • Affordable
  • Easy to install, use, store, and maintain
  • Versatile
  • Customizable
  • Stylish
  • Sturdy
  • Lightweight
  • Portable
  • Reusable

Cons:

  • Cheap options can be flimsy
  • Needs regular cleaning
  • Premium products can be costly upfront

Price Range: $150 to $2,000

Insulated Foam Board

Image Credit: Edward McQueenflickr

2. Insulated Foam Board

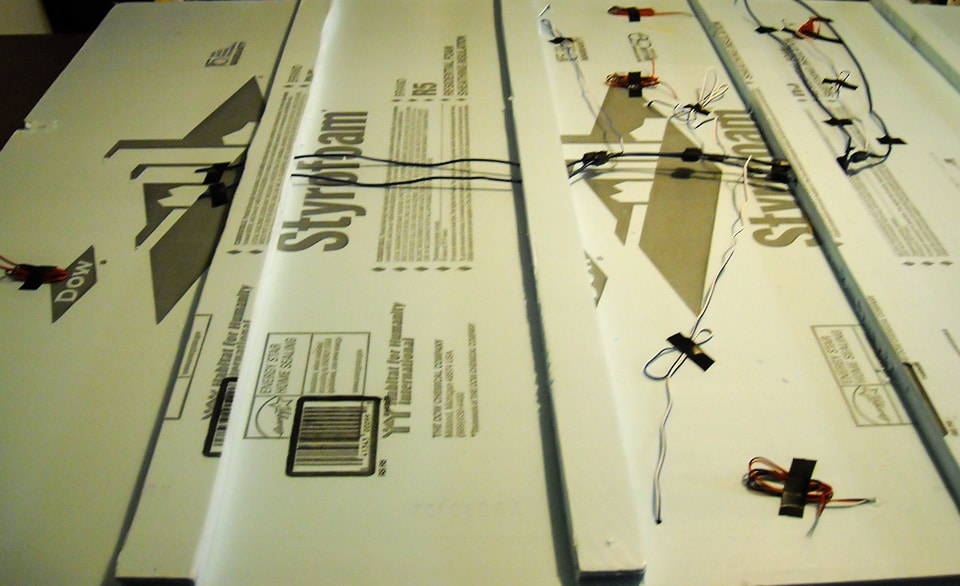
Insulated foam board is another favorite RV skirting material. Not only is it readily available and economical but foam board is also conveniently lightweight, easy to work with (including cutting and installation), and very stylish.

This insulating material is also easy to store and transport. But since it’s super lightweight, you will need to securely attach it with plenty of tape or plywood to your trailer or motorhome to prevent it from flying away with the wind. You can get sturdy options, though, that do not suffer damage easily.

Another drawback of insulated foam board RV skirtings is that they are single-use. So, unless you stay in one spot, you’ll have to buy and install them repeatedly. It will drive up your costs and harm the environment in the long term.

Pros:

  • Cost-effective
  • Easy to find, 
  • Convenient to cut and install
  • Portable and easy to store
  • Elegant
  • Lightweight

Cons:

  • Needs a secure attachment to the RV to prevent it from blowing away
  • Not environment-friendly
  • Repeated purchases add to the cost

Price Range: $100 to $200

Plywood is another low-cost and readily available RV skirting material

Image Credit: mtneer_manflickr

3. Plywood

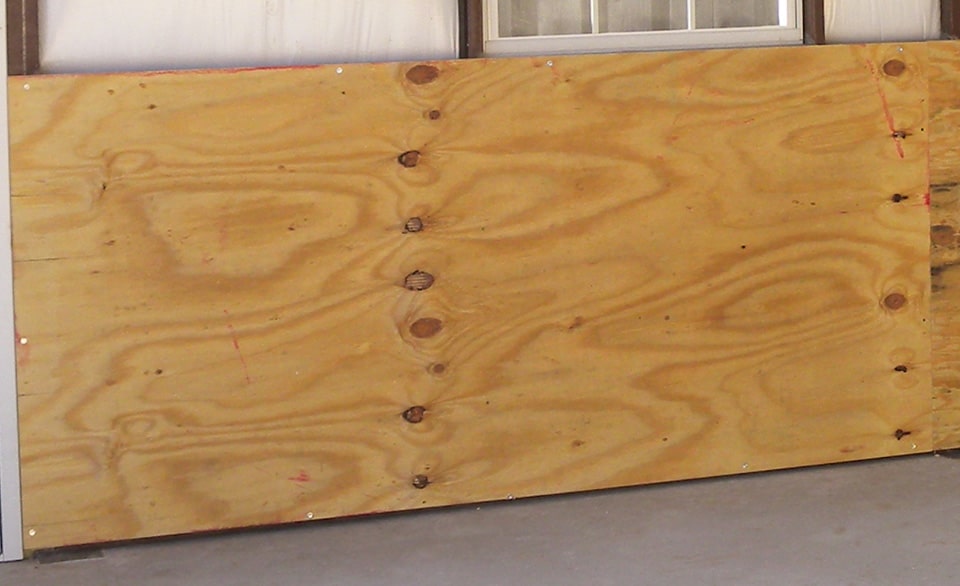
Plywood is another low-cost and readily available RV skirting material that effectively protects against strong winds. Although it easily adapts to any RV type and model, cutting, installing, and removing plywood involves plenty of work and skill.

If you’re someone who loves taking out your RV frequently, plywood skirting is not a suitable choice for you. Plywood skirtings are heavy and need to be removed and stored before moving, but their inflexibility makes storage difficult as they need plenty of space. They can also get dirty and damaged during transportation.

Many RVers dump their plywood skirtings instead of carrying them along to avoid using up too much space in their RV. So, the reusability of this material is low, which makes it harmful to the environment and costly in the long run.

On the other hand, for stationary RV owners, plywood skirtings are a fantastic option as they last for years without needing replacement. A fresh coat of paint will add to their aesthetic and keep them looking new for a long time.

Although exposure to water or moisture makes them prone to rotting and decay. But using water-resistant materials beneath them can protect them from decay and improve durability.

Plywood skirtings also offer more storage, so you can safely store camping gear and other belongings under your RV. 

But it is not highly insulating, so sealing the gaps between boards is necessary for better results.

Pros:

  • Protects well against cold winds
  • Suitable for RVers parked in one location for prolonged periods
  • Durable
  • Inexpensive
  • Adaptable
  • Easy to source

Cons:

  • Not very insulating
  • Takes time and effort to cut, attach, and remove
  • Not great for RVers who frequently change locations
  • Can get dirty and damaged during transportation
  • Bulky and inflexible
  • Needs a lot of storage space
  • Not as reusable as other skirting materials on this list
  • Can be costly, especially in the long run
  • Not eco-friendly
  • Not water-resistant

Price Range: $100 to $1,000


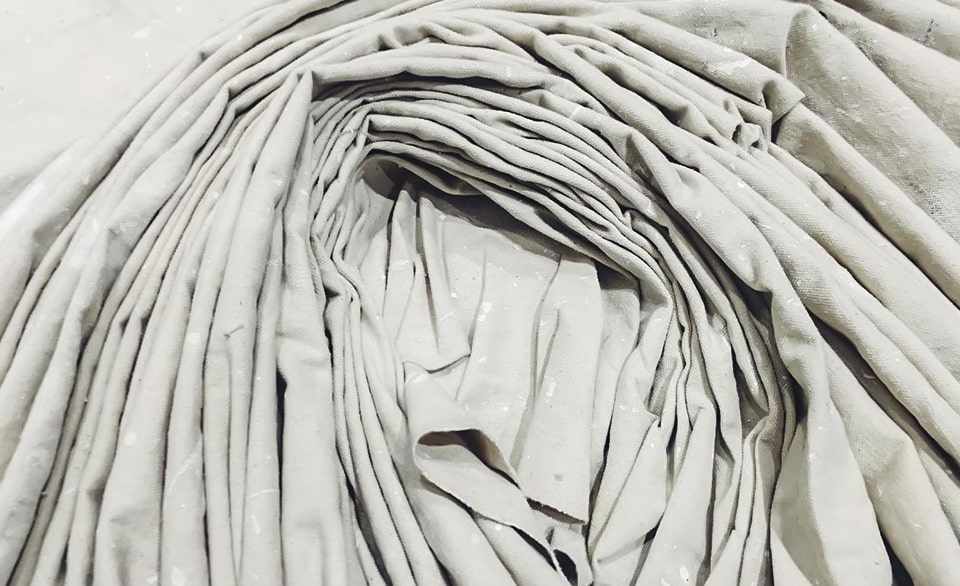
Canvas-Heavy-Duty Fabric

Image Credit: Fernando de Sousaflickr

4. Canvas/Heavy-Duty Fabric

Canvas and other heavy-duty fabrics are popular and cheap skirting materials that are easy to source, cut, attach, and remove. This makes them ideal for RVers who are frequently on the move.

But you need to securely attach them to your RV using Velcro strips, adhesive tape, suction cups, or grommets. They also do not offer the best insulation and are not long-lasting. So, you will have to replace the skirt once every few years, which can add to your costs and increase waste.

You can opt for recycled canvas fabric skirtings instead to stay sustainable and environmentally friendly.

Pros:

  • Readily available
  • Easy to cut, install, and remove
  • Cost-effective
  • Great for RVers who travel a lot

Cons:

  • Lacks high insulating properties
  • Needs fastening systems for secure attachment
  • Not durable
  • Not reusable and sustainable

Price Range: $30 to $150

Metal is another common skirting material that is easy to source
Image Credit: kunal bhosleflickr

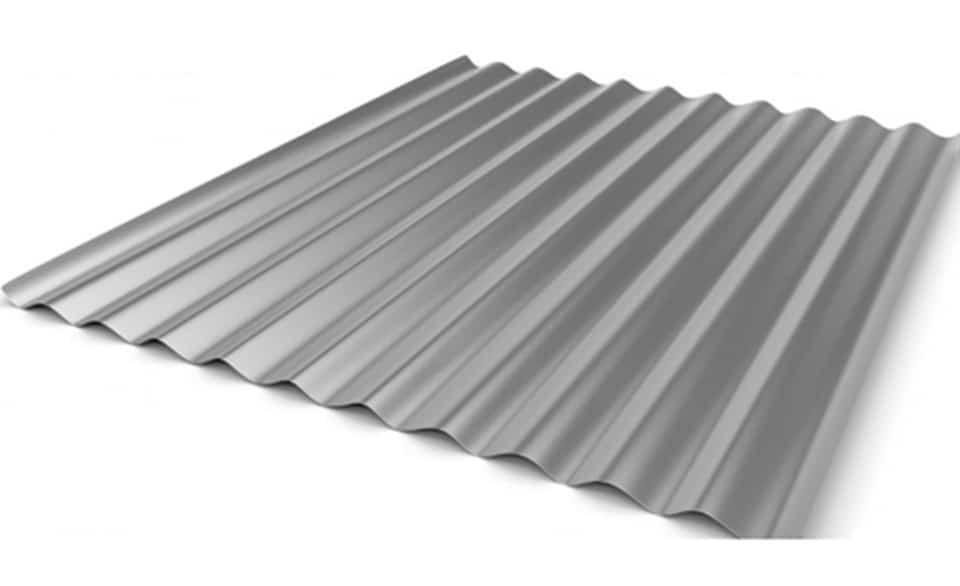
5. Metal

Metal is another common skirting material that is easy to source, install, and disassemble. It is also sturdy and offers reliable protection against cold winds and water.

You can source it in different styles, such as ribbed panels, that you can paint in your favorite color. Ribbed panels are also available in a range of colors with a warranty against color fading. Corrugated panels are another classic metal skirting style that offers a shiny appeal, while thick panels provide extra strength.

But it should be noted that metal skirtings can rust or corrode, so applying a fresh layer of paint whenever it fades is important. And depending on the type of metal you choose the skirting you opt for can be affordable or expensive. So, choose a metal that suits your budget and needs.

Pros:

  • High strength
  • Protects against wind and water
  • Readily available
  • Easy to assemble and disassemble
  • Economical
  • Available in different styles to suit various purposes

Cons:

  • Prone to rust and corrosion
  • Needs maintenance
  • Can come at a high price point

Price Range: $500 to $2,000

Choosing Your RV Skirting Style
Image Credit:
EZSnapDirect.com

Choosing Your RV Skirting Style

There are a couple of RV skirting styles you can pick from, which include the following:

1. Custom-Fit RV Skirting

If you opt for a custom-fit RV skirting solution, a custom skirting provider will visit your location and measure your RV. They will then produce the skirting as per your specifications and install it on your RV at their shop or your site.

This skirting style offers high convenience to RVers as they can sit back and relax while a professional fits the skirting onto their RV. It also looks great and is reusable, which maximizes the return on investment. But this option is often quite costly, which makes many RVers prefer installing their skirts on their own.

You may also have to travel to the company’s shop for a consultation or to get the skirt installed.

Suitability: Great for stationary RVers with a high budget

Price Range: $1,500 to $3,000

2. DIY RV Skirting

DIY RV skirting offers a budget-friendly alternative to custom-fit skirtings. You can source the materials from different suppliers or opt for EZ Snap’s DIY skirting kits. While going it alone can be challenging, buying our kits simplifies the assembly process.

We will send you all the materials and hardware you need to install your RV skirting right to your doorstep. You can also find installation tutorial videos and guides on our website to ease the process for you.

Our kit helps you avoid the risk, stress, and hassle of figuring out everything alone. They will also help you take advantage of an affordable price point while ensuring the quality and durability of your skirting.

Suitability: Budget-conscious and quality-conscious RVers

Price Range: $500 to 2,000

Key Factors to Consider When Choosing Your RV SkirtingImage Credit: Adam PetersonCC BY-SA 4.0, – Wikimedia Commons

Key Factors to Consider When Choosing Your RV Skirting

Look at some important elements to consider when selecting your RV skirting:

1. Climate

The climate where you live and where you will travel is the topmost consideration when choosing RV skirtings. Snowy weather conditions call for heavy-duty insulation. Meanwhile, sunny climates need UV-resistant and fade-resistant skirting solutions that protect the underbellies of RVs.

2. Budget

Pricing is another factor you must consider when picking an RV skirt. Choose skirting material and style that fits within your budget. You can get high-quality options that cost hundreds and thousands of dollars or cheaper stuff for less than $100.

You will also need to track shipping fees. Bulky or fragile skirtings come with high delivery fees, whereas durable or lightweight skirtings may have lower shipping charges. Look for free shipping to help you save more money.

3. Maintenance and Durability

Durability and maintenance are other factors to consider when buying RV skirtings. Durable and low-maintenance skirtings like those made of vinyl and metal are better than fabric-based or foam-based options. Durable materials will cost more initially, but they will help you save money in the long run.

Installing your RV skirt should be easy and hassle-free

4. Ease of Installation

Installing your RV skirt should be easy and hassle-free. It should be quick and not require too many special tools. EZ Snap’s DIY kits simplify the installation process by making it quick and simple. We use a special adhesive and avoid the use of drills, screws, and other tools. Moreover, our kits are easy to store and transport.

Maintaining Your RV Skirting: Tips and Suggestions

Here are a few tips to help you care for your RV skirting and reduce replacement and repair costs:
  • Install the skirting correctly and ensure proper ventilation to avoid moisture buildup and prevent mold or mildew growth.
  • If you have vinyl skirting like those from EZ Snap, clean it occasionally with mild detergent and water and avoid painting it.
  • Repaint metal skirtings when their paint comes off to combat rust and corrosion.
  • Use water-resistant materials under plywood skirtings to prevent rotting.
  • Regularly remove nearby weeds and other vegetation to help your skirting last longer.

Conclusion

RV skirtings are excellent insulating solutions that create a protective barrier for your motor homes. They are also available in a range of materials and styles, so you can easily choose one that fulfills your needs.

EZ Snap’s non-fray RV skirting kits are a leading skirting solution as they are durable, weather-resistant, versatile, affordable, lightweight, and easy to install, use, and store. We also ship orders quickly, preventing delivery delays and avoiding any inconvenience to you. Visit our website for more information and browse our range of skirting solutions.


Frequently Asked Questions (FAQs)

Why is RV skirting necessary?

RV skirtings create a barrier around an RV’s underbelly to keep the cold and heat out and protect it in harsh weather conditions. They help protect the RV’s plumbing, maintain an optimal temperature inside the RV, and keep heating bills low in the winter.

What type of RV skirting material is best for cold climates?

Any insulating or protective material like vinyl, foam board, plywood, metal, or heavy-duty fabric is suitable for cold climates.

How much does it cost to skirt an RV?

RV skirting typically costs $100 to $3,000 or even $7,000. Custom-made skirting comes with hefty price tags, while readymade or DIY kits are cheaper.

The DIY versions, such as EZ Snap’s RV skirting solutions, are the most cost-effective options among RV skirtings. Depending on the size and type of the RV and the number of slide-outs, they cost $1,000 or even less. The EZ Snap RV Skirting Cost Calculator will help you quickly determine the cost of skirting for your RV.

Can I install RV skirting myself?

Yes, you can get custom self-installed DIY kits like those from EZ Snap. We send you all the materials and hardware you need to install your premium vinyl RV skirting on your own, making self-installation easy and quick.

How should I maintain my RV skirting from EZ Snap?

EZ Snap’s DIY RV skirting kits do not need much maintenance. Although periodic cleaning with a mild detergent or soap and water will help them last longer.

10 Must-Have RV Accessories for a Perfect Journey

10 Must-Have RV Accessories for a Perfect Journey

Image Credit: Gavin SeimPixabay

Regarding RV living, having the right accessories can make all the difference. RV accessories enhance the overall experience and provide practical solutions to many common problems while living on the road. From temperature control to internet connectivity, the list of must-have RV accessories can be overwhelming. However, investing in these accessories can help make your RV more comfortable, functional, and enjoyable.

Investing in must-have RV accessories

Image Credit: Rudy and Peter SkitteriansPixabay

Investing in these top ten must-have RV accessories can provide a multitude of benefits and next to zero negatives besides the added cost of investment into your RV. Whether you’re a full-time RVer or just like to enjoy the occasional road trip with family and friends, these must-have accessories can seriously help make life on the road feel more like home. Some of the benefits of investing in must-have accessories include:

Improved comfort and convenience: RV accessories can make life on the road far more comfortable and convenient for everyone in the rig. For example, thermal insulation kits can help regulate the temperature inside your RV and minimize the need for heating and cooling equipment. RV skirting can protect your RV from the elements and pests, in addition, to helping maintain the temperature inside of the RV.

Enhanced safety and security: RV accessories can also improve safety and security on the road. For example, RV surge protectors can protect your electrical system from power surges. In addition, RV-specific GPS navigation systems can help you navigate unfamiliar streets, low bridges, and tight turns and avoid hazards on your trip.

Cost savings: While there may be a sticker shock to some of the items on our top ten must-have RV accessories, these investments can help you save money in the long run. For example, portable solar panels can help you save on energy costs by providing a renewable power source for your RV and the potential to not have to plug into shore power depending on your final setup. If you are plugging into shore power or running a generator while boondocking, having good skirting can help reduce the energy needed to keep the RV warm or cool.

Now let’s take a closer look at ten must-have RV accessories that can enhance your RV experience:

RV Snap-On Skirting

RV Snap-On Skirting:

RV snap-on skirting is a protective barrier that attaches to the bottom of your RV. It is typically made of durable fabric or vinyl. The price can vary drastically depending on the size and type of skirting you choose. For instance, stiff or rigid skirting will be the most effective and increase the R-value of your RV the best, but it will also be the most expensive option. Alternatively, soft skirting, usually made from vinyl rolls, is the best bang for your buck. It costs less than hard skirting and is typically easier to add/remove and store. However, it will not be as effective at insulating as hard skirting because there will inevitably be gaps at the base of the skirting if not weighed down, and the vinyl itself is not an efficient insulator. There are also plenty of DIY options using plywood, insulating panels, or spare vinyl.

Temperature control: RV skirting can help regulate the temperature inside your RV by providing an additional insulation layer.

Protection from elements: RV skirting can protect your RV from wind, rain, and snow, which can help prevent damage and keep your RV in good condition.

Pest control: RV skirting can also help keep pests, such as rodents and insects, from entering your RV.

Increased living and storage space: By adding RV skirting, you are, in essence, doubling the square footage of your RV and creating tons of additional storage space for anything that can be kept outside but needs a degree of protection, like bikes, extra shoes, outdoor equipment specific to the trip, etc. 

Consider the material, size, and color when choosing an RV snap-on skirting. First, look for skirting made of a durable, weather-resistant fabric designed to fit your make and model RV and is appropriate to the climates where you will most frequently have your RV. Next, consider the color of the skirting and choose one that complements the color of your RV. Finally, look at the products made and distributed by EZ Snap. They produce high-quality, pre-cut RV skirting kits that do not require drilling holes in your RV.

RV-Leveling Blocks

Image Credit: lw5315usflickr

RV-Leveling Blocks:

A level RV is essential for maintaining stability and comfort and preventing damage to your RV’s chassis and suspension over time. A level RV also ensures that your appliances, such as your refrigerator, work correctly and that your plumbing systems can drain adequately. 

There are several types of leveling blocks to choose from, including:

Plastic blocks: Plastic leveling blocks are lightweight and easy to use and are typically injection molded to fit the curvature of tires, maintaining a greater level of surface area contact and ensuring a solid hold. 

Wood blocks: Wood leveling blocks are inexpensive and can be made from scrap lumber. However, you will want to connect the blocks with a rope or chain to ensure they do not slip, as there is less surface area in contact with the tire with a block. 

Metal blocks: Metal leveling blocks are durable, can be used in extreme weather conditions, and tend to have much more intense traction to the tire in the form of tiny spikes that “bite” your tire. These are the most expensive and durable options but arguably one of the most effective and longest-lasting. 

How to use leveling blocks effectively:

When using leveling blocks, start with a surface cleared of rocks and debris. Use a bubble level to determine which corner is the lowest. Place a stack of blocks under that corner leveling jack, then raise the jack until close to level. Rinse and repeat for the remaining three leveling jacks.

RV Specific GPS Navigation System

Image Credit: H. Michael Miley / flickr

RV Specific GPS Navigation System:

A dedicated RV GPS navigation system can help you navigate unfamiliar roads and avoid hazards like low bridges, narrow roads, and unexpectedly tight turns. RV GPS systems, similar to others, provide real-time traffic updates, which can help you avoid delays, save time, and enjoy your trip. 

When choosing an RV GPS navigation system, consider elements such as:

Screen size: A larger screen size can make reading the map easier and navigating.

Traffic updates: Real-time traffic updates can help you avoid delays and save time.

Voice commands: Voice commands can make it easier to use the GPS system while driving

Some popular RV GPS navigation systems include:

Garmin RV 890: This GPS system is designed specifically for RVs and provides real-time traffic updates, voice commands, and a large 8-inch screen.

TomTom Go Camper: This GPS system provides customized routes for RVs and includes features such as campsite reviews and alerts for low bridges and narrow roads.

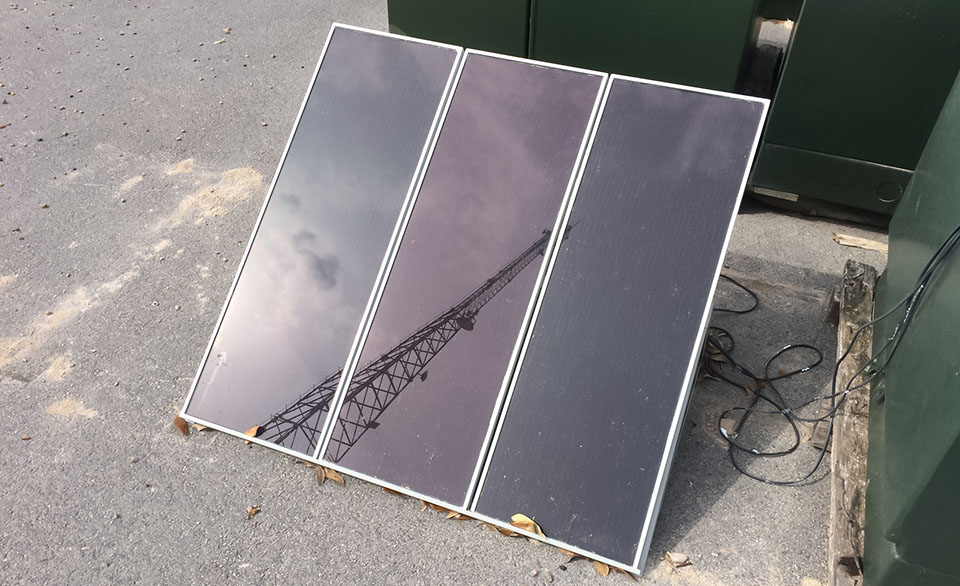
Portable Solar Panels

Image Credit: jcutrerflickr

Portable Solar Panels:

Solar power is a renewable and environmentally-friendly source of power for RVs. Portable solar panels can provide a reliable source of power for your RV, even when you’re off the grid, extend the duration of your trips, and expand the possibilities of where you can go. 

There are several types of portable solar panels to choose from, including:

Foldable solar panels: Foldable solar panels are lightweight and easy to transport but tend to be more expensive as they are more modular than rigid panels and typically restricted in power production due to the nature of the folding design limiting the physical size of the panel. These are an excellent option for supplemental power as they can be easily moved with shadows throughout the day. 

Rigid solar panels: Rigid solar panels are durable and can be mounted on your RV’s roof, these come in a wide variety of options, but you will want to look for monocrystalline panels as they are much more efficient and what most modern solar power systems will be using. 

Flexible solar panels: Flexible solar panels are lightweight and can be curved to fit the contours of your RV’s roof. These are the most expensive option, but for a good reason, as they are the lightest and most durable option. They can also be customized to your RV more than the other options and easily be removed. 

Consider the power output of the panels, power requirements of your RV, size, and weight when choosing a portable solar panel. In addition, look for a solar panel that is easy to install and has a high-efficiency rating, can connect to your current system or has a standalone battery system, and can meet your personal power requirements.

RV Water Filters

Image Credit: Robert Owen-WahlPixabay

RV Water Filters:

Clean water is essential for maintaining good health in your RV. Unfortunately, water sources in RV parks or campsites may contain bacteria, viruses, or other contaminants that can cause illness and damage your trip. So you need to have your own trusted water filtration system on (and off) the road. 

There are several types of water filters to choose from, including:

Inline water filters: Inline water filters are installed directly into the water line and are designed to remove sediment, chlorine, and other impurities. These are a great “first defense,” You should always have one in your RV to install on spigots before the water enters your holding tank. 

Under-sink water filters: Under-sink water filters are installed under the sink and provide clean drinking water to your RV faucet. This should be used with an inline filter for clean drinking water from unverified sources. 

Portable water filters: Portable water filters are lightweight and can filter water from any source. These are typically found in camping stores designed for backcountry or emergency settings. They are highly effective but very slow and have limited fill rates. 

Countertop or in-fridge water filters: These are filters that are filled up with unpurified water and are typically filtered using a gravity system and kept on your counter, such as a Berkey filter, or in your fridge, such as a Brita.

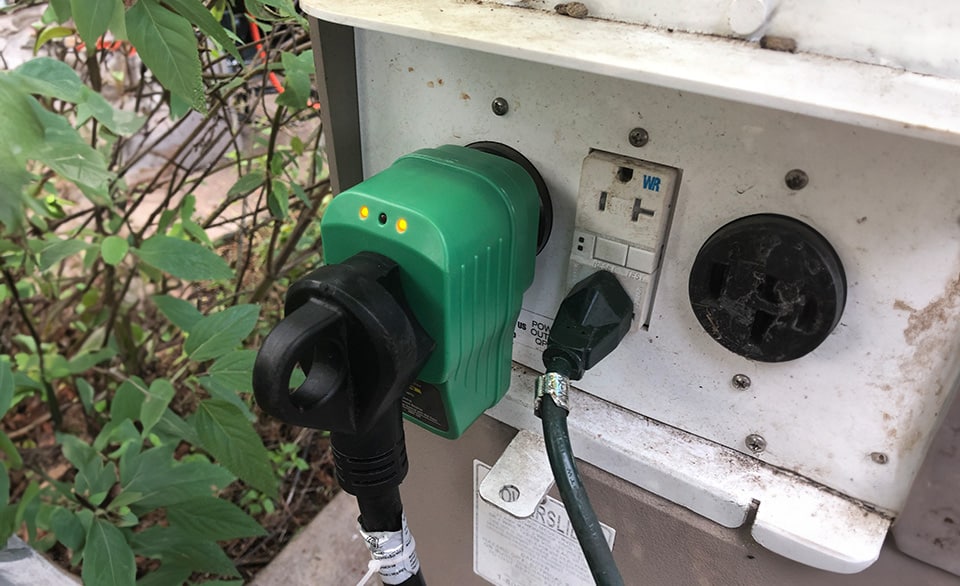
RV Surge Protectors

Image Credit: Aaronflickr

RV Surge Protectors:

A surge protector protects your RV’s electrical system from power surges and other electrical issues, which is especially important in places like RV parks or campgrounds, whose power stability is unknown. 

There are several types of RV surge protectors to choose from, including:

Portable surge protectors: Portable surge protectors can be used at any RV site and are easy to install.

Hardwired surge protectors: Hardwired surge protectors are permanently installed in your RV and provide continuous protection.

When choosing a surge protector, consider the level of protection, the size of your RV’s electrical system, and the type of plugs and connectors you need.

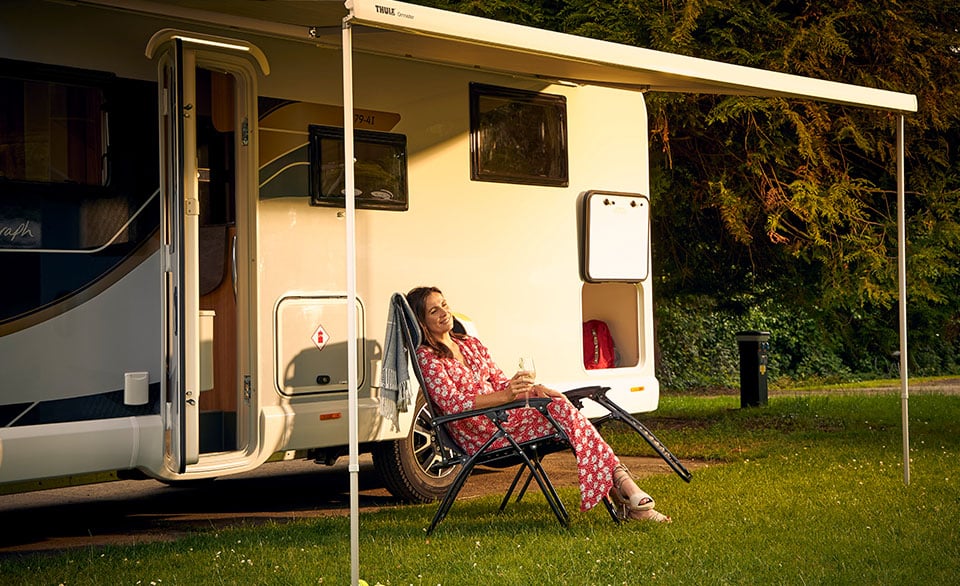
RV Awning and Outdoor Living Accessories

Image Credit: Bailey of Bristolflickr

RV Awning and Outdoor Living Accessories:

An RV awning and outdoor living accessories can enhance your outdoor living space and make your RV experience more enjoyable.

There are several types of RV awnings to choose from, including:

Retractable awnings: Retractable awnings can be easily retracted when not in use, providing more space when needed.

Fixed awnings: Fixed awnings provide permanent shade and protection from the elements.

Slide-out awnings: Slide-out awnings provide shade and protection for your RV’s slide-outs.

Several additional outdoor living accessories can enhance your RV experience, including:

Outdoor rugs: Outdoor rugs can provide a comfortable and clean surface for outdoor living.

Outdoor furniture: Outdoor furniture can provide seating and relaxation for outdoor living.

Grills and cooking accessories: Grills and cooking accessories can provide a convenient way to cook.

Easy-to-Install Blinds

Image Credit: Ryan Smithflickr

Easy-to-Install Blinds:

Blinds are an essential accessory for any RV, providing privacy and light control that you may not realize you need until the moment you need it. They can also help regulate the temperature inside your RV by blocking out sunlight and reducing heat transfer in and out of your RV. RVs aren’t the most insulated things in the world, so anything you can do to help retain heat goes a long way. 

There are several types of RV blinds to choose from, including:

Roller shades: Roller shades are made of fabric or vinyl and can be rolled up or down to control the amount of light that enters your RV. These are the “classic” kind of shades that you may see and are the most durable and lightweight option. 

Pleated shades: These are made of a paper-like material and can be opened and closed by pulling on a cord. Pleated shades are relatively durable for their material. Still, they can only take so much abuse if left down while operating your RV. 

Cellular shades: Cellular shades are made of a honeycomb-like material and provide superior insulation but are quite delicate in comparison, so consider spending the extra money on a more durable material if given the option. 

When selecting blinds for your RV, consider factors such as the material, color, and size. Look for blinds made of durable, lightweight materials designed to fit your RV windows, and consider your specific need for blinds. When installing blinds, follow the manufacturer’s instructions carefully and use the appropriate tools and hardware.

Thermal Insulation Kits

Thermal Insulation Kits:

Proper insulation is critical for maintaining a comfortable temperature inside your RV for you and your family. With adequate insulation, your RV can become more comfortable and warmer, making sleeping, relaxing, or working easier and feel more like your home away from home. 

There are several types of RV insulation kits to choose from that will create a much better traveling environment for you, including:

Foam insulation: Foam insulation is easy to install and provides excellent thermal insulation. You can cut it to tight tolerances custom to any nook and cranny in your RV. However, foam insulation is not the most durable thing in the world, so be careful when removing and storing it. 

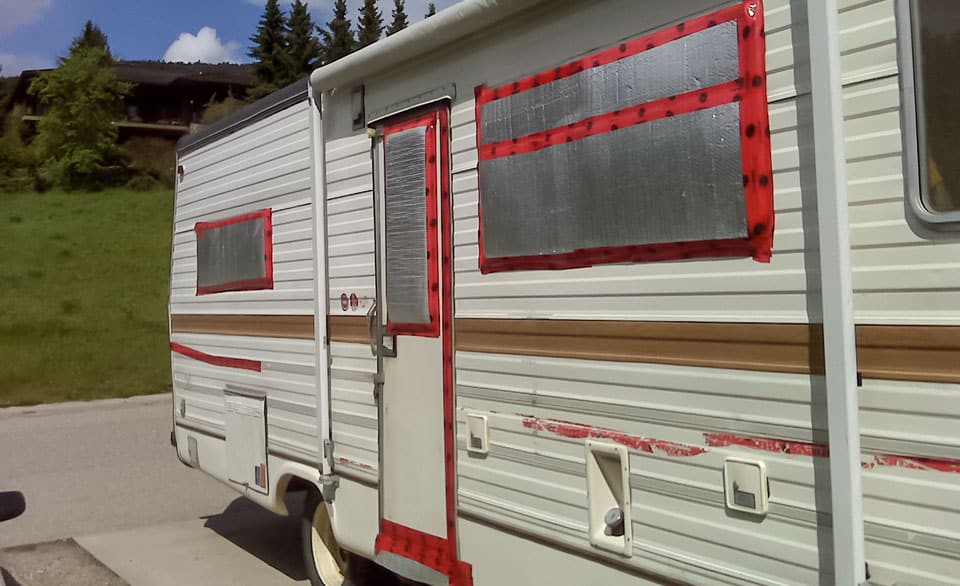
Reflective insulation: Reflective insulation is designed to reflect heat and is ideal for hot climates as it reflects heat away from your windows and traps the cool air inside. Also, very durable and easy to store as it is flexible and can be folded or rolled up. 

Insulation blankets: Insulation blankets are lightweight materials placed over windows and doors to reduce heat transfer. Insulation blankets are the easiest to install as you don’t need to be exact. In fact, they are thick curtains you put over your windows or can even hang up to create “walls” to trap heat within specific areas of your RV.

When installing insulation in your RV, following the manufacturer’s instructions carefully is essential. Wear gloves and protective clothing, as certain insulation materials, such as fiberglass, can irritate the skin. Consider hiring a professional insulation installer if you’re uncomfortable doing the work yourself.

RV Wi-Fi Boosters

Image Credit: Indonesian Art Creativeflickr

RV Wi-Fi Boosters:

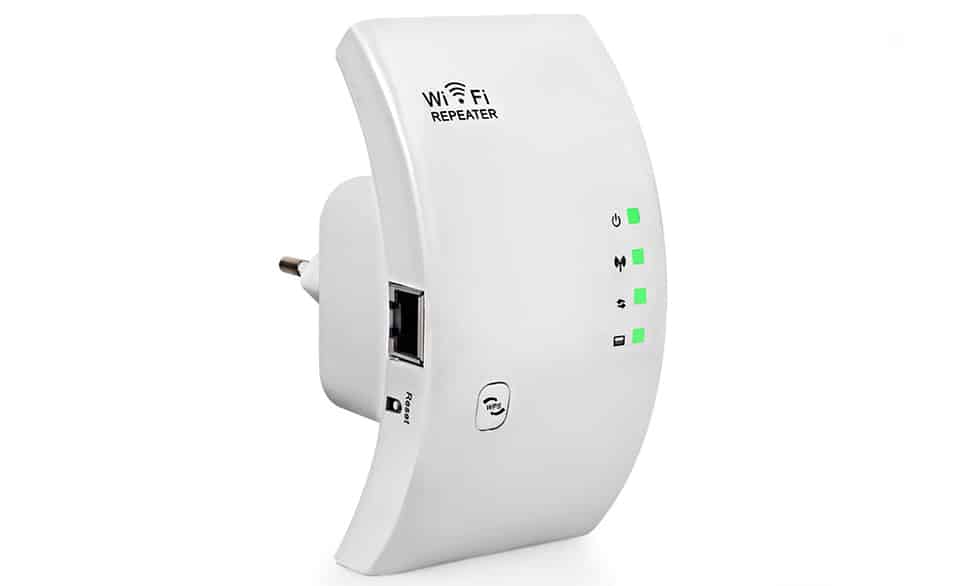
A Wi-Fi booster can help you stay connected to the internet while on the road. This is especially important for remote workers or those who need to stay connected to the internet while traveling or have a stable video call with friends to show them how great of a time you’re having in your RV.

There are several types of RV Wi-Fi boosters to choose from, including:

Wireless range extenders: WIFI range extenders enable you to receive a signal from further away, such as when you get assigned the furthest RV parking space from the building that holds the WIFI router for the campground. Another use for them is to transmit a signal further; for example, if you have Wi-Fi in your trailer, you can boost the signal to reach you further away if you have a nice spot you would like to relax AND have WIFI. 

Cellular signal boosters: Cellular signal boosters can boost the strength of your RV’s cellular signal, providing faster internet speeds and excellent internet connectivity when needed. These use your wireless provider, typically valid for folks using a mobile hotspot in their RV. 

Satellite internet: Satellite internet provides internet connectivity in remote areas where other types of internet may not be available and is the fastest and most reliable form of wireless internet. Also, the most expensive option and typically requires lengthier contracts. 

When choosing a Wi-Fi booster for your RV, consider factors such as the strength of the signal needed, the number of people needing WIFI in your RV, and the speed of the internet connection you need. 

Conclusion

Having the right accessories can significantly enhance your RV experience. From ensuring your RV is level and well-insulated to staying connected, this article’s 10 must-have RV accessories can dramatically improve your comfort and enjoyment while traveling.

Don’t Replace Your Old Windows with Low-E Glass – Use Shade Screens

Don’t Replace Your Old Windows with Low-E Glass – Use Shade Screens

Window Shades
Skylight Shades
RV Skirting
RV Shades
Boat Shades

Imagine losing $1000 from your income every single year.

For most American households, that’s roughly how much it will cost to heat and cool their home for the year.

That adds up, especially when every dollar counts.

It’s no surprise that people are looking for ways to save on energy costs.

Typically, windows are the worst energy culprits on any given house.

Heat gain and heat loss through windows account for between 25%-30% of a home’s energy use for heating and cooling.

If a window has failing seals, it will perform even worse.

Even the type of the window frame can affect energy performance.

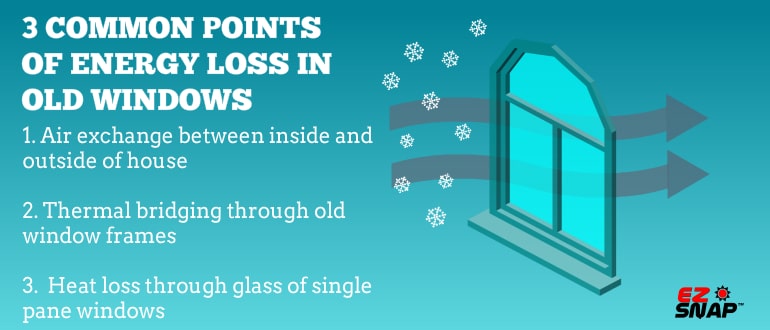
If the window frame is made from a material that is a poor insulator, such as aluminum, it can create what’s known as a thermal bridge and conduct heat from inside the house to outside. 

One inefficient window can lose as much heat as 10 to 20 times what an insulated wall would lose.

Even if your window is new and well sealed, it could still be the cause for a lot of energy use in your home.

Solar energy is still able to pass through glass, so even an insulated window can heat up a room quickly if it gets a lot of sun.

In the dead heat of summer, having even just one window or skylight that gets a lot of sun exposure can mean the AC is running all day just to cool the room off.

So What Can Be Done?

The most common recommendation to make old windows more energy efficient is to replace them entirely with new, low-e windows.

Low-e windows are windows that have been treated with a film that reflects solar heat while still letting natural light pass through.

With less solar heat entering the home, the AC no longer has to work as hard to keep the house cool.

The less energy the AC uses, the more savings there are for the homeowner.

Is replacing old windows with new ones worth the cost?

There will be energy savings from replacing old windows with new, low-e glass windows but it comes with a substantial upfront cost.

The National Association of Realtors estimates the cost of replacing every window in a 2,450 square foot house to be around $19,000.

For a household trying to save money in energy bills, that’s a very large investment with a slow return.

What are some more cost effective alternatives to replacing an old window?

The most important thing to do with old windows is stop any exchange of air between the inside and outside of your house.

For drafty windows, using a product like rope caulk to seal up any holes can make a major improvement.

Plastic film insulation is another popular and effective solution for sealing up older windows.

Both options are inexpensive and simple enough for anyone to apply.

For windows that get a lot of sun exposure, a quick and easy way to make them more energy efficient is to mount exterior shade mesh on them (also called shade screen or solar screen/mesh/fabric).

There are a lot of different kinds of shade mesh available, but they all work by the same principle.

It’s a mesh fabric, and like low-e glass, it works by blocking solar heat and light, while still letting natural light through.

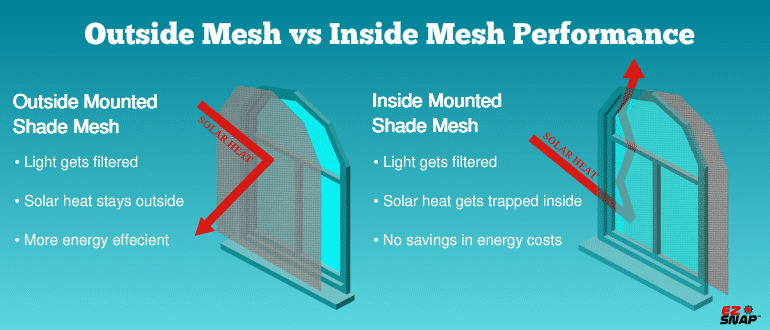
Unlike low-e glass, which is a film that’s been applied to the glass, solar mesh is installed on the exterior of the window.

Applying the shade screen to the outside of a window is key for it’s ability to keep a room cool.

If it’s applied to the inside of a window it will still work but not nearly as well.

If it’s mounted on the inside the screen will still provide shade from the sun, but the energy savings will be significantly less because the heat will be trapped inside the house.

If you are considering shade screens for your home and don’t know which one to choose, the easiest and best option is EZ Snap.

They sell do-it-yourself kits that let you mount and cut your mesh to your window, no matter it’s size or shape.

EZ Snap is also a fraction of the cost of what you would pay to buy and install new windows.

You save on the price of the product, and because you are able to install it yourself, you save on labor as well.

EZ Snap shade screen is also better at blocking solar heat than low-e glass.

The effectiveness of heat blocking applications for windows is measured by the Solar Heat Gain Coefficient (SHGC).

The SHGC is the amount of solar radiation (heat) that transmits through a window.

It’s measured between 0 and 1, and the less solar heat that transmits through a window, the lower a window’s SHGC number is going to be.

There are a lot of low-e glass makes and models, but the range of SHGC for most of them from varies between 0.60 – 0.25. 

Shade mesh from EZ Snap has a SHGC of .18.

Something else to consider is that low-e windows are known to damage turf and siding.

In the right conditions, the solar heat that they reflect can focus into a hot spot creating a magnifying glass effect that melts anything in its path.

The problem is becoming so rampant with the rising popularity of low-e windows that one scientist is calling them, “the next asbestos.”

If you or your neighbor has a low-e window that is damaging property, EZ Snap is also the ideal solution.

Rather than replace the entire window, installing EZ Snap window shade over the problem window provides a fast and effective fix.

The solar heat is reflected off of the mesh before it ever reaches the window, preventing any chance of a hot spot forming.

The result is 100 percent effective and can be installed in as little as an afternoon.

An added benefit to an exterior shade product like EZ Snap is that it’s also removable. So, when the winter months come you can take it off and benefit from the natural heating you get with the sun.

It’s like getting free heat in the winter.

No matter which window option you choose to make your home more energy efficient, it’s important to do your research before making a final decision. 

You want to make sure that you are going to be getting the maximum return for your investment.

Replacing your windows might be worth the cost, or it might make more sense to invest in solutions that are able to make your existing windows more energy efficient.


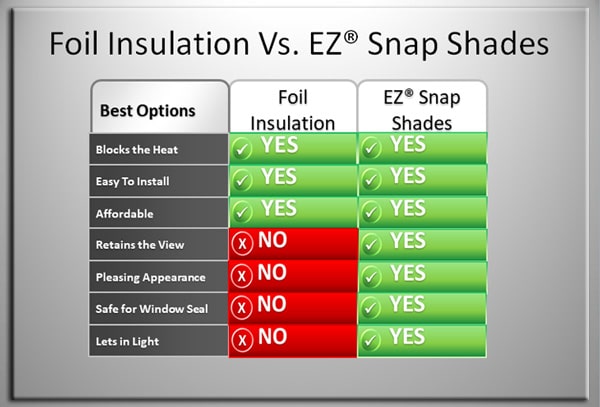
How To Choose Between Foil Insulation and Shade Screen

How To Choose Between Foil Insulation and Shade Screen

If you have a window that gets a lot of sun you likely also have a room that gets so hot it could double as an oven.

For those who want to cut down the heat, using air conditioning can be expensive and loud. Black-out drapes usually block more light than heat, and fans can only do so much. The two most common choices for people who want a low cost A/C alternative are foil insulation and shade screens.

But which one to choose?

We’ve provided a quick breakdown of both to help you decide what will work best for you.

To insulate or not to insulate?

Foil Insulation

Foil Insulation

If you are considering going the foil insulation route it’s best to know how it works. Foil, or reflective, insulation essentially functions like a mirror that reflects light and heat out of a given space.

Typically, it’s used on windows that get a lot of sun exposure.

Having just one window that gets a lot of sun can cause the room temperature to soar on a sunny day. Foil insulation can be cut to size and placed over it as an effective heat blocking measure.

For it to work effectively it must be hung on the outside of the window and it has to completely cover it. Unfortunately, this also means covering up your view and finding a way to attach it to the outside of your house or RV (usually tape). 

If the foil is placed on the inside, it means that sunlight is hitting the window and heat will still be able to get into the room as a result. The key to keeping a room cool is making sure the heat stays on the outside of the glass because once heat gets in it’s hard to dissipate.

If you have double pane windows, placing foil insulation on the inside of the glass may cause the window seal to fail.

The reason for this is that the foil is reflecting heat back through the glass panes causing it to super heat. If there is a sudden change in temperature, like a cloud covering the sun, the stress from the metal expanding and contracting rapidly can cause the seal to fail.

RV with Foil Insulation

RV with foil insulation taped over windows

It’s the same principle for why applying tint on a window will void the manufacturers warranty.

Foil insulation can also be an eyesore. Having it attached to your window also means you are essentially hanging a big piece of tinfoil to your home or RV all summer.

Despite these drawbacks, foil insulation remains a popular choice because it’s cheap and effective.

If you are thinking of going with foil, Reflectix is generally considered one of the best brands in terms of value for quality.

What about Shade Screens?

Shade screen is a fabric that is designed to be placed over a window and provide shade. Just like the foil insulation it works best when attached to the outside of your window.

There’s a lot of different varieties of shade screens on the market, so if you’re planning on purchasing shade screen know that they are not all created equal.

There’s a lot of different brands out there and it can be hard to feel like you’re picking the right one. Some have irregular or uneven weaves, or some will give you shade but you also won’t be able to see through it.

DIY RV Window Shades

RV with EZ Snap Window Shades

The best shade screen is from EZ Snap. It’s a patented product made from a non-fray mesh that blocks 90% of the sun’s heat. It’s also been designed to allow you to see out of it so you only block the heat, not the view.

EZ Snap is attached with a stick-on stud, so there’s no drilling and no holes left behind. The mesh snaps onto the studs, so it can be taken on and off without much hassle. What’s also great is that a kit from EZ Snap comes with everything you need to install your shade mesh, so no frantic trips to Home Depot needed.
When the EZ Snap mesh is hung it looks natural over a window, and while a lot of the heat is blocked, you still get a good amount of natural light coming through. 

Choosing between foil insulation and shade screen comes down to a matter of preference and appearance. If you are in need of a quick fix then foil will get you through. If you are wanting a more permanent solution that looks good, but still retains your view, then a product like EZ Snap shades is the answer.

10 Best Ways to Keep Your RV Cool in Summer Heat

10 Best Ways to Keep Your RV Cool in Summer Heat

Nothing beats the summer for getting out and enjoying your RV.

However, keeping your rig cool in the midday heat can be a challenge for even the most experienced traveler.

You might have an AC unit that is too loud, or boondocking, or maybe you don’t have AC at all. Fear not, we’ve compiled the top ten inexpensive ways to keep your RV cool without an air conditioner this summer.

1. Parking is everything

Be sure to park smart this summer. Where you park is the number one way to keep the heat down. Sidling up beside a nice lush tree will help keep one side of your RV cool, plus it’s doesn’t cost a thing.

Be aware of what side your RV is facing as well. The hottest part of the day is typically around 3 pm, so you want to try and keep as few windows exposed as possible to the afternoon sun.

2. Clean and be cool

Having good airflow in your RV is a key part of keeping it cool. Something that gets overlooked a lot is the dust and grime buildup in the areas behind and around your fridge and stove. If the airflow is inefficient then you will have heat flowing back into the RV, making for unhappy campers. Before your set out on your adventure, make sure to give those places a thorough clean.

3. Swap out those bulbs

When you’re trying to keep the temperature down every little thing counts, and this is one that doesn’t take much of an effort to do. If you’re still using incandescent light bulbs, know that each one of those works like a tiny heat generator. For the power they consume, around 90% of it is expended as heat.

Switch those old bulbs over to LED light bulbs, they’ll give you the same amount of light but with a fraction of the heat.

4. Your biggest fan(s)

There are two ways to use your fans to cool down for those hot days and nights. During the day get those fans pointed right at you. Air that is moving feels cooler than air that is still, so you will at least get some relief with some fans blowing at you.

In the evening, when the air is cooler outside of your RV than inside, point your fans facing out the windows. This way you will be blowing the hot air out and at the same time drawing the cool air in. The more windows you can have open for an effective cross-breeze, the better.

5. Cook out

Try to cook the majority of your meals outside of your RV. Any time you fire up your oven you are generating a lot of heat that is hard to dissipate. Plus, who wants to cook in a sweltering hot room? Cook your meals outside, either over the fire or on a camp stove.

It may take a bit more work to haul your ingredients and cookware in and out of your RV, so try and make enough so you have leftovers and don’t have to cook every single meal.

6. Shade Screens are a dream

Usually the main heat culprit in your RV is your biggest window or windows. The sun’s rays come in through the glass and heat up the interior of your RV. Then, because the heat has nowhere to go, it just keeps getting hotter and hotter.
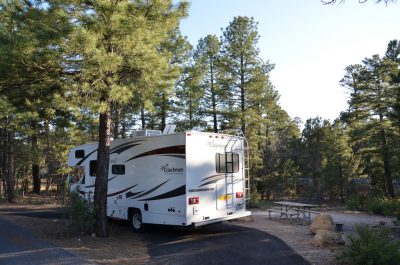
The key is to stop the sun from even getting through the glass, and EZ Snap Shade Screens are by far the easiest and best option for attaching shade to your RV. The best part is that they block the 90% of the heat but you can still see out of them, so you get to keep your view.
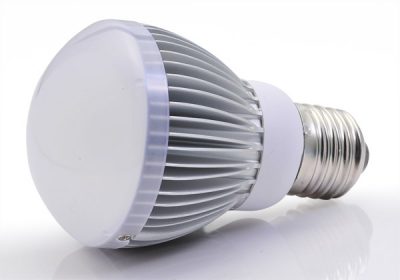
EZ Snap Exterior Blinds for RV Coach

RV with EZ Snap Shades

7. Tarp time

They may not be pretty but tarps are the Swiss Army Knife of any good RV’r. They’re inexpensive, they don’t take up a lot of space and they have a variety of uses. If there are any trees nearby you can try and attach your tarp across them to make some extra shade and cut down on the sun exposure to your RV.

8. Get on Google

Depending on the nature of your trip you may be planning your stops well in advance. Use Google Earth to scout your prospective stops to try and cherry pick the sites that will have the most shade. You will be glad you spent the extra time planning when the midday sun is out and you are relaxing in the shade from a nearby tree.

9. Night time is the right time (to cool down)

If your RV is like an oven during the day, the evening is the time to cool down not just yourselves, but your over-hot RV as well. Open up all those windows and turn those fans on.

Don’t forget to open your cupboards and storage bays, as those are places where heat can build up over the course of the day and can keep your RV uncomfortably hot if not aired out.

10. Skylight too bright

Your large windows may take all of the blame for the heat, but don’t forget about your skylight. They are notorious heat generators, and they can be a big reason why your RV is unbearable hot. Covering up your skylight is one of the best ways your can bring down the temperature in your RV this summer. Here’s a list of the top four ways to cover a hot skylight for under $100.

Top 4 Fixes Under $100 to Block Skylight Heat

Top 4 Fixes Under $100 to Block Skylight Heat

Window Shades
Skylight Shades
RV Skirting
RV Shades
Boat Shades

Need To Cover Your Hot Skylight?

Here’s How To Beat The Heat On A Budget

While they are known for keeping things bright, skylights also have a dark side.

With all the light they let in skylights can heat up a room to the point where it becomes an abandoned part of your home.

The cause of your hot house is called “the greenhouse effect”: light comes in, heats up your room, and then has nowhere else to go. Which would be fine if you were growing tomatoes in your living room, but chances are you’re not.

Even with the AC on max some rooms just can’t be cooled, and the sun’s rays can also cause your furniture and floors to fade.

We’ve compiled a list of the top four DIY ways to cool your skylight and get your house back.


1. Paint over your skylight

This one is as simple as it sounds. The key to cooling a hot skylight is to stop the sun before it gets through the glass.

If you can block the light, you can block the heat. Painting over your skylight will stop light from getting through and will keep your house much cooler for just the cost of a can of paint.

The main drawback with painting your skylight is that it is a fairly permanent fix. Scraping paint off is time-consuming and you will undoubtedly be left with more than a few scratches on your glass.

Depending on how hot your room is getting though, this may be a sacrifice you are willing to make.


2. Tarp it up

A quick and easy fix that is by far the cheapest of all your options. Simply buy a blue tarp that is several feet longer than your skylight. Lay it over top of the skylight so that it is completely covered and pin down the excess fabric using bricks. It’s a fast, cheap, and easy skylight cover.
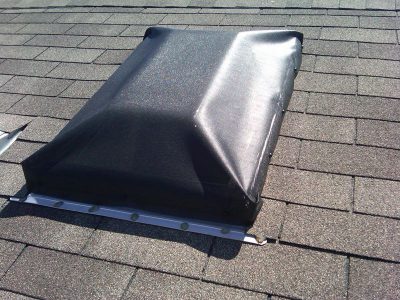
You’ll still get some ambient light coming through and most of the heat will be stopped, but expect your room to have a blue tinge.

Depending on how visible your skylight is from the street, you may also have the neighborhood eyesore on your roof all season. Once summer’s over, it’s only a matter of picking up the bricks and rolling up your tarp and you get your skylight back without a whole lot of trouble.


3. Board it up

This method requires the most amount of skill, but it’s the only one that doesn’t involve a trip to the roof. You will need to buy and cut a piece of foam insulation board that will fit snugly into your skylight shaft opening.

Then, along the outside of the insulation board attach weather stripping. This will ensure a tight fit that you can push in or take out depending on the weather.

This one may take some trial and error as you will need to cut the foam board to just the right size so it is just big enough to squeeze into the opening and effectively pin itself in place.

The biggest drawback with this method is that you are now trapping all the heat between the skylight and the insulation. This heat can build up to the point that your seals could fail or your glass could crack, so proceed with caution.


4. EZ Snap Skylight Shades

EZ Snap Raised Skylight Exterior Blinds

EZ Snap is a solar mesh that attaches to the outside of your skylight that is proven to block up to 90 percent of the sun’s heat. It still lets in lots of natural light, plus it’s affordable and a breeze to install. 

First, measure the size of your skylight and then order the appropriate kit from https://ezsnapdirect.com/products/skylight-shades/.

Once the kit comes, no special tools are needed to install it. Simply attach your mounting studs to the frame and then attach the mesh to the studs using the pins and caps included in the kit. Once it’s on it can be left on all year round.

If you want some direct sun in those cooler months you can also easily unsnap the mesh and store it away until next year.

Whichever method you choose to combat your sizzling skylight, know that the US Department of Energy concluded that exterior blinds and shades are up to seven times more effective at stopping heat from entering the home than interior blinds or window tinting.

Shade “Product of the Year”

EZ Snap® Quick & Easy

The patented EZ Snap® fasteners & our proprietary non-fray fabrics make it easy for you to “cut to size” and install right on site. Our “NO DRILL” 3M™ adhesive snap studs also mean no holes in your skylights, windows or RV with professional-looking results, every time.

  • No Experience Needed
  • No Special Tools Required
  • No Drill 3M™ Adhesive Studs
  • Non-Fray EZ Snap™ Solar Shading Mesh