Boosting Your Home’s Curb Appeal Top Skirting Ideas for Houses
We all desire a house that warmly invites visitors and leaves a lasting impression. To achieve this, both interior and exterior aspects require attention. Enhancing your home’s curb appeal can improve first impressions and increase resale value.
A well-maintained and aesthetically pleasing exterior can attract more buyers, likely sell faster, and even command a higher price. This is because it looks fresh and reflects pride in ownership, making it appear as a worthy investment to the buyer.
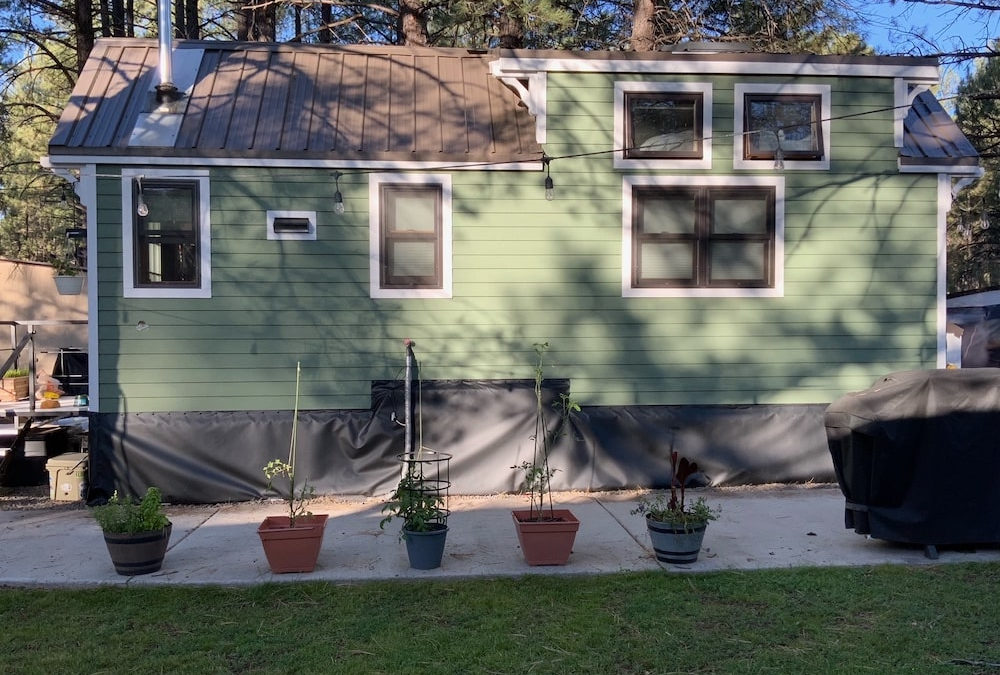
One often-overlooked feature that can make a substantial difference is house skirting. Your choice in skirting can greatly affect both appearance and functionality.
More than merely concealing the crawl space or foundation, skirting is crucial for improving the exterior appearance, protection, and insulation. The right material can provide a clean, unified look that complements the architectural design.
This article explores the world of house skirting, offering top ideas to enhance curb appeal. We’ll investigate various options, along with their benefits and drawbacks, and guide you in choosing the right skirting, installation, maintenance, and replacement.

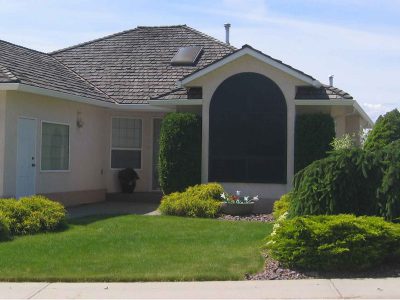
Image Credit: Gerd Altmann / Pixabay
Understanding House Skirting
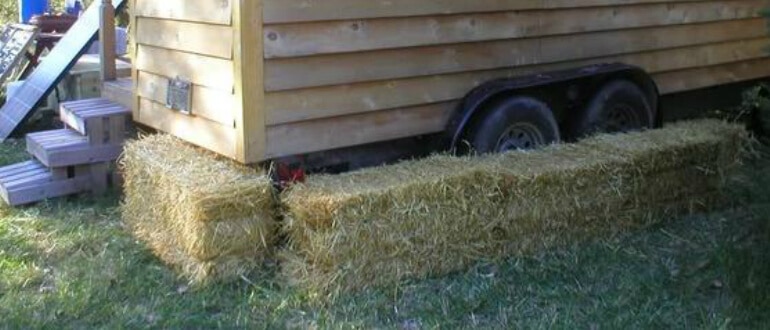
House skirting, or underpinning, encloses the space between the ground and the exterior walls’ base. It’s available in diverse materials, each with unique benefits and aesthetic qualities. House skirting isn’t merely an aesthetic addition; it also creates a protective barrier that conceals and shields the crawl space or foundation.
Functional Role of House Skirting
House skirting plays a vital role in maintaining a home’s integrity.
- Protection against Pests: Skirting serves as a defense mechanism, keeping pests like rodents and insects from accessing the crawl space and invading the foundation.
- Barrier against Debris: It deters debris, leaves, and other outdoor elements from accumulating under the house, reducing the risk of moisture buildup and potential structural damage.
- Weather Barrier: House skirting protects the foundation from excess rainwater and moisture, preventing water damage and mold growth, and thus preserving structural integrity.
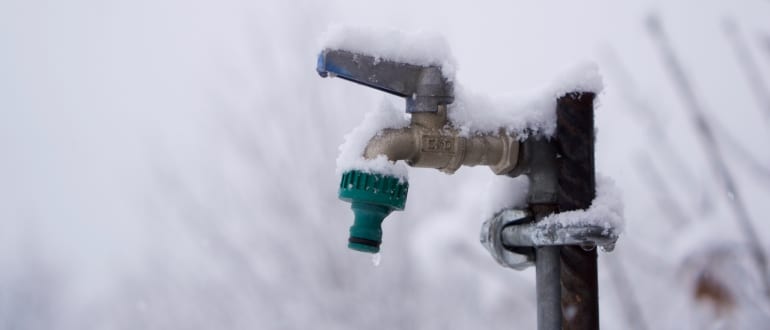
- Insulation Benefits: In areas with harsh weather conditions, skirting acts as insulation, protecting plumbing and other vulnerable components from freezing. This helps avoid costly winter repairs.
- Concealing Unattractive Areas: Skirting covers unsightly parts of your home’s exterior, such as the crawl space or foundation. This results in a more polished and cohesive appearance.
- Enhancing Energy Efficiency: Certain skirting materials, like insulated skirting, improve energy efficiency by acting as a barrier against cold air. This keeps the interior warmer in winter and cooler in summer, saving on energy costs.
The Aesthetic Importance Of House Skirting
Besides its functional benefits, house skirting also plays a significant role in enhancing the visual appeal of your property. It’s more than a practical addition; it’s a design choice that can transform the overall curb appeal of your home.
- Elegant and Classic Appearance: Options like brick or stone skirting evoke an elegant and timeless vibe, elevating your home’s aesthetic appeal. It’s a touch of class and sophistication that remains perpetually stylish.
- Polished Visual Impact: Neat and properly aligned skirting gives your home a sense of completeness and care. It accentuates the overall visual appeal, making the house appear well-maintained.
- Increased Property Value: Selecting the right skirting can enhance curb appeal and attractiveness to potential buyers. A pleasing exterior contributes to the overall aesthetics, potentially increasing the property’s market value.
- Personalization Options: House skirting offers the chance to add your unique style. Whether expressing individual preferences or aligning with existing architectural elements, skirting can be chosen to reflect your personality.
- Exterior Cohesion: Skirting unifies various architectural elements of your home’s exterior, tying them together into one cohesive, polished appearance. It’s an essential tool in design that ensures a harmonious look.
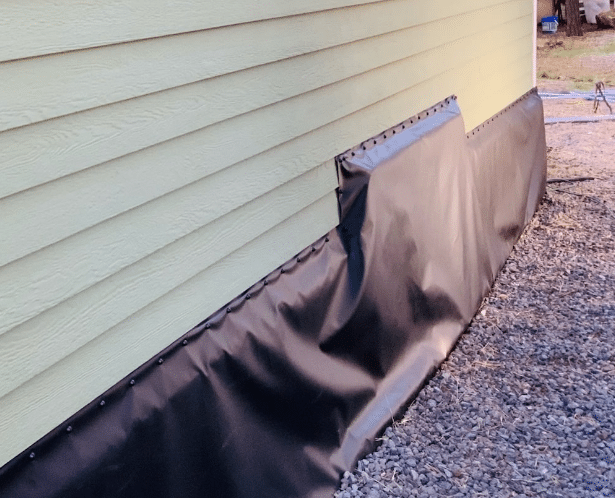
Image Credit: EZSnapDirect.com
Top Skirting Ideas to Boost Your Home’s Curb Appeal
Now that you understand the benefits of adding skirting to your home, are you ready to elevate its appearance? Choosing the right skirting is essential to reaping the full rewards. To assist you in this decision, here are some popular skirting ideas, starting with vinyl skirting.
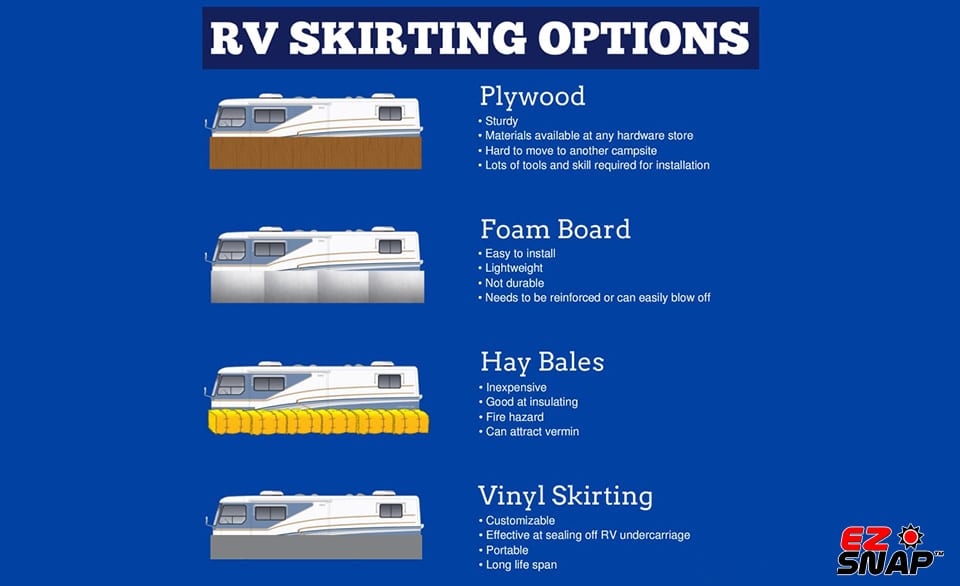
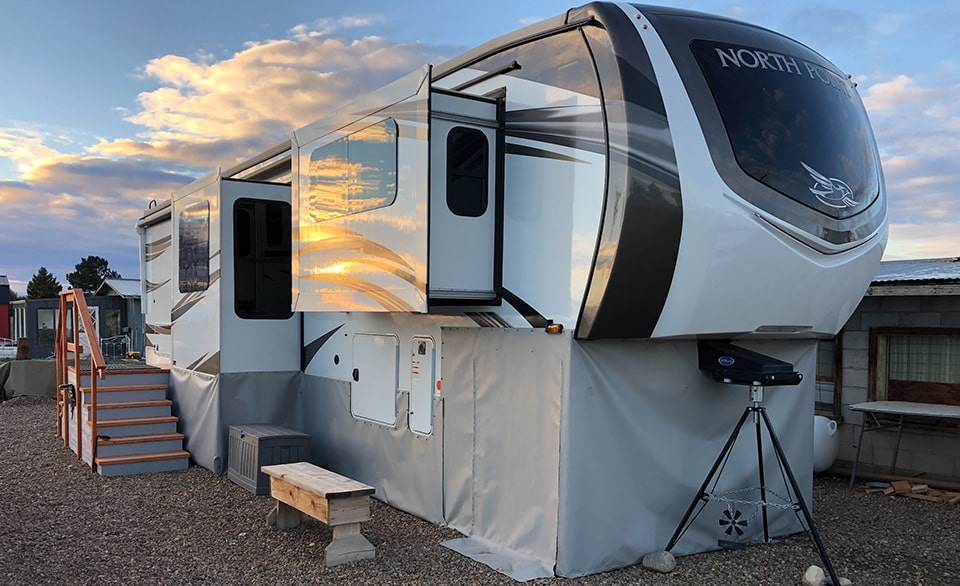
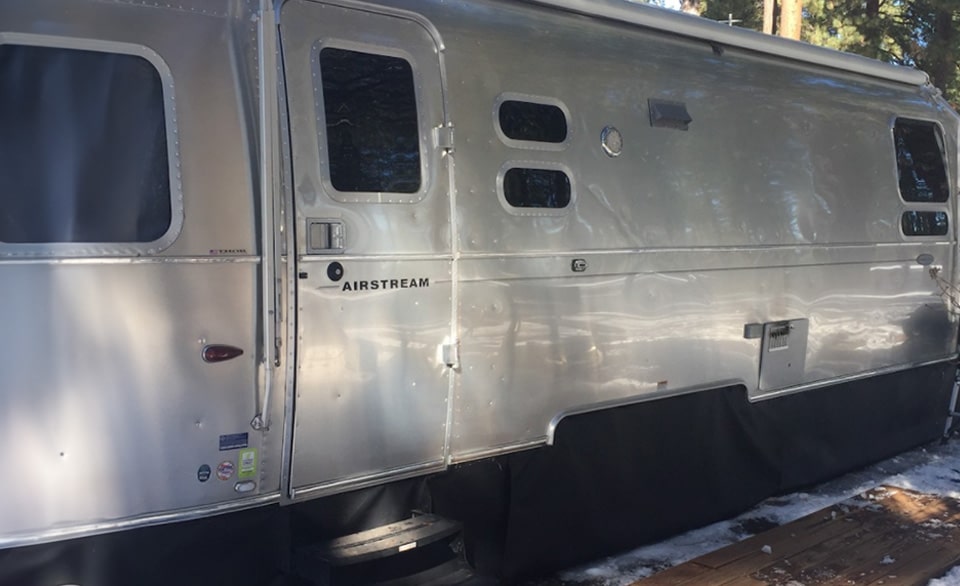
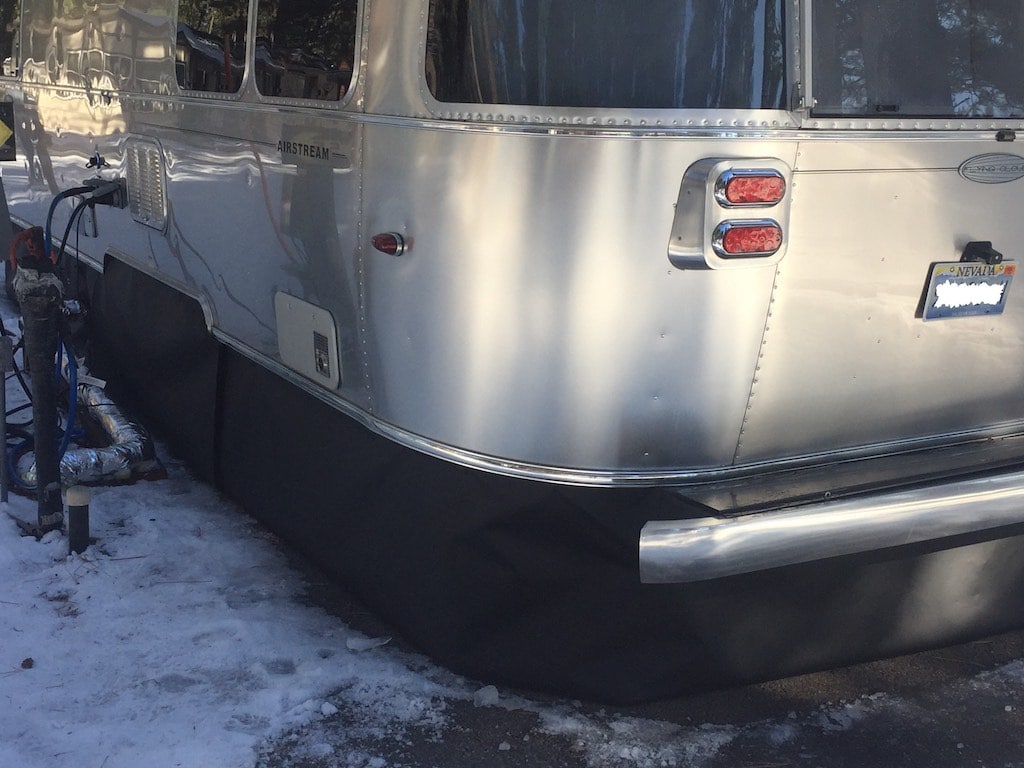
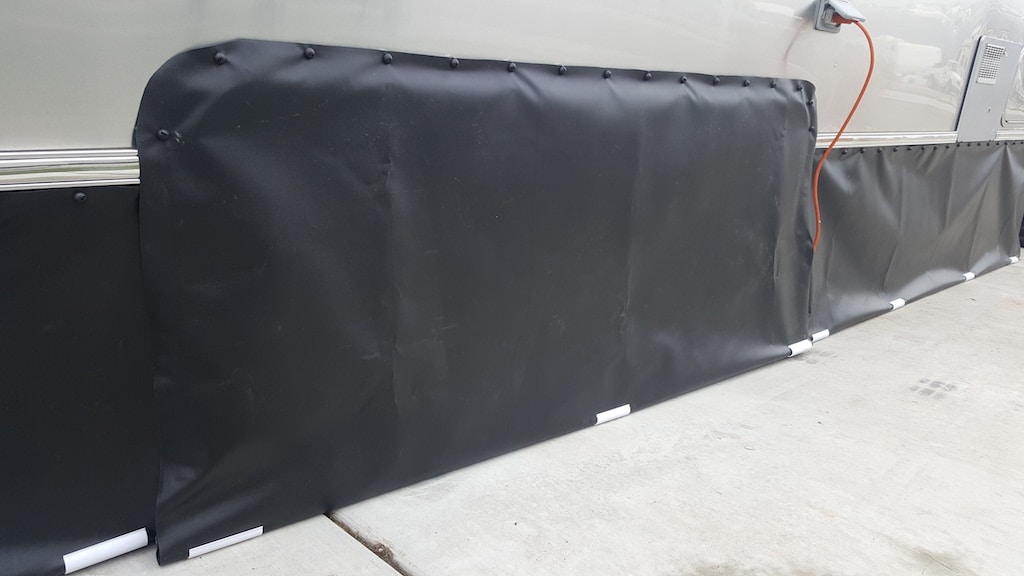
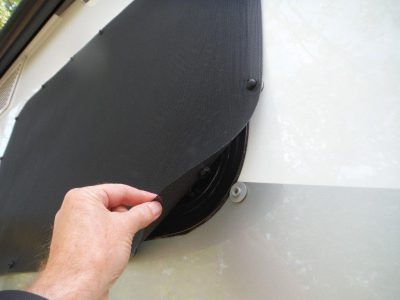
Vinyl Skirting
Vinyl skirting consists of panels designed to cover the space between the ground and your home’s exterior walls. Available in various styles and colors, vinyl can be selected to complement your home’s architecture.
Benefits of Vinyl Skirting
Vinyl skirting offers several advantages that make it an appealing choice for many homeowners:
- Aesthetic Improvement: Vinyl helps your home’s exterior look cleaner and more refined, potentially boosting your property’s value.
- Durability: This material is resilient and long-lasting, resistant to sun damage, chipping, and cracking.
- Easy Maintenance: Vinyl’s resistance to water and insects simplifies care and offers excellent protection against rodents and insect infestations.
Potential Drawbacks of Vinyl Skirting
While vinyl skirting has numerous advantages, there are some potential downsides to consider:
- Lack of Natural Appeal: Some homeowners might find that vinyl doesn’t capture the natural appearance of materials like brick or stone.
- Thermal Expansion or Contraction: Extreme temperatures may cause vinyl to expand or contract, resulting in fit and stability issues. Professional installation can mitigate these problems, ensuring a snug and secure fit.
Testimonial from a Homeowner:
“Before installing vinyl skirting, our home’s exterior looked incomplete and lacked the desired polished appearance. Vinyl skirting was the perfect solution as it offered a wide range of colors, and we found a perfect match for our house. Not only does it look fantastic, but it also keeps pests out, which was a persistent issue with our previous skirting. We are delighted with the improvement in our home’s curb appeal and highly recommend vinyl skirting to anyone looking for an affordable and durable solution.” – Emily, Homeowner.
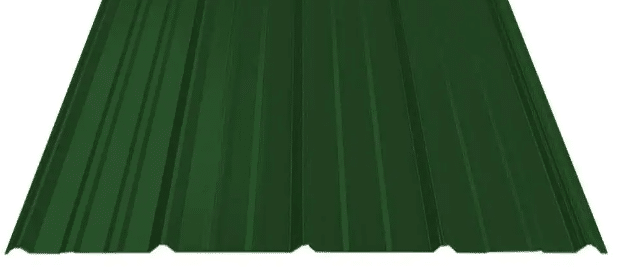
Image Credit: Gibraltar Building Products
Metal Skirting
Metal skirting, often crafted from aluminum or galvanized steel, adds a sleek, modern touch to a home’s exterior. It offers excellent protection against pests and harsh weather, making it a robust and resilient option..
Benefits of Metal Skirting
The appeal of metal skirting lies in its numerous advantages:
- Durability: Designed to withstand even the harshest weather conditions and heavy impacts, metal skirting is an investment that can outlast other materials.
- Pest Resistance: Termites and other insects don’t stand a chance against metal, enhancing its protective qualities.
- Fire Resistance: An added bonus of metal skirting is its resistance to fire, providing an extra layer of safety for your home.
Potential Drawbacks of Metal Skirting:
While metal skirting offers many benefits, there are potential concerns to be aware of:
- Susceptibility to Rust: Metal can be prone to rust, especially in humid or coastal environments. Modern advancements in coatings and finishes can mitigate this risk, but it’s still something to consider.
- Aesthetic Compatibility: The sleek and contemporary appearance of metal skirting may not suit traditional or rustic-style homes, so it might not be the ideal choice for every property.
Testimonial from a Homeowner
“After considering various options, we settled on metal skirting for its modern look and durability. Our home now stands out in the neighborhood, and we appreciate the low maintenance it requires. Knowing it is resistant to pests and fire, the added peace of mind makes it a wise investment for our family.” – Sarah, Homeowner.

Image Credit: CC BY-SA 3.0, / Wikimedia Commons
Brick or Stone Skirting
For those seeking a timeless and classic appearance, brick or stone skirting is an appealing choice. Crafted from genuine materials, this option exudes a sense of elegance and sophistication that can significantly enhance your home’s exterior aesthetics.
Benefits of Brick or Stone Skirting
Brick or stone skirting offers several compelling advantages:
- Durability: Known for its robust nature, brick or stone can withstand harsh weather and resist fading. Its longevity ensures that your home maintains its attractive appearance for years to come.
- Insulation: With superior insulation properties, brick or stone skirting aids in regulating the temperature within the crawl space, contributing to reduced energy consumption and a more comfortable living environment.
Potential Drawbacks of Brick or Stone Skirting
While the benefits are considerable, there are specific considerations to be mindful of with brick or stone skirting:
- Cost: The genuine materials and professional installation required for brick or stone skirting can make it a more expensive option upfront.
- Construction Requirements: The weight of brick or stone necessitates a solid foundation, potentially increasing both construction time and expenses. It’s essential to evaluate these factors in line with your budget and preferences.
Testimonial from a Homeowner
“We decided to invest in brick skirting for our home, and we couldn’t be happier with the result. The rich texture and timeless appeal have transformed our house into a stately residence. Not only does it look amazing, but we also noticed an improvement in temperature regulation inside our home. The investment was well worth it, and we always receive compliments from neighbors!” – John, Homeowner.
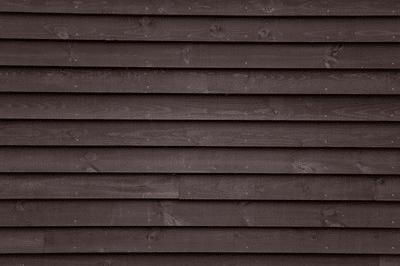 Image Credit: Douglas Neiner / flickr
Wood or Cedar Skirting
For homeowners looking to cultivate a rustic and traditional aesthetic, wood or cedar skirting offers natural charm and warmth. These materials can create a cozy and inviting appearance, making them an appealing choice for many.
Benefits of Wood or Cedar Skirting
Wood or cedar skirting provides unique benefits, adding to their allure:
- Natural Beauty: Their inherent charm adds warmth and character to a home’s exterior, offering a timeless appeal.
- Customization: The adaptability of wood allows for creativity and customization in design. Cedar’s natural oils enhance its pest resistance, making it a robust choice.
Potential Drawbacks of Wood or Cedar Skirting
While attractive, wood or cedar skirting requires careful consideration due to:
- Maintenance Needs: These materials need consistent care to protect against moisture, rot, and insects. Regular staining or sealing is crucial for maintaining their appearance and durability.
- Cost Considerations: Depending on the type and quality of wood, it may not be the most cost-effective option, especially for larger homes. It’s essential to weigh these factors when choosing wood or cedar for skirting.
Testimonial from a Homeowner
“We wanted our home to have a cozy and inviting feel, and wood skirting was the perfect choice. The wood’s natural grain and warm tones made our house a picturesque cottage. While we do invest some effort in maintaining it, the beauty and charm it adds to our home make it all worthwhile.” – David, Homeowner.
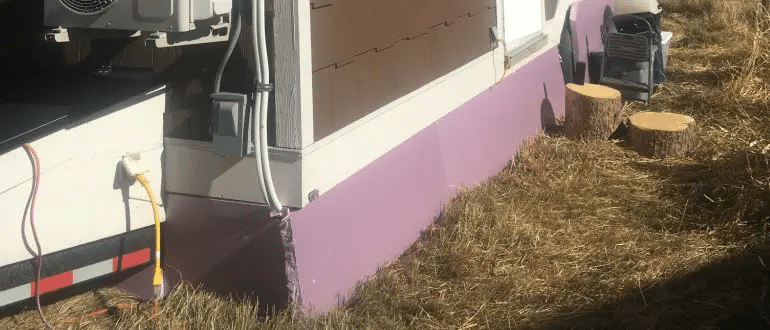
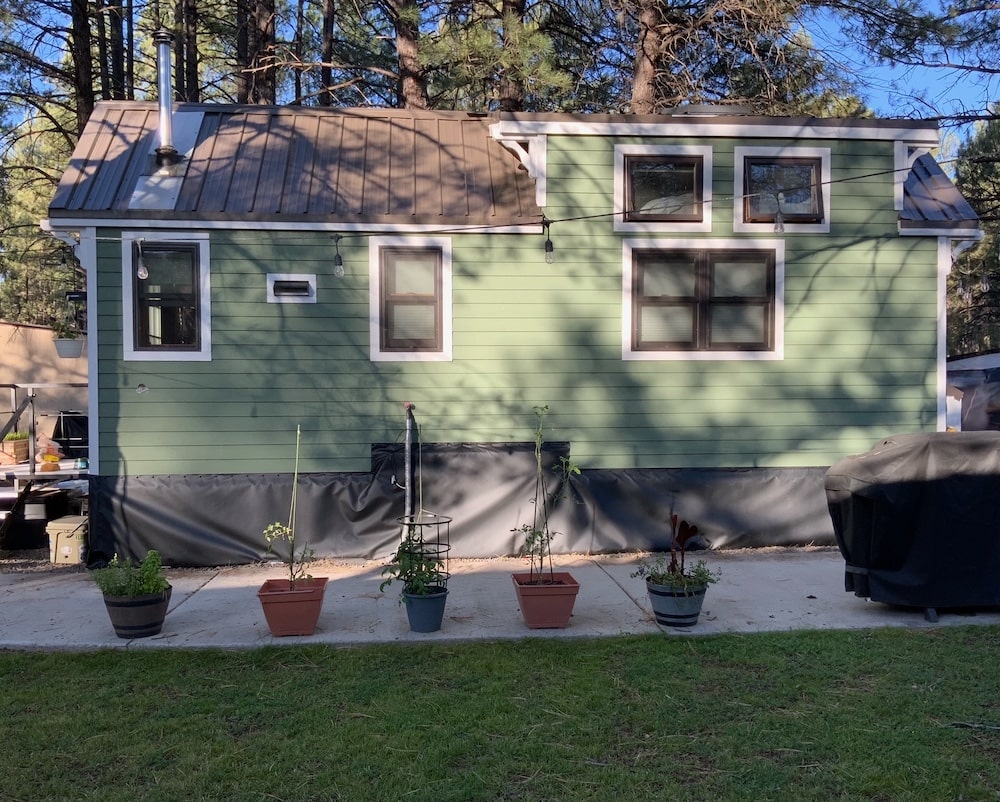
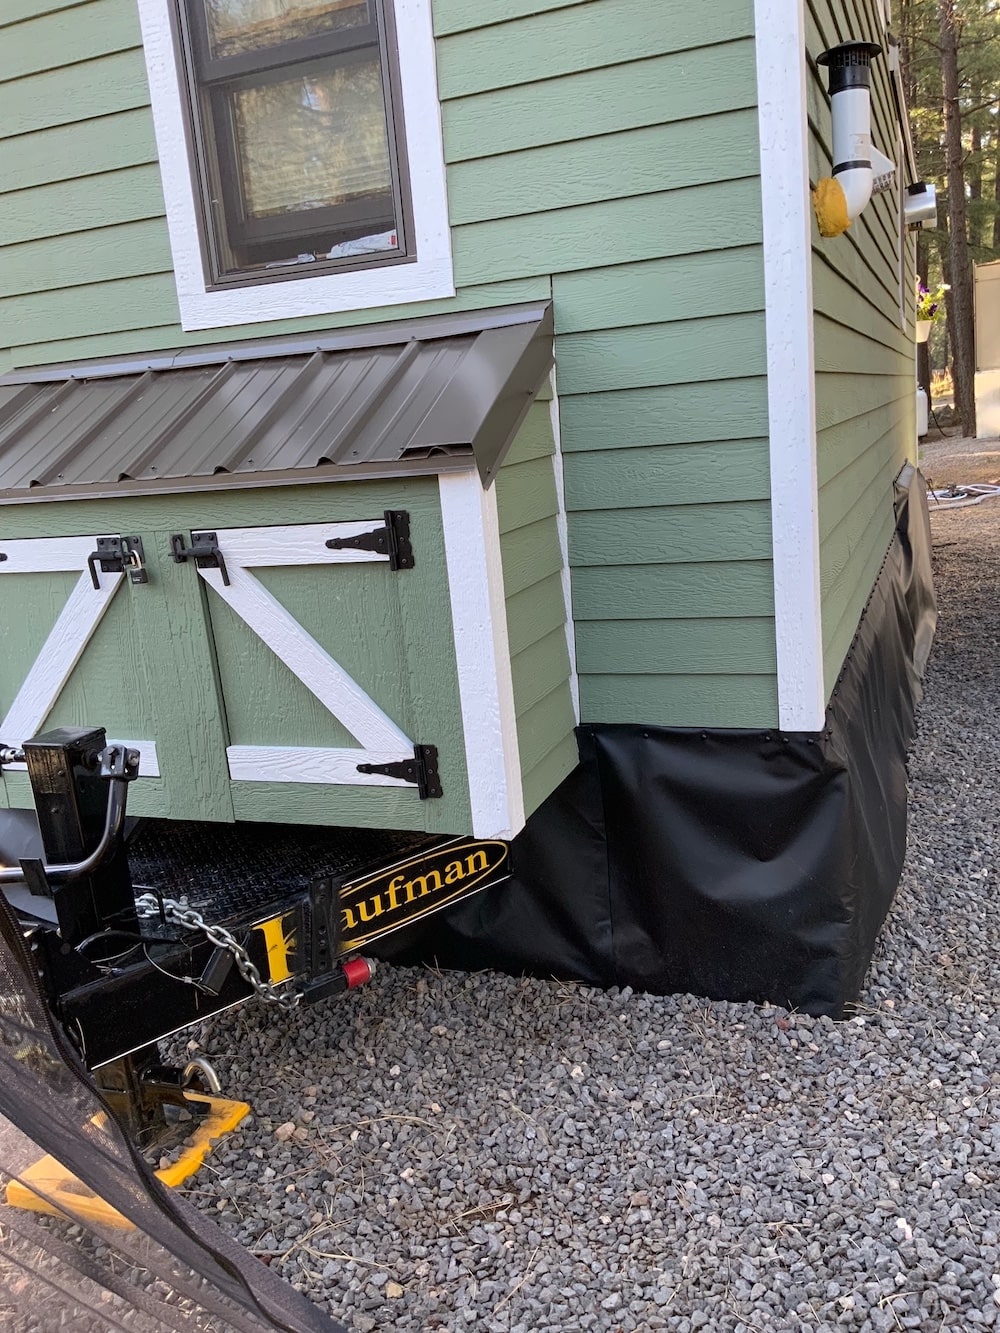
Image by EZSnapDirect.com
Insulated Skirting
Insulated skirting is a modern and innovative option that combines aesthetics with energy efficiency. It consists of foam panels that offer thermal insulation while enhancing the exterior’s visual appeal.
Benefits of Insulated Skirting
Insulated skirting stands out for various advantages:
- Energy Efficiency: By creating a thermal barrier, insulated skirting helps regulate the temperature within the crawl space, reducing both heating and cooling expenses. It’s an investment in long-term savings.
- Protection Against Pests and Moisture: In addition to its thermal properties, insulated skirting offers reliable protection against common outdoor nuisances like pests and moisture, ensuring a safer and more comfortable living space.
Potential Drawbacks of Insulated Skirting
While offering many benefits, insulated skirting comes with specific considerations:
- Upfront Cost: The initial investment in insulated skirting may be higher compared to other options. However, the energy-saving features often justify the cost over time, leading to significant savings on utility bills.
- Maintenance Needs: The foam material used in insulated skirting may require regular care to prevent damage from rodents and insects. A consistent maintenance routine can ensure the skirting remains effective and visually appealing.
Testimonial from a Homeowner
“We were looking for a way to make our home more energy-efficient, and insulated skirting was an excellent choice. Our energy bills have noticeably decreased, and we appreciate the added protection it offers against pests and moisture. It’s a win-win for us, as it not only boosts our curb appeal but also saves us money in the long run.” – Lisa, Homeowner.

Image Credit: Arek Socha / Pixabay
How to Choose the Right Skirting for Your Home
Selecting the perfect skirting for your home is a critical decision, impacting both aesthetic appeal and functional benefits. Here are essential considerations to guide you through the process:
Understanding the Style and Design of Your Home
Matching the skirting to your home’s architectural style is vital to create a cohesive look. Whether your home exudes a traditional, rustic vibe where brick or stone skirting could shine, or a modern feel that calls for sleek vinyl or metal, understanding your home’s overall design will help you pick a complementary option.
Considering the Local Climate and Environmental Conditions
Your region’s climate and environmental conditions can significantly influence your skirting material choice. If you’re living in an area with extreme weather or harsh conditions, robust materials like metal or insulated skirting might be apt. For humidity or termite-prone locales, vinyl or brick, known for their resistance to moisture and pests, might be suitable.
Factoring in Budget and Maintenance Requirements
Your budget and maintenance preferences should play a crucial role in your selection. Materials like vinyl may be more budget-friendly, but always weigh cost against quality and long-term advantages. Also, consider the upkeep involved in your chosen material—some options like wood might need more regular care compared to others.
Deciding whether to Consult with Professionals
If you find the choice overwhelming or seek expert insights, consulting with skirting professionals or contractors might be beneficial. They can offer valuable recommendations, assess your specific needs, and provide cost estimates. However, this decision should align with your preferences and comfort level in handling the project. If you opt for professional guidance, they can also ensure correct installation and compliance with local building regulations, contributing to a high-quality and lasting finish.
Installation Tips for House Skirting
Installing house skirting is essential for its effectiveness and longevity. These tips, applicable to various materials like vinyl, metal, brick, stone, wood, or insulated skirting, can guide you to a perfect and lasting finish.
Preparing Measurements and Materials
Measure the house’s perimeter accurately before starting, and prepare all necessary materials to prevent delays.
Do’s During Installation
- Do: Clear the area and level the surface before installation.
- Do: Utilize the manufacturer-recommended fasteners and tools for stable installation.
- Do: Ensure adequate ventilation under the house to avoid moisture and related problems.
Don’ts During Installation
- Don’t: Over-tighten fasteners, as it may weaken the material.
- Don’t: Place the skirting too near the ground; leave space for expansion and contraction.
- Don’t: Neglect to seal the edges. Proper sealing keeps pests out and enhances weather resistance.

Image Credit: LEEROY Agency / Pixabay
Hiring A Professional vs. DIY
Installing home skirting is a task that requires attention to detail and an understanding of the specific materials and methods. The decision to hire a professional or do it yourself depends on various factors. Here’s an overview to help you decide:
Hiring a Professional:
- Expertise and Experience: Professionals bring knowledge and experience, which can ensure a flawless finish.
- Time and Effort Saved: A pro can complete the task efficiently, allowing you to focus on other things.
- Potential for Avoiding Mistakes: Hiring a professional may minimize the chance of costly errors.
- Cost: Professional services come at a price, which might be a significant consideration for some homeowners.
DIY Approach:
- Cost Savings: Doing it yourself can save money if you already have the required tools and skills.
- Personal Satisfaction: There’s a sense of accomplishment in completing a home improvement project on your own.
- Potential Challenges: Without prior experience, you might encounter challenges that can lead to mistakes or an imperfect finish.
- Time Commitment: DIY installation may take longer, especially if you are learning as you go.
The decision between hiring a professional and a DIY approach depends on your budget, skills, time availability, and preferences. A professional may provide a quick and high-quality installation but comes with a cost. In contrast, a DIY approach might be more satisfying and budget-friendly but could be more time-consuming and pose some risks if you’re inexperienced. Assessing your situation and weighing these factors will help you make the best choice for your home’s skirting installation.
Testimonial from a Homeowner who Hired a Professional to Install Skirting:
“I was unsure about the skirting process, so I preferred calling in a pro. It was the best decision ever! The expert made it look like a dream – perfect alignment and as secure as possible. Ultimately, I just had to walk into my home with the cool new skirting without any worries. I highly recommend getting a helping hand!” – Kristen, homeowner
Maintaining and Replacing House Skirting
House skirting enhances your home’s appearance, but maintenance is key to its longevity. Occasionally, it may require replacement. Here’s a look at regular upkeep routines and indicators for replacement for various skirting types:
Regular Maintenance Routines
Different types of skirtings demand different levels of attention. So, what routine should you maintain for your particular type? Leave that to us. We’ll guide you about the basic ones.
Here are some regular maintenance routines you should follow for various skirting types.
- Vinyl Skirting: Requires occasional cleaning with mild detergent and water. Check for cracks or damage, repairing or replacing panels as needed.
- Brick or Stone Skirting: May need periodic cleaning to remove debris and stains. Ensure bricks or stones are secure, fixing any loose or chipped pieces.
- Metal Skirting: Generally rust-resistant, a soft brush and water keep it looking good. Inspect for dents or other damage, addressing issues promptly.
- Wood or Cedar Skirting: Needs regular staining or sealing for protection from moisture and insects. Look for rot or termite damage, replacing wood as necessary.
- Insulated Skirting: Typically low-maintenance, but inspect foam panels for damage, particularly at edges, and repair or replace as needed.
Indicators for When to Replace Your House Skirting
When should you take the hint that it’s time to replace the house skirting? Some signs can tell you to eliminate the old and worn-out skirtings. Here are a few such indicators.
- Visible Damage: If you notice visible damage, such as cracks, holes, or significant wear and tear on your skirting, it may be time for a replacement.
- Pest Infestations: An increase in pest activity, such as rodents or insects, around your home could indicate that your skirting has become compromised, and replacement may be necessary.
- Moisture Issues: Water damage or signs of moisture inside the crawl space may indicate that your skirting is not providing adequate protection and should be replaced.
- Aesthetic Decline: Fading, discoloration, or an overall decline in the skirting’s appearance can negatively impact your home’s curb appeal, prompting consideration for replacement.
Replacement Tips
Understanding when and how to replace skirting is essential. Here are a few tips:
- Inspect Regularly: Regularly check for significant damage or wear that might warrant a replacement.
- Choose the Right Materials: If replacement is necessary, select materials that suit your home’s style and local weather conditions.
- Consider Professional Help: If you’re unsure about the replacement process, professional assistance ensures proper installation.
Conclusion
House skirting not only enhances visual interest and curb appeal but also plays a vital functional role in protecting the home. By complementing the architectural style, the right skirting choice adds a finishing touch that elevates the property’s appearance.
From the classic elegance of brick or stone to the warmth of wood and the versatility of vinyl, various skirting options allow personalization to reflect individual tastes. Whether you prefer the durability of metal or the energy-saving benefits of insulated skirting, choices abound to suit your needs.
Considering your skirting options carefully can help enhance your home’s exterior, making it well-protected and inviting. Remember, achieving great curb appeal is within reach with the right skirting choice.
If you’re planning to install skirting in your home, explore the extensive range of options available at EZSnapDirect.com, where great selections await you.
Should you have any questions or concerns, feel free to comment below or subscribe to our blog for more insights on home renovation. For further information, visit EZSnapDirect.com today.
Don’t hesitate—take the first step in transforming your home’s exterior now!
References:
https://homedecorbliss.com/11-front-porch-skirting-ideas/
https://anchorfoundationrepair.net/blog/skirting-options-crawlspace-home/
https://housing.com/news/skirting-design-ideas-for-your-home/
http://www.johnsonstimber.co.uk/news/the-advantages-of-skirting-boards
https://constrofacilitator.com/skirting-board-components-advantages-types-and-applications/
https://www.davidsavage.co.uk/6-benefits-of-using-skirting-board-styles-in-your-home/
https://blogs.tameerkaro.com/skirting-in-construction-10-different-types/
https://dailycivil.com/types-of-skirting-in-construction-what-is-skirting/
https://housing.com/news/skirting-design-ideas-for-your-home/
https://anchorfoundationrepair.net/blog/skirting-options-crawlspace-home/
https://www.periodmouldings.co.uk/advice-guides/guide-to-choosing-skirting-boards/
https://www.homebuilding.co.uk/buying-guides/skirting-boards
https://www.leistenshop-24.de/en/tips/avoid-mistakes-when-installing-skirting-boards-the-best-tips


 keep the temperature down every little thing counts, and this is one that doesn’t take much of an effort to do. If you’re still using
  majority of your meals outside of your RV. Any time you fire up your oven you are generating a lot of heat that is hard to dissipate. Plus, who wants to cook in a sweltering hot room? Cook your meals outside, either


 fix that is by far the cheapest of all your options. Simply buy a blue tarp that is several feet longer than your skylight. Lay it over top of the skylight so that it is completely covered and pin down the excess fabric using bricks. It’s a fast, cheap, and easy skylight cover.
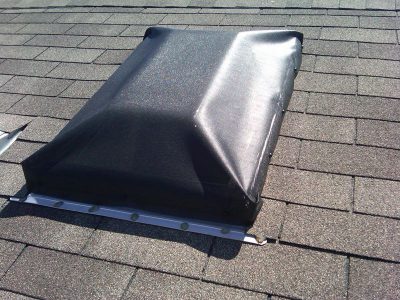

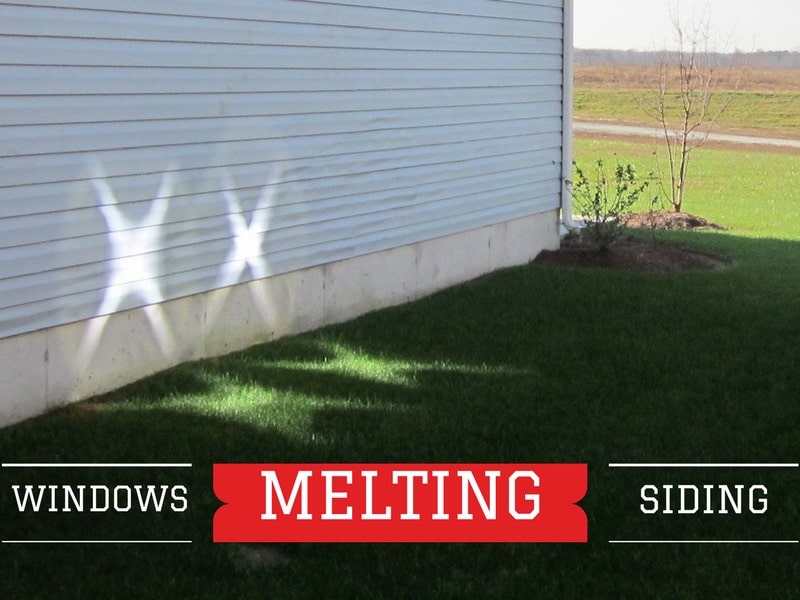


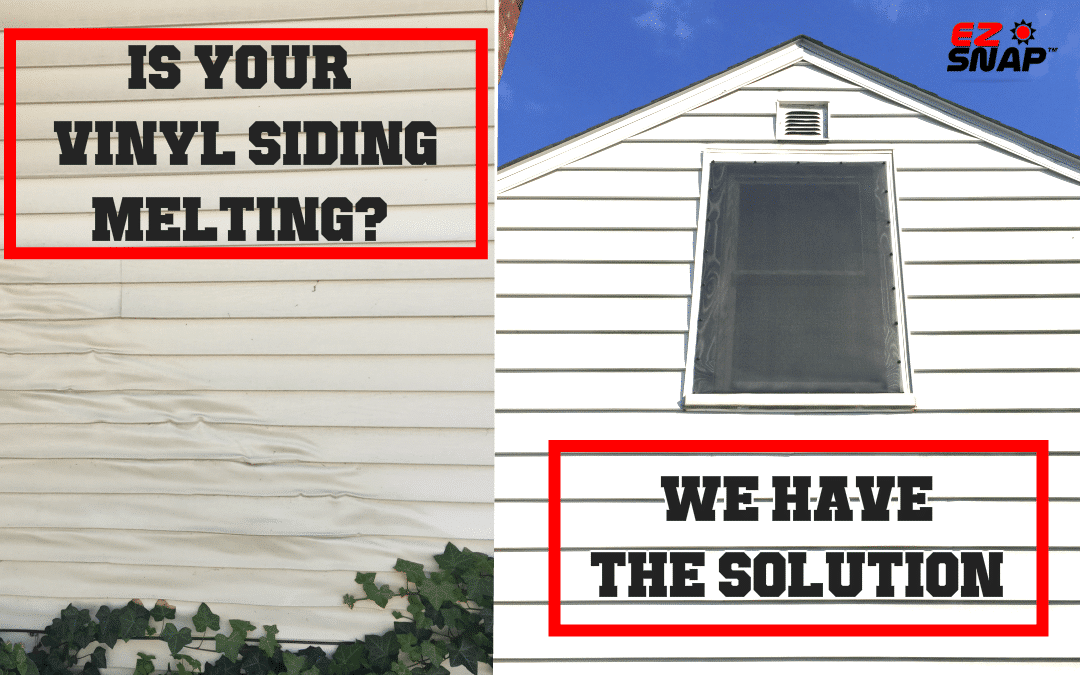
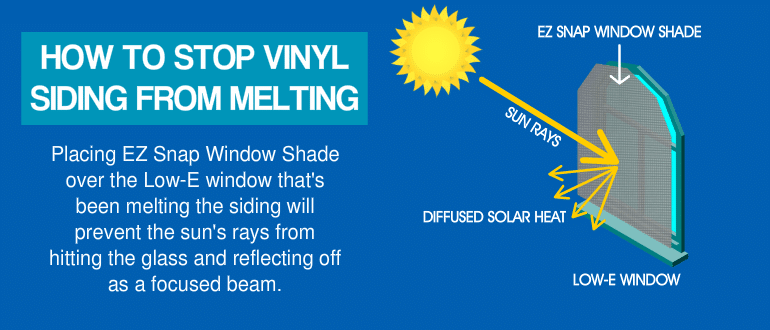
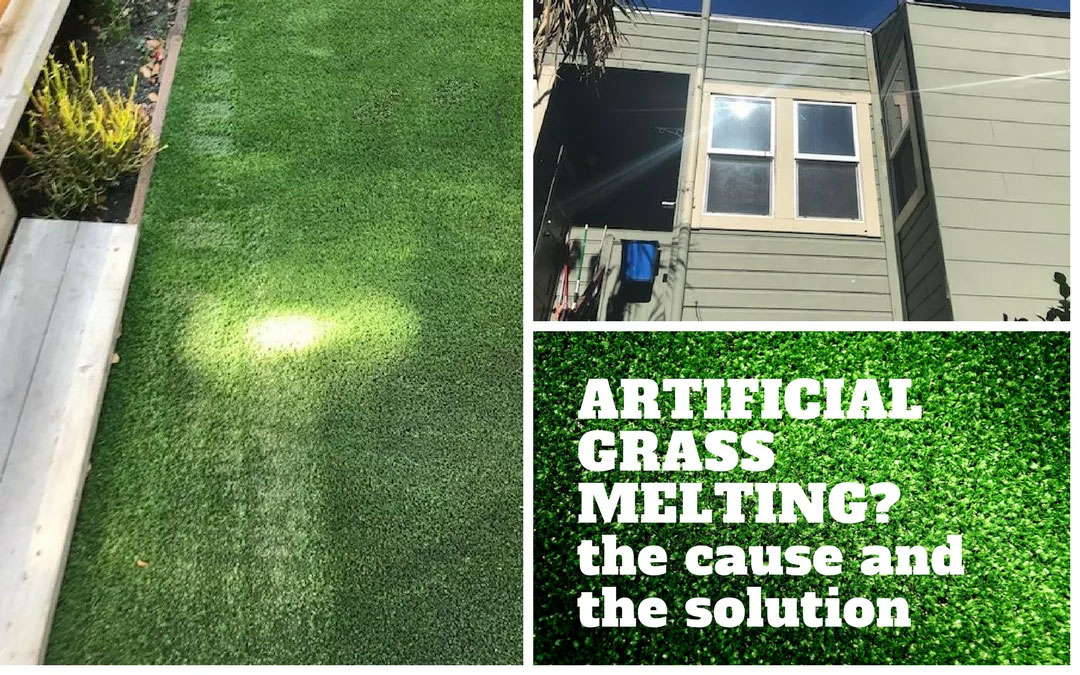
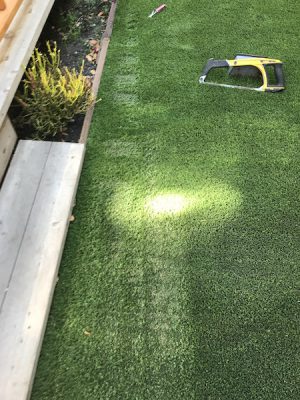
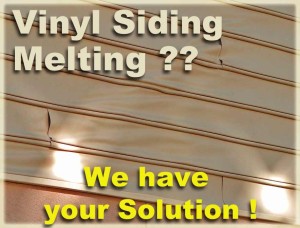 What is causing the vinyl siding to melt and warp?


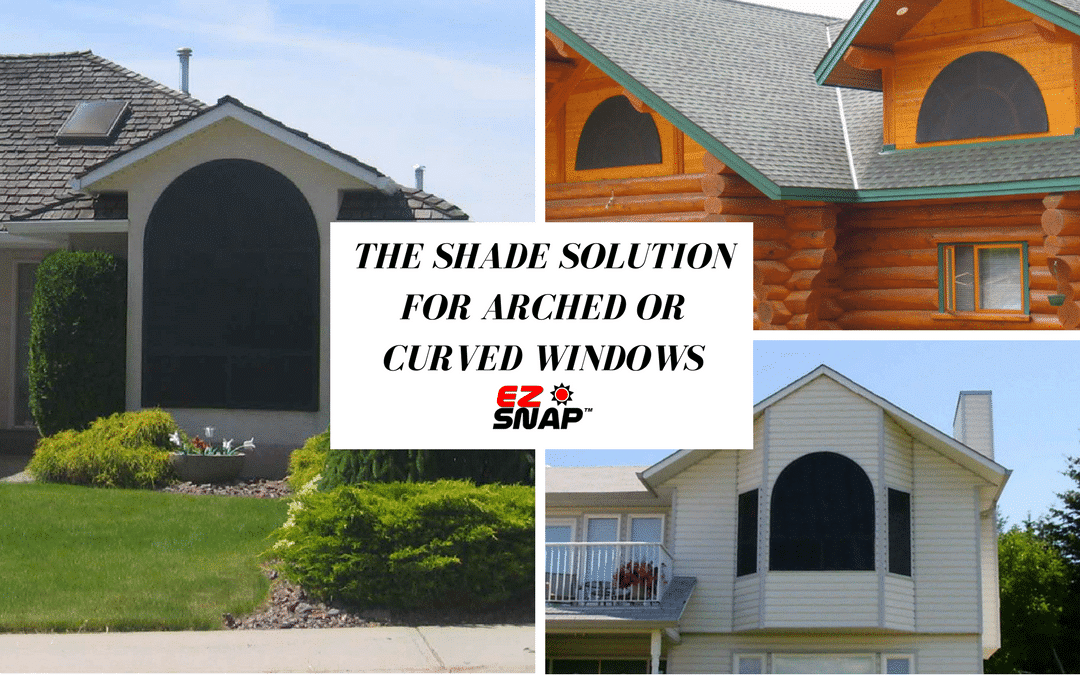
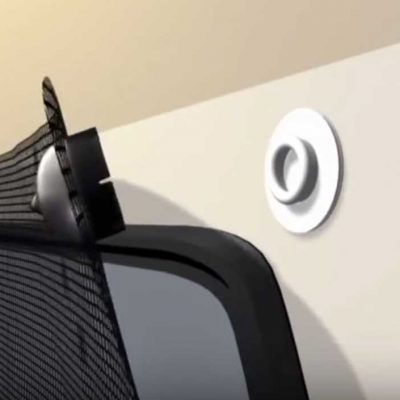
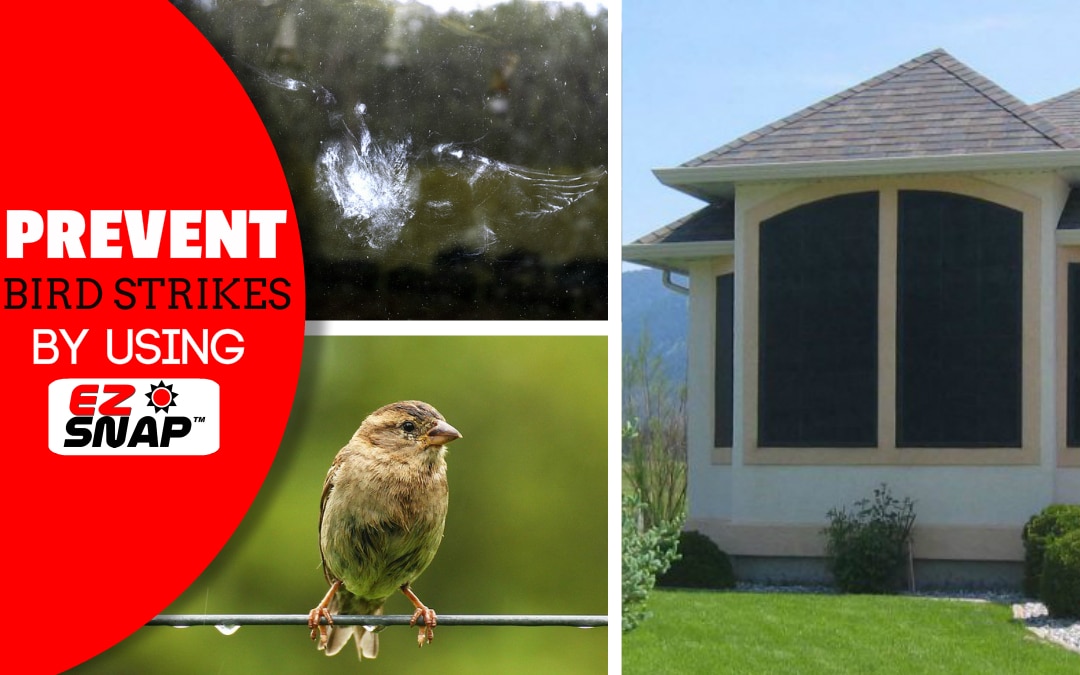
 EZ Snap Innovations has developed the perfect solution to providing shade to any shape of window, curved, arched, or even round.


 EZ Snap’s
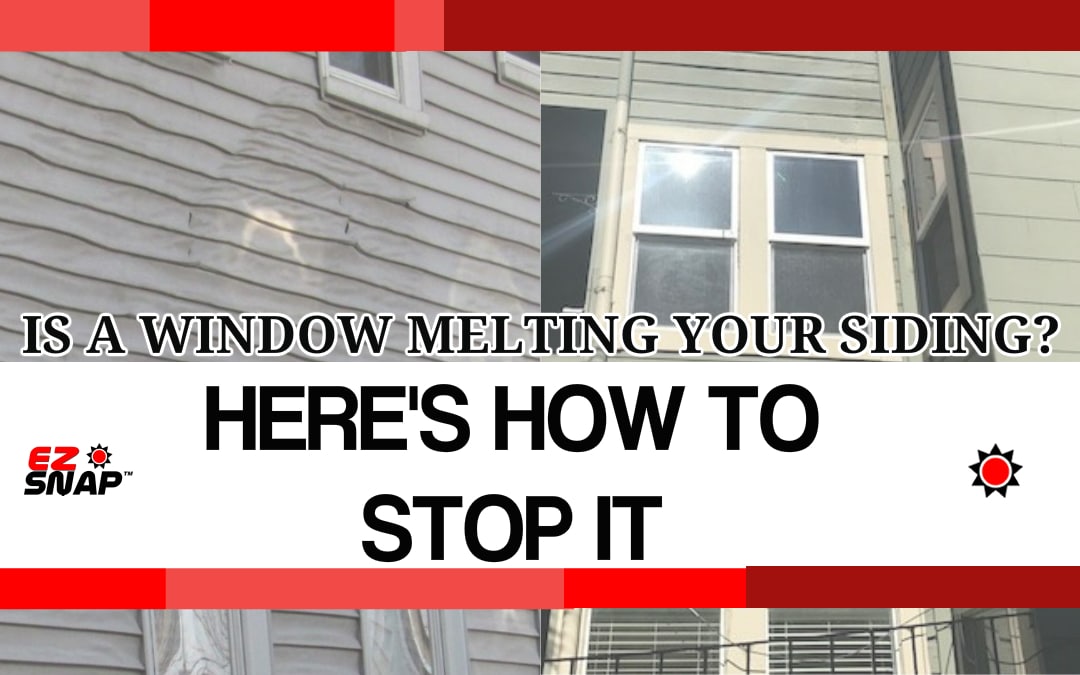


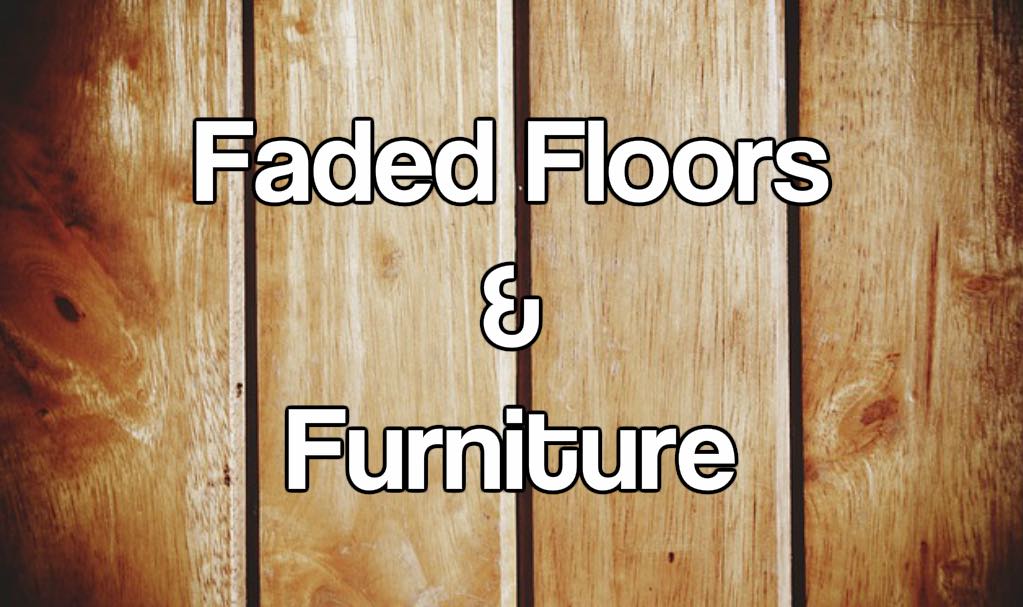
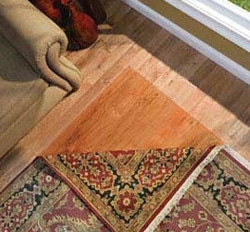 If sun light is entering your home, there is the risk of it fading your flooring carpeting or furniture.


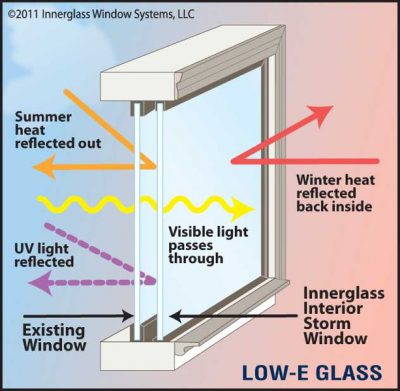
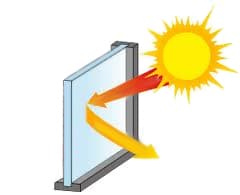 SHGC stands for Solar Heat Gain Coefficient. This number is commonly used as a guide line for rating the energy efficiency of windows and their various shading treatments.
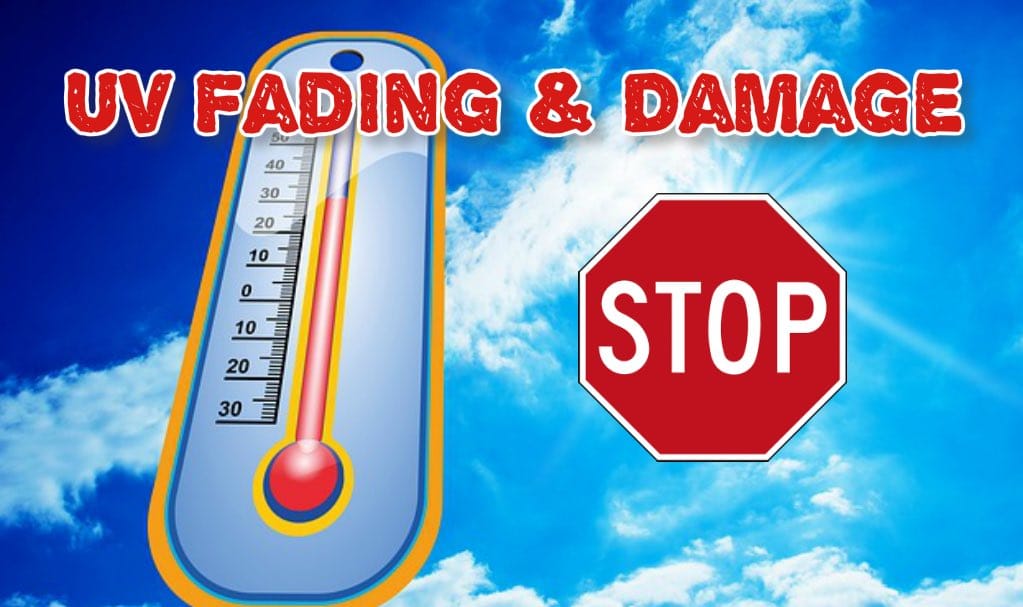
 The sun is a very powerful force indeed. Especially when you consider the earth only receives about one two-billionth of the sun’s total energy. We have all experienced the power the sun has to fade and damage,whether it’s the paint on your car or your favorite chair.


 1. Privacy:
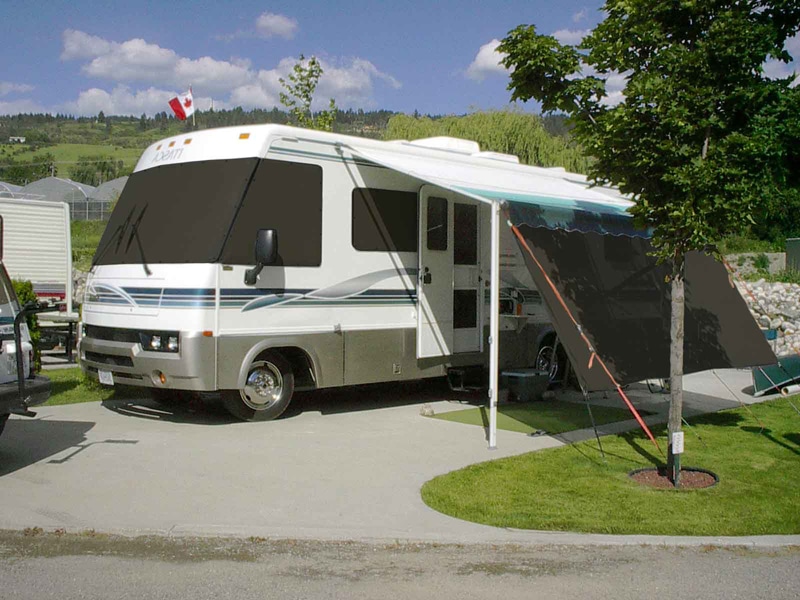
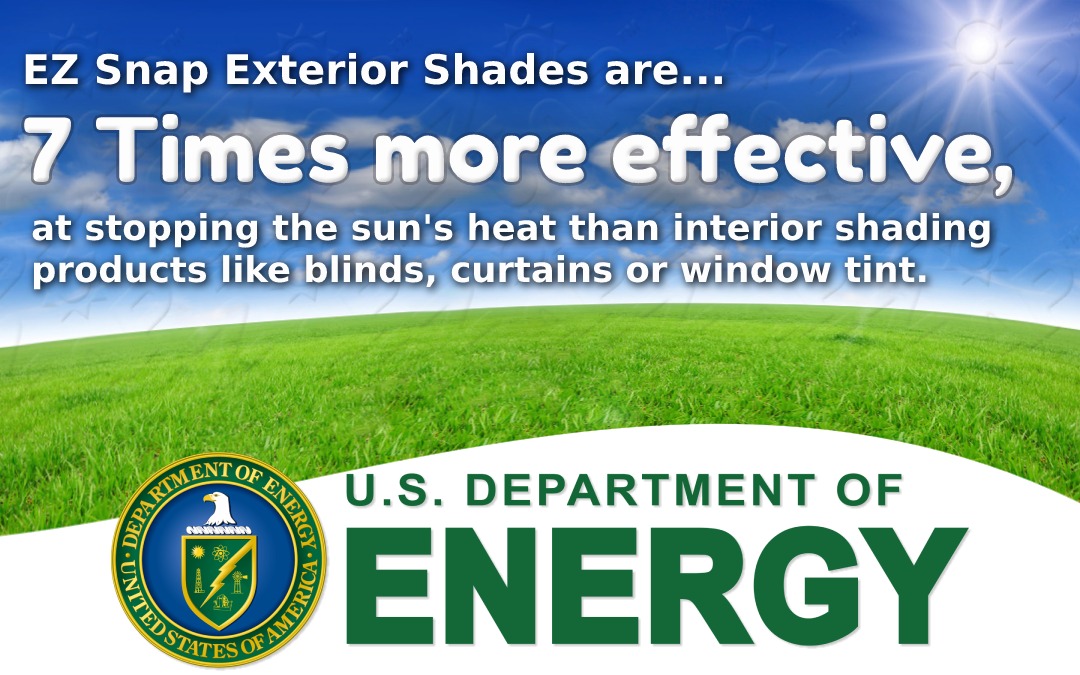
 There is a better way. By simply adding exterior
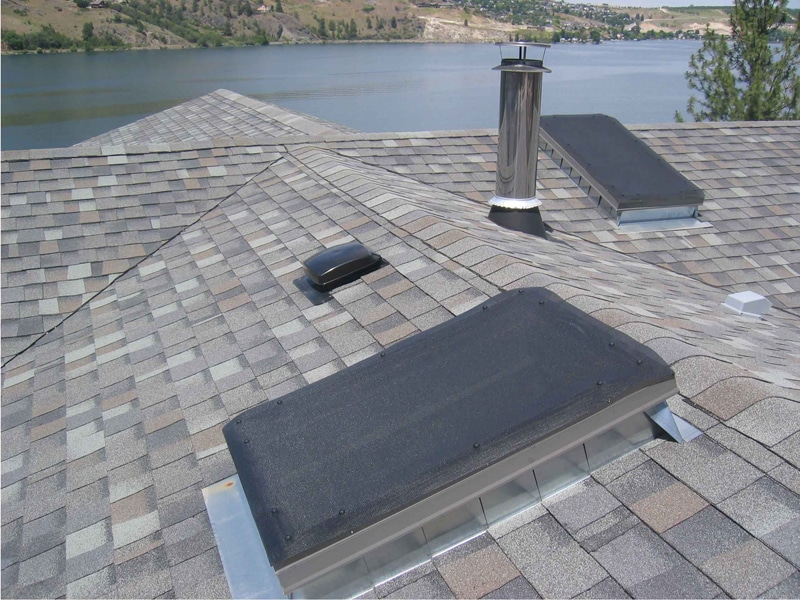
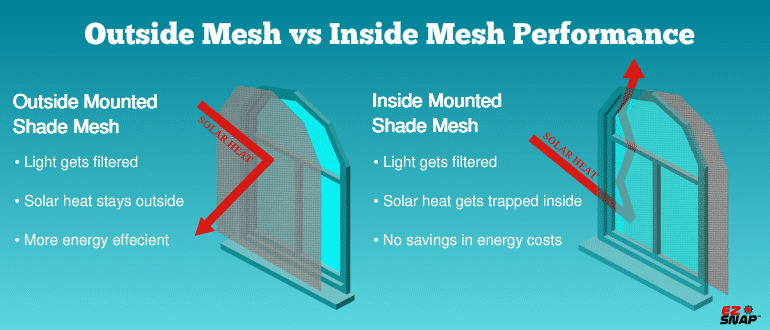
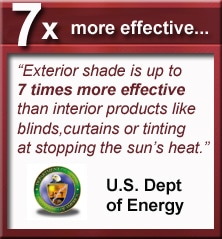
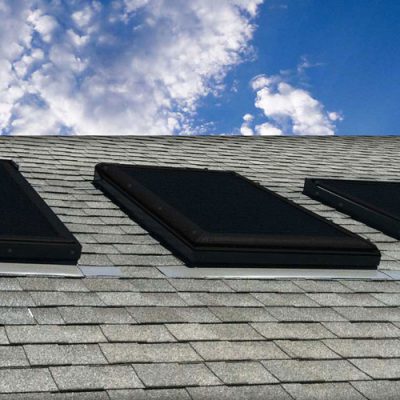 Even though skylights tend to be much smaller in size than the typical windows, they can easily allow too much heat and light into the home. This is due to the fact that they are placed on the roof, usually directly facing the sun. This location and angle allows the sun’s heating rays to directly enter the home, usually for most of the daylight hours. Interior blinds are helpful at reducing the excessive light that enters, but they do little to stop heat. As with any shade or blind to be effective, they must be installed on the outside of the skylite or window.
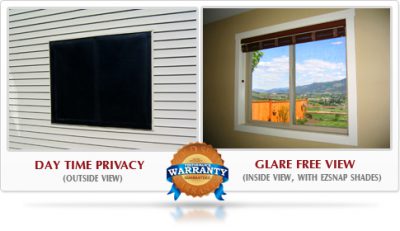 Let’s compare.
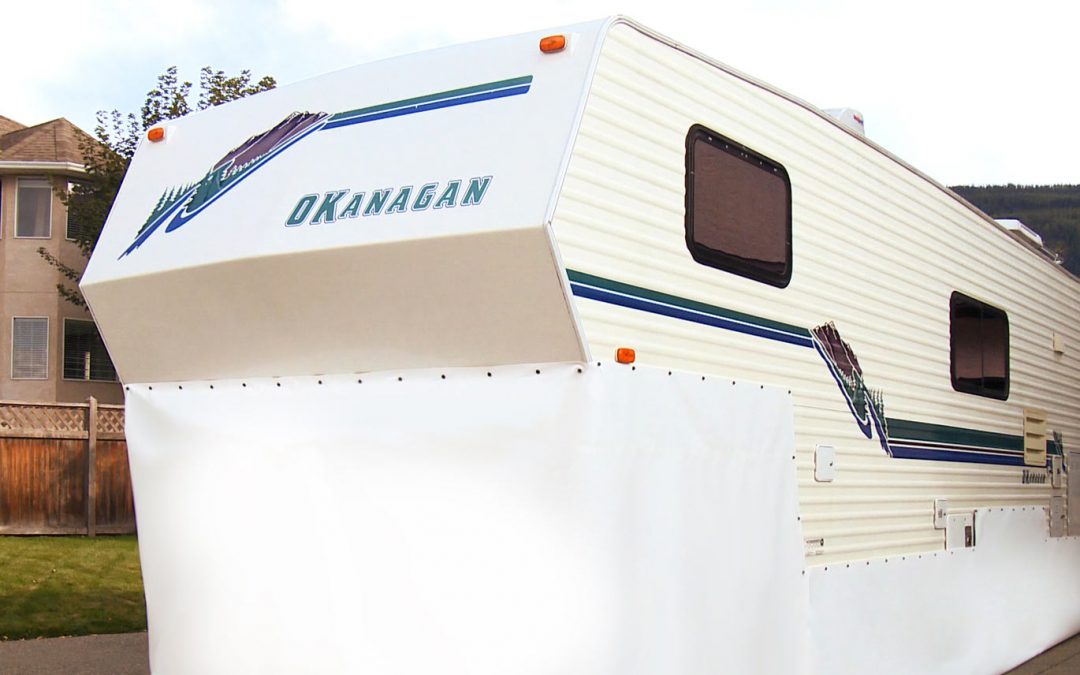

