10 Must-Have RV Accessories for a Perfect Journey

10 Must-Have RV Accessories for a Perfect Journey

Image Credit: Gavin SeimPixabay

Regarding RV living, having the right accessories can make all the difference. RV accessories enhance the overall experience and provide practical solutions to many common problems while living on the road. From temperature control to internet connectivity, the list of must-have RV accessories can be overwhelming. However, investing in these accessories can help make your RV more comfortable, functional, and enjoyable.

Investing in must-have RV accessories

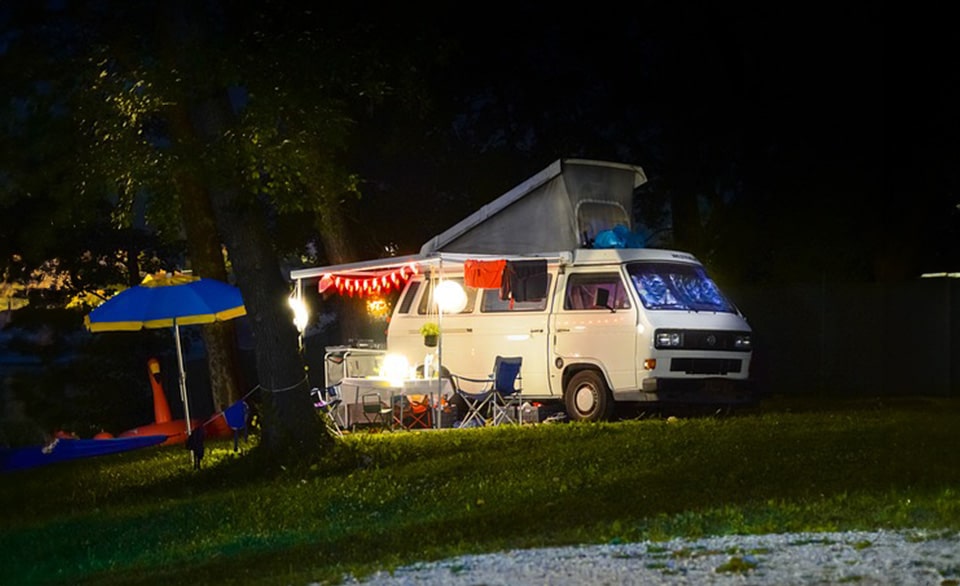
Image Credit: Rudy and Peter SkitteriansPixabay

Investing in these top ten must-have RV accessories can provide a multitude of benefits and next to zero negatives besides the added cost of investment into your RV. Whether you’re a full-time RVer or just like to enjoy the occasional road trip with family and friends, these must-have accessories can seriously help make life on the road feel more like home. Some of the benefits of investing in must-have accessories include:

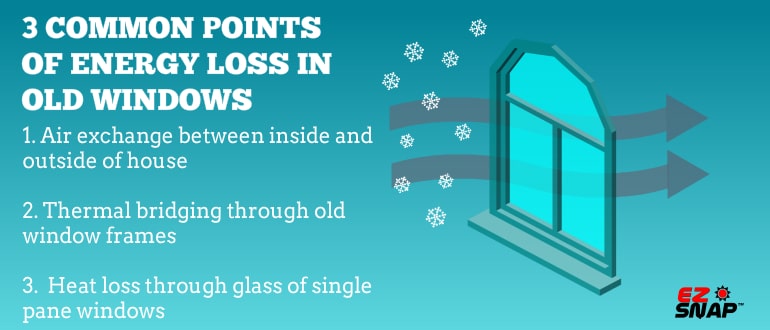
Improved comfort and convenience: RV accessories can make life on the road far more comfortable and convenient for everyone in the rig. For example, thermal insulation kits can help regulate the temperature inside your RV and minimize the need for heating and cooling equipment. RV skirting can protect your RV from the elements and pests, in addition, to helping maintain the temperature inside of the RV.

Enhanced safety and security: RV accessories can also improve safety and security on the road. For example, RV surge protectors can protect your electrical system from power surges. In addition, RV-specific GPS navigation systems can help you navigate unfamiliar streets, low bridges, and tight turns and avoid hazards on your trip.

Cost savings: While there may be a sticker shock to some of the items on our top ten must-have RV accessories, these investments can help you save money in the long run. For example, portable solar panels can help you save on energy costs by providing a renewable power source for your RV and the potential to not have to plug into shore power depending on your final setup. If you are plugging into shore power or running a generator while boondocking, having good skirting can help reduce the energy needed to keep the RV warm or cool.

Now let’s take a closer look at ten must-have RV accessories that can enhance your RV experience:

RV Snap-On Skirting

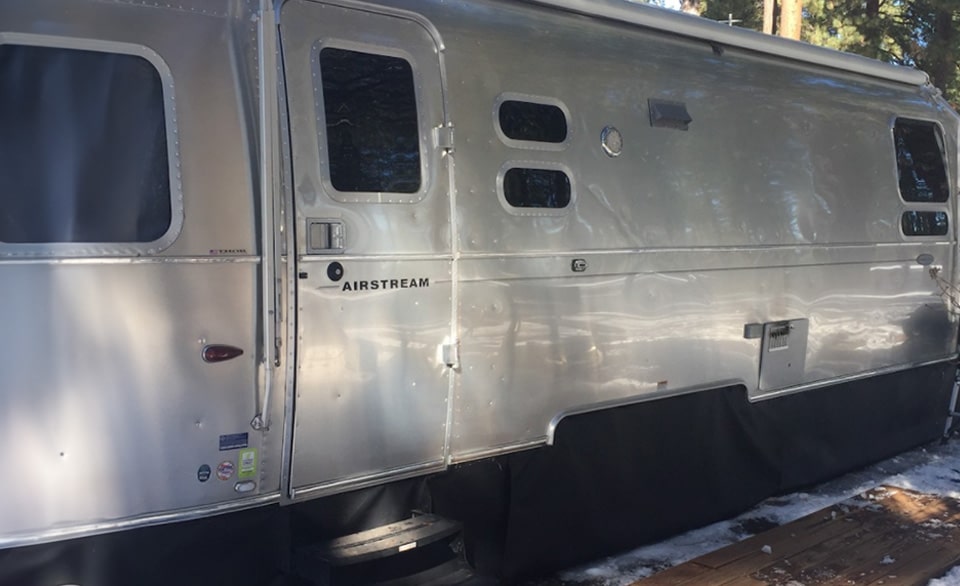
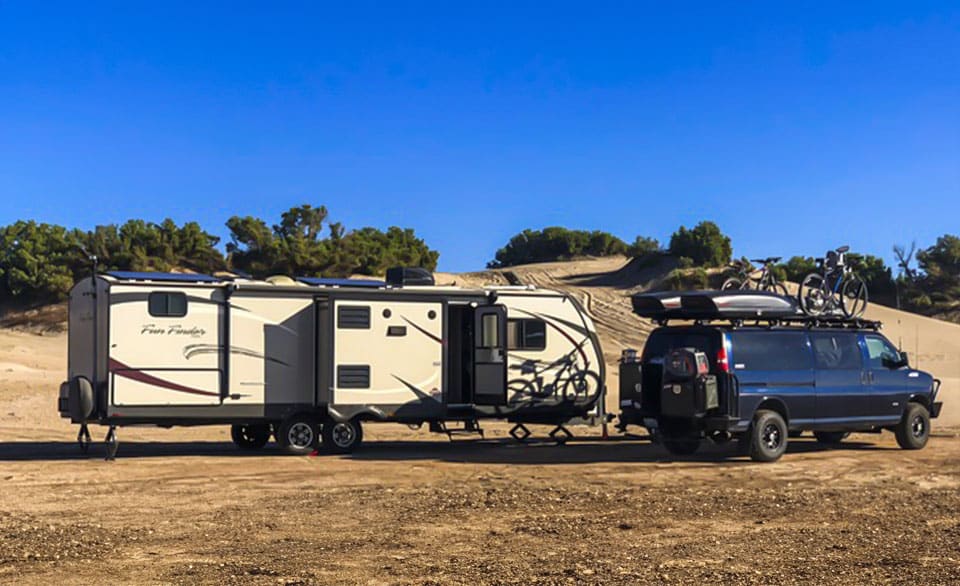
RV Snap-On Skirting:

RV snap-on skirting is a protective barrier that attaches to the bottom of your RV. It is typically made of durable fabric or vinyl. The price can vary drastically depending on the size and type of skirting you choose. For instance, stiff or rigid skirting will be the most effective and increase the R-value of your RV the best, but it will also be the most expensive option. Alternatively, soft skirting, usually made from vinyl rolls, is the best bang for your buck. It costs less than hard skirting and is typically easier to add/remove and store. However, it will not be as effective at insulating as hard skirting because there will inevitably be gaps at the base of the skirting if not weighed down, and the vinyl itself is not an efficient insulator. There are also plenty of DIY options using plywood, insulating panels, or spare vinyl.

Temperature control: RV skirting can help regulate the temperature inside your RV by providing an additional insulation layer.

Protection from elements: RV skirting can protect your RV from wind, rain, and snow, which can help prevent damage and keep your RV in good condition.

Pest control: RV skirting can also help keep pests, such as rodents and insects, from entering your RV.

Increased living and storage space: By adding RV skirting, you are, in essence, doubling the square footage of your RV and creating tons of additional storage space for anything that can be kept outside but needs a degree of protection, like bikes, extra shoes, outdoor equipment specific to the trip, etc. 

Consider the material, size, and color when choosing an RV snap-on skirting. First, look for skirting made of a durable, weather-resistant fabric designed to fit your make and model RV and is appropriate to the climates where you will most frequently have your RV. Next, consider the color of the skirting and choose one that complements the color of your RV. Finally, look at the products made and distributed by EZ Snap. They produce high-quality, pre-cut RV skirting kits that do not require drilling holes in your RV.
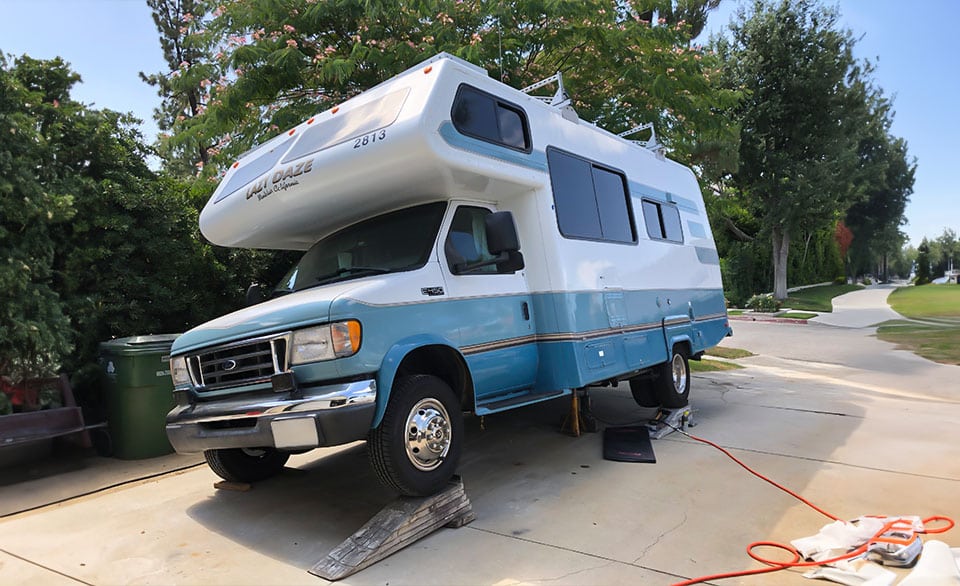
RV-Leveling Blocks

Image Credit: lw5315usflickr

RV-Leveling Blocks:

A level RV is essential for maintaining stability and comfort and preventing damage to your RV’s chassis and suspension over time. A level RV also ensures that your appliances, such as your refrigerator, work correctly and that your plumbing systems can drain adequately. 

There are several types of leveling blocks to choose from, including:

Plastic blocks: Plastic leveling blocks are lightweight and easy to use and are typically injection molded to fit the curvature of tires, maintaining a greater level of surface area contact and ensuring a solid hold. 

Wood blocks: Wood leveling blocks are inexpensive and can be made from scrap lumber. However, you will want to connect the blocks with a rope or chain to ensure they do not slip, as there is less surface area in contact with the tire with a block. 

Metal blocks: Metal leveling blocks are durable, can be used in extreme weather conditions, and tend to have much more intense traction to the tire in the form of tiny spikes that “bite” your tire. These are the most expensive and durable options but arguably one of the most effective and longest-lasting. 

How to use leveling blocks effectively:

When using leveling blocks, start with a surface cleared of rocks and debris. Use a bubble level to determine which corner is the lowest. Place a stack of blocks under that corner leveling jack, then raise the jack until close to level. Rinse and repeat for the remaining three leveling jacks.

RV Specific GPS Navigation System

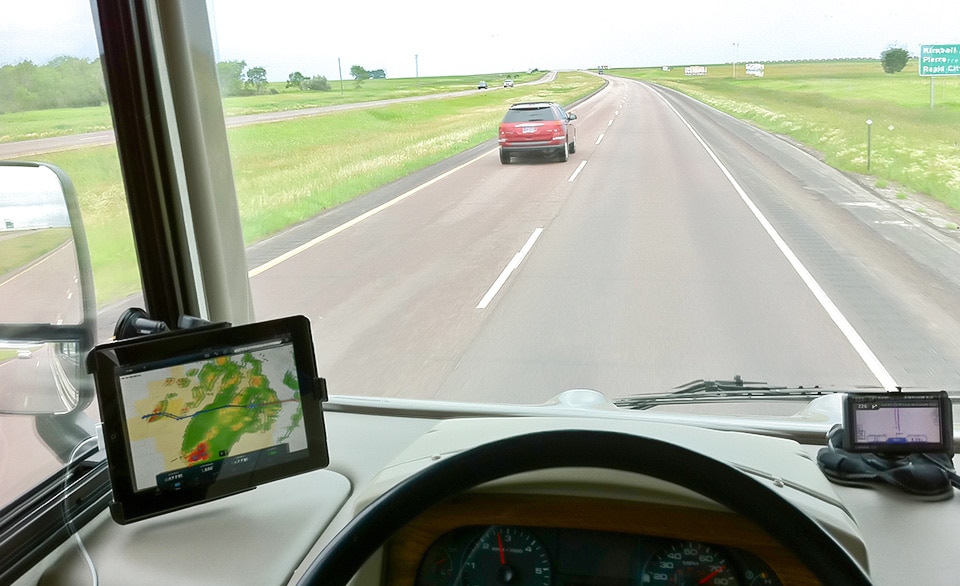
Image Credit: H. Michael Miley / flickr

RV Specific GPS Navigation System:

A dedicated RV GPS navigation system can help you navigate unfamiliar roads and avoid hazards like low bridges, narrow roads, and unexpectedly tight turns. RV GPS systems, similar to others, provide real-time traffic updates, which can help you avoid delays, save time, and enjoy your trip. 

When choosing an RV GPS navigation system, consider elements such as:

Screen size: A larger screen size can make reading the map easier and navigating.

Traffic updates: Real-time traffic updates can help you avoid delays and save time.

Voice commands: Voice commands can make it easier to use the GPS system while driving

Some popular RV GPS navigation systems include:

Garmin RV 890: This GPS system is designed specifically for RVs and provides real-time traffic updates, voice commands, and a large 8-inch screen.

TomTom Go Camper: This GPS system provides customized routes for RVs and includes features such as campsite reviews and alerts for low bridges and narrow roads.
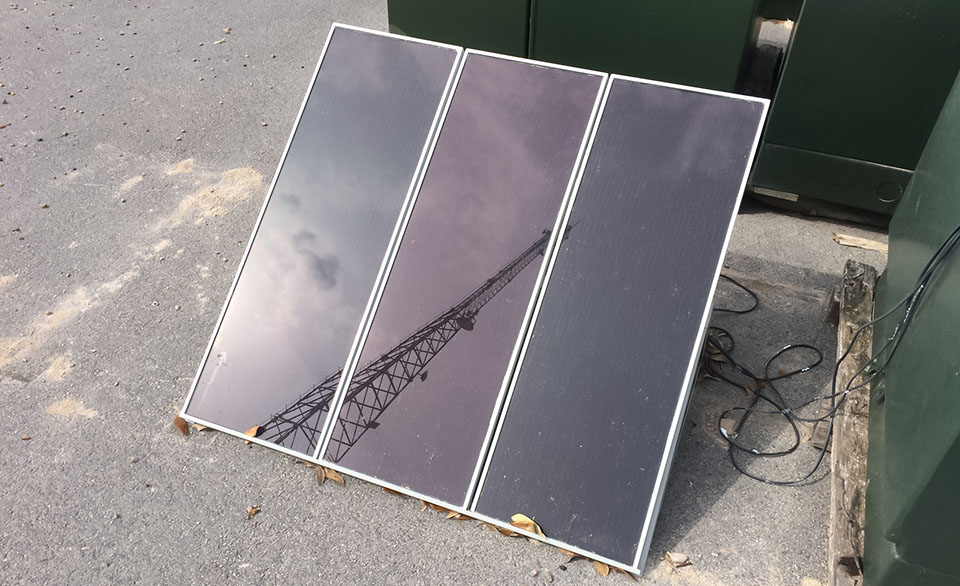
Portable Solar Panels

Image Credit: jcutrerflickr

Portable Solar Panels:

Solar power is a renewable and environmentally-friendly source of power for RVs. Portable solar panels can provide a reliable source of power for your RV, even when you’re off the grid, extend the duration of your trips, and expand the possibilities of where you can go. 

There are several types of portable solar panels to choose from, including:

Foldable solar panels: Foldable solar panels are lightweight and easy to transport but tend to be more expensive as they are more modular than rigid panels and typically restricted in power production due to the nature of the folding design limiting the physical size of the panel. These are an excellent option for supplemental power as they can be easily moved with shadows throughout the day. 

Rigid solar panels: Rigid solar panels are durable and can be mounted on your RV’s roof, these come in a wide variety of options, but you will want to look for monocrystalline panels as they are much more efficient and what most modern solar power systems will be using. 

Flexible solar panels: Flexible solar panels are lightweight and can be curved to fit the contours of your RV’s roof. These are the most expensive option, but for a good reason, as they are the lightest and most durable option. They can also be customized to your RV more than the other options and easily be removed. 

Consider the power output of the panels, power requirements of your RV, size, and weight when choosing a portable solar panel. In addition, look for a solar panel that is easy to install and has a high-efficiency rating, can connect to your current system or has a standalone battery system, and can meet your personal power requirements.
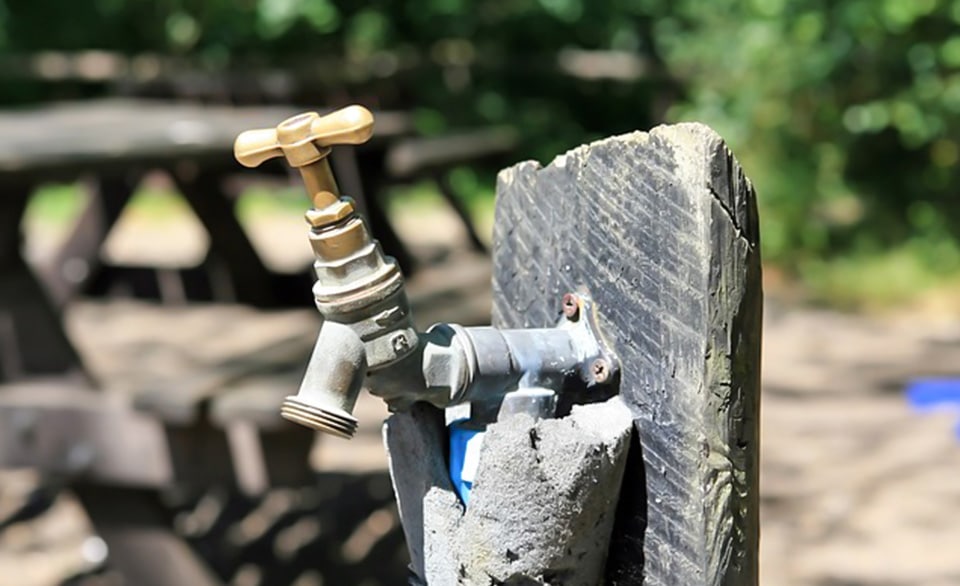
RV Water Filters

Image Credit: Robert Owen-WahlPixabay

RV Water Filters:

Clean water is essential for maintaining good health in your RV. Unfortunately, water sources in RV parks or campsites may contain bacteria, viruses, or other contaminants that can cause illness and damage your trip. So you need to have your own trusted water filtration system on (and off) the road. 

There are several types of water filters to choose from, including:

Inline water filters: Inline water filters are installed directly into the water line and are designed to remove sediment, chlorine, and other impurities. These are a great “first defense,” You should always have one in your RV to install on spigots before the water enters your holding tank. 

Under-sink water filters: Under-sink water filters are installed under the sink and provide clean drinking water to your RV faucet. This should be used with an inline filter for clean drinking water from unverified sources. 

Portable water filters: Portable water filters are lightweight and can filter water from any source. These are typically found in camping stores designed for backcountry or emergency settings. They are highly effective but very slow and have limited fill rates. 

Countertop or in-fridge water filters: These are filters that are filled up with unpurified water and are typically filtered using a gravity system and kept on your counter, such as a Berkey filter, or in your fridge, such as a Brita.

RV Surge Protectors

Image Credit: Aaronflickr

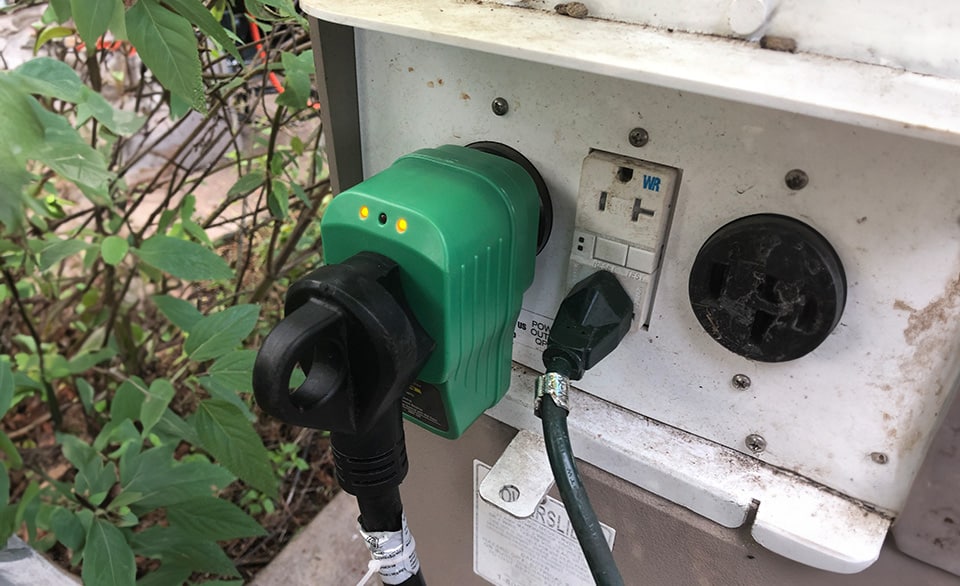
RV Surge Protectors:

A surge protector protects your RV’s electrical system from power surges and other electrical issues, which is especially important in places like RV parks or campgrounds, whose power stability is unknown. 

There are several types of RV surge protectors to choose from, including:

Portable surge protectors: Portable surge protectors can be used at any RV site and are easy to install.

Hardwired surge protectors: Hardwired surge protectors are permanently installed in your RV and provide continuous protection.

When choosing a surge protector, consider the level of protection, the size of your RV’s electrical system, and the type of plugs and connectors you need.
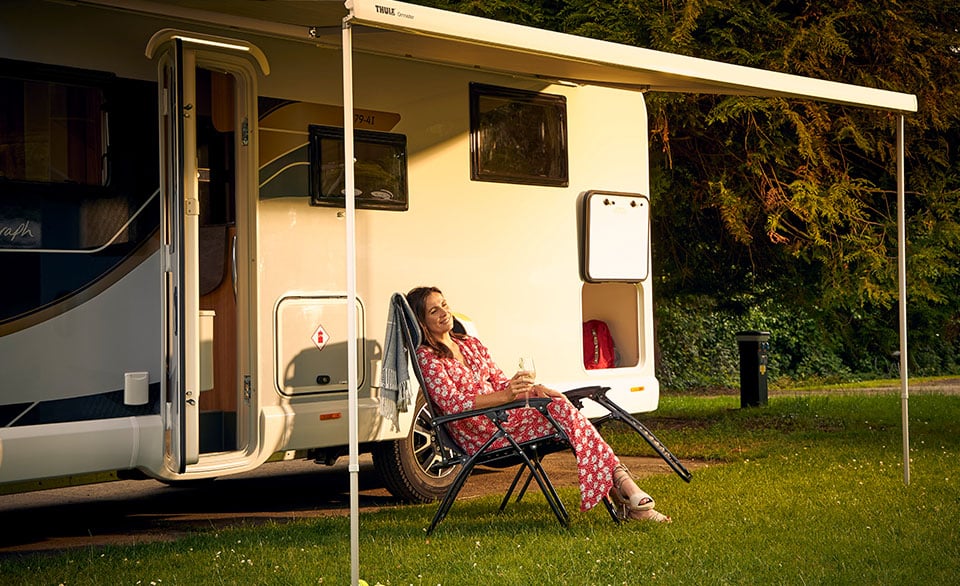
RV Awning and Outdoor Living Accessories

Image Credit: Bailey of Bristolflickr

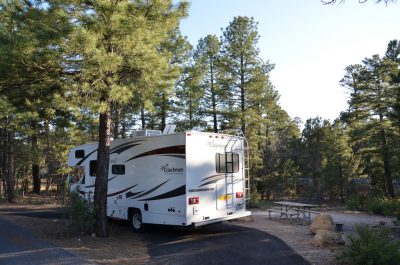
RV Awning and Outdoor Living Accessories:

An RV awning and outdoor living accessories can enhance your outdoor living space and make your RV experience more enjoyable.

There are several types of RV awnings to choose from, including:

Retractable awnings: Retractable awnings can be easily retracted when not in use, providing more space when needed.

Fixed awnings: Fixed awnings provide permanent shade and protection from the elements.

Slide-out awnings: Slide-out awnings provide shade and protection for your RV’s slide-outs.

Several additional outdoor living accessories can enhance your RV experience, including:

Outdoor rugs: Outdoor rugs can provide a comfortable and clean surface for outdoor living.

Outdoor furniture: Outdoor furniture can provide seating and relaxation for outdoor living.

Grills and cooking accessories: Grills and cooking accessories can provide a convenient way to cook.
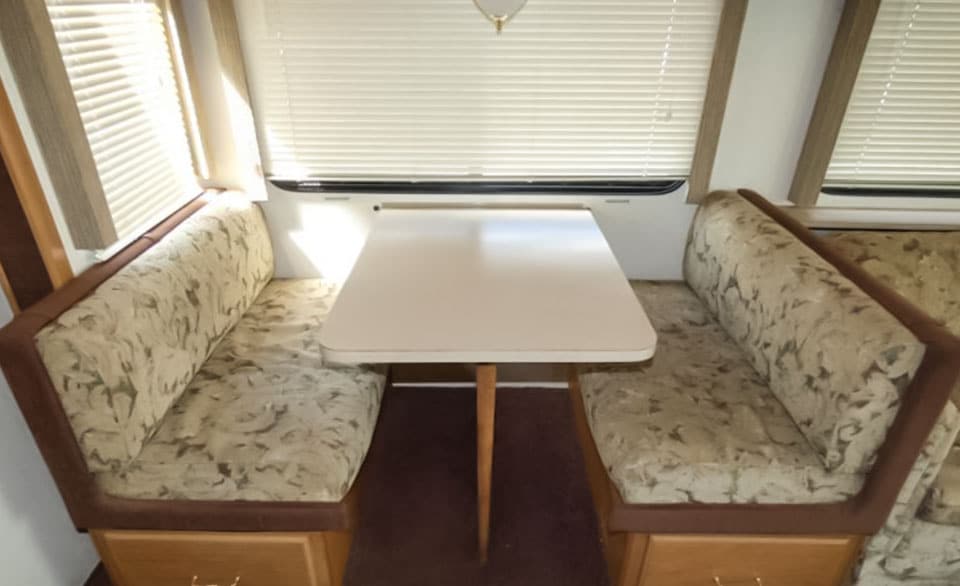
Easy-to-Install Blinds

Image Credit: Ryan Smithflickr

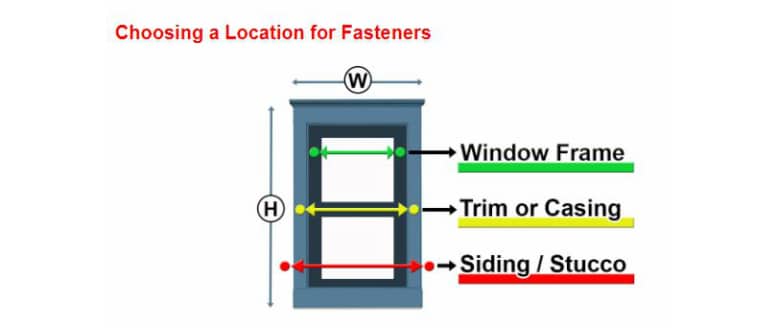
Easy-to-Install Blinds:

Blinds are an essential accessory for any RV, providing privacy and light control that you may not realize you need until the moment you need it. They can also help regulate the temperature inside your RV by blocking out sunlight and reducing heat transfer in and out of your RV. RVs aren’t the most insulated things in the world, so anything you can do to help retain heat goes a long way. 

There are several types of RV blinds to choose from, including:

Roller shades: Roller shades are made of fabric or vinyl and can be rolled up or down to control the amount of light that enters your RV. These are the “classic” kind of shades that you may see and are the most durable and lightweight option. 

Pleated shades: These are made of a paper-like material and can be opened and closed by pulling on a cord. Pleated shades are relatively durable for their material. Still, they can only take so much abuse if left down while operating your RV. 

Cellular shades: Cellular shades are made of a honeycomb-like material and provide superior insulation but are quite delicate in comparison, so consider spending the extra money on a more durable material if given the option. 

When selecting blinds for your RV, consider factors such as the material, color, and size. Look for blinds made of durable, lightweight materials designed to fit your RV windows, and consider your specific need for blinds. When installing blinds, follow the manufacturer’s instructions carefully and use the appropriate tools and hardware.

Thermal Insulation Kits

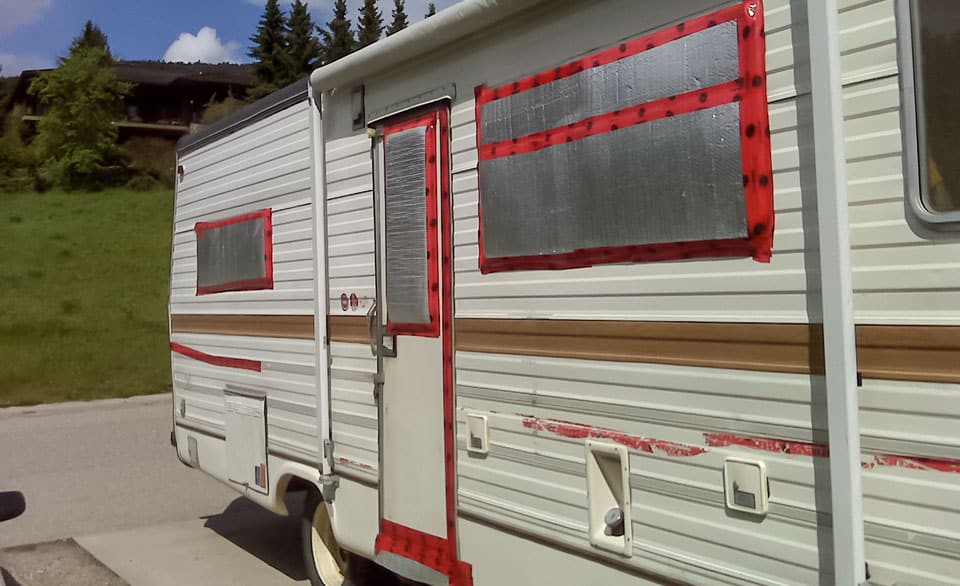
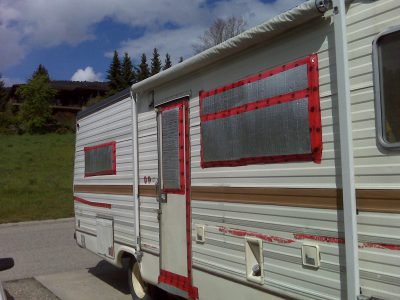
Thermal Insulation Kits:

Proper insulation is critical for maintaining a comfortable temperature inside your RV for you and your family. With adequate insulation, your RV can become more comfortable and warmer, making sleeping, relaxing, or working easier and feel more like your home away from home. 

There are several types of RV insulation kits to choose from that will create a much better traveling environment for you, including:

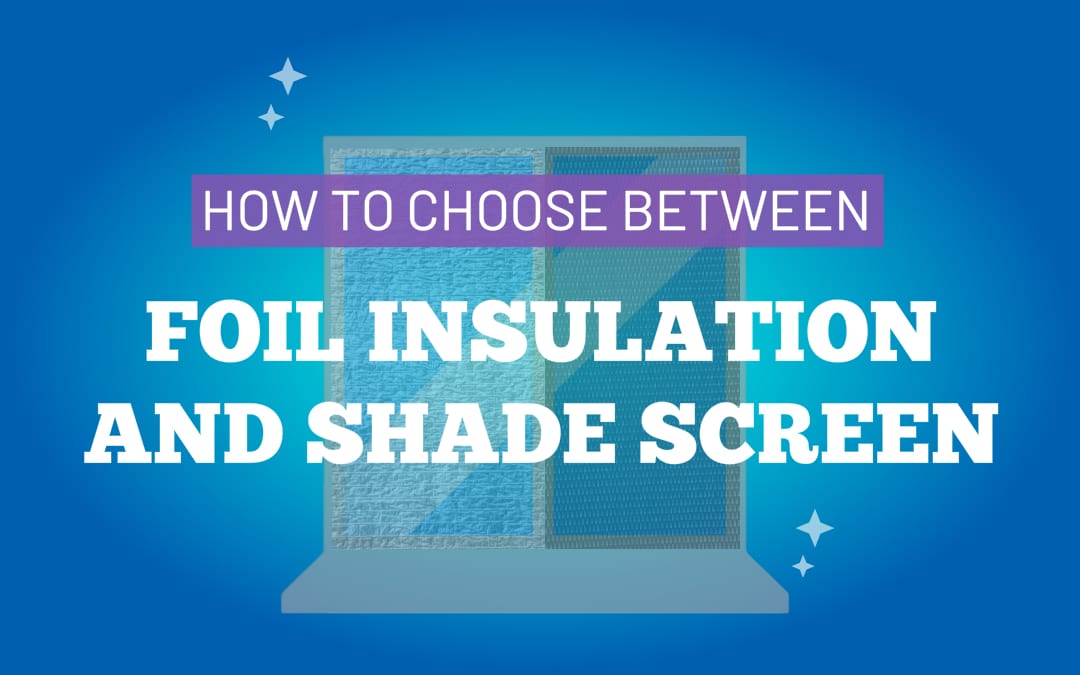
Foam insulation: Foam insulation is easy to install and provides excellent thermal insulation. You can cut it to tight tolerances custom to any nook and cranny in your RV. However, foam insulation is not the most durable thing in the world, so be careful when removing and storing it. 

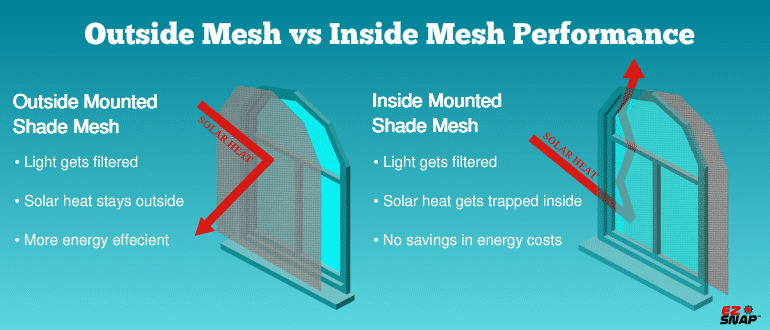
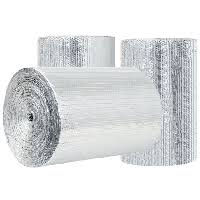
Reflective insulation: Reflective insulation is designed to reflect heat and is ideal for hot climates as it reflects heat away from your windows and traps the cool air inside. Also, very durable and easy to store as it is flexible and can be folded or rolled up. 

Insulation blankets: Insulation blankets are lightweight materials placed over windows and doors to reduce heat transfer. Insulation blankets are the easiest to install as you don’t need to be exact. In fact, they are thick curtains you put over your windows or can even hang up to create “walls” to trap heat within specific areas of your RV.

When installing insulation in your RV, following the manufacturer’s instructions carefully is essential. Wear gloves and protective clothing, as certain insulation materials, such as fiberglass, can irritate the skin. Consider hiring a professional insulation installer if you’re uncomfortable doing the work yourself.
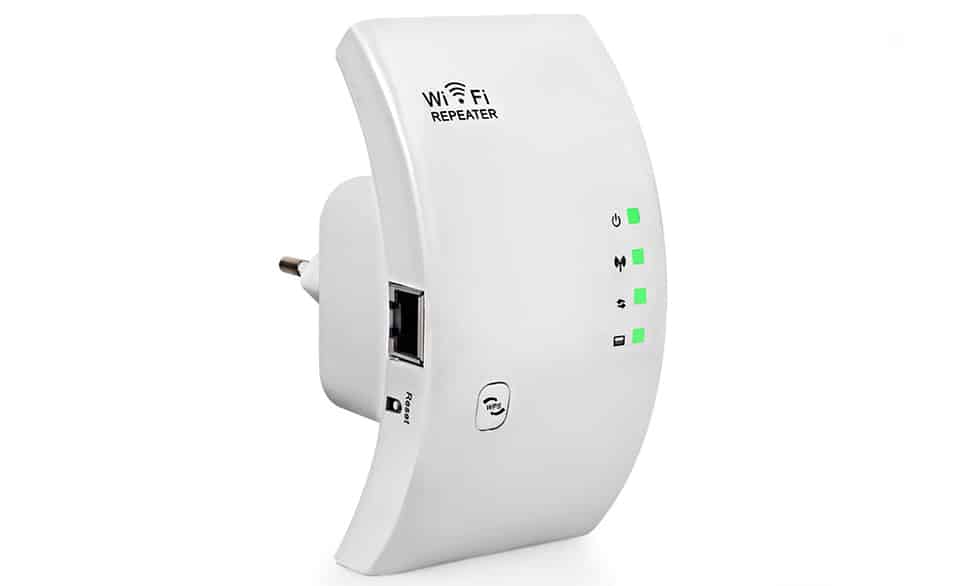
RV Wi-Fi Boosters

Image Credit: Indonesian Art Creativeflickr

RV Wi-Fi Boosters:

A Wi-Fi booster can help you stay connected to the internet while on the road. This is especially important for remote workers or those who need to stay connected to the internet while traveling or have a stable video call with friends to show them how great of a time you’re having in your RV.

There are several types of RV Wi-Fi boosters to choose from, including:

Wireless range extenders: WIFI range extenders enable you to receive a signal from further away, such as when you get assigned the furthest RV parking space from the building that holds the WIFI router for the campground. Another use for them is to transmit a signal further; for example, if you have Wi-Fi in your trailer, you can boost the signal to reach you further away if you have a nice spot you would like to relax AND have WIFI. 

Cellular signal boosters: Cellular signal boosters can boost the strength of your RV’s cellular signal, providing faster internet speeds and excellent internet connectivity when needed. These use your wireless provider, typically valid for folks using a mobile hotspot in their RV. 

Satellite internet: Satellite internet provides internet connectivity in remote areas where other types of internet may not be available and is the fastest and most reliable form of wireless internet. Also, the most expensive option and typically requires lengthier contracts. 

When choosing a Wi-Fi booster for your RV, consider factors such as the strength of the signal needed, the number of people needing WIFI in your RV, and the speed of the internet connection you need. 

Conclusion

Having the right accessories can significantly enhance your RV experience. From ensuring your RV is level and well-insulated to staying connected, this article’s 10 must-have RV accessories can dramatically improve your comfort and enjoyment while traveling.

Shade Kit Size Calculator for Window, Skylight, RV & Boat

Shade Kit Size Calculator for Window, Skylight, RV & Boat

We are proud to announce the launch of our brand new EZ Snap Shade Kit Size Calculator.

“What size window shade kit do I need?”

It’s the first question most people ask themselves when they want shade screen and figuring out the answer used to be difficult and time-consuming.

Now, our new calculator will instantly let you know what size kit you need, how many fasteners you need and how to cut your mesh in the most efficient way.

If your project is for an RV, boat or skylight you can use the exact same calculator.

All you need is the measurements (in inches) of the windows or skylights that need EZ Snap shade screen.

If you don’t know how to measure your window, there are a few things to consider. 

The first step is to determine where you want to mount your fasteners. 

You can mount your EZ Snap shade screen on the window frame, on the trim or on the siding.

If you are planning on using the adhesive fasteners, you will need a 1 inch wide, smooth mounting surface.

For people who have a domed skylight and aren’t sure how to measure it, start where you will be mounting your fasteners and measure across the dome itself.

Once you have the height and width for your windows or skylights, add an extra 2 inches to all your measurements.

Your shade mesh will be mounted an inch past your fasteners, so adding 2 more inches in height and width will account for the extra shade mesh needed on the top and bottom, and both sides.

Now that you have your measurements, enter the numbers in the appropriate fields.

If you have multiple windows of the same size you have the option to change the quantity.  

Next, enter your email address and press Calculate. 

Our program will analyze your measurements and will let you know the recommended size of shade kit, how many fasteners you need (in total, as well as how many per window) and how to cut your mesh.

You will also get the results emailed to you to have as a guide when it comes time for your installation.

You can see there is a category called ‘Max fastener spacing’. The calculator takes into account the size of your window and will automatically adjust your required fastener spacing.

We recommend a maximum of 10 inch spacing between fasteners for windows under 25 square feet (which is most windows). If your window is 25 square feet or larger, then you will need a maximum of 5 inch spacing.

We also recommend placing an extra fastener on all four of your window corners.

There is going to be more force on the fasteners in the corners, so placing two in every corner and offsetting them will give twice the holding power and will help keep your mesh secure and problem-free. Our calculator automatically adds an extra 4 fasteners to every window.

You can see the results below include an easy to follow cutting guide where all the different windows are labeled and have their measurements included.

No more guessing, no more math, just enter in your window or skylight measurements and find out exactly what you need to order.

Follow this link to try our calculator for yourself!

How Much EZ Snap Window Shades Can Lower the Home Temperature?

How Much EZ Snap Window Shades Can Lower the Home Temperature?

How much of a difference will EZ Snap make?

It’s a common question that we get. People want to know that a product will deliver if they are going to spend their hard earned money on it.

So, if you ever wondered what kind of temperature difference EZ Snap exterior shade screen can make then you’ll want to read this.

It’s already well known that the best way to cut down on heat is to use exterior shade.

The reason why it’s such an effective method at reducing solar heat gain is because it stops the heat from entering the house.

It’s why window blinds and drapes are not effective at keeping a house cool. They are on the wrong side of the glass.

Windows are typically the source for up to 48% of the heat build up inside a home, and blinds can only knock down a fraction of that.

That’s because when your shade is on the inside of the glass, then the heat has already gotten inside the house and you are fighting a losing battle.

The key is to stop the solar heat from ever getting inside the house in the first place, and that is what exterior shade provides.

EZ Snap exterior shades can stop up to 90% of solar heat, which means you will get a more comfortable space and a lower energy bill.

As for what kind of difference that means in temperature, here are some customer reviews of our shades that show what our shade kits can do.

Window Shade Temperature Difference

James wrote to us because he was ready to install another AC unit before finding EZ Snap.

“I have been searching for years for an inexpensive way to cool my upstairs.

I was almost ready to put in a second HVAC system when I stumbled upon EZ Snap. The windows face west and they get pummeled by the sun.

I just installed these and with my thermal imaging camera there is a 23 degree difference between the window with the solar shade and the one without.

I could not even believe it. I went back every hour to check and it was still the same readings!

The install was super easy and it actually looks decent. I was worried they would look like covers over the windows but they appear more like thick window screens.

Hopefully they hold up long term, but for the price you really can’t beat it! Thank you so much!”

We also get a lot of people who call to tell us about their hot skylights.

The difference that one skylight with a lot of sun exposure can make to a room is astounding.

We’ve heard from customers who tell us they’ve abandoned entire rooms because of how unbearable they can get from a hot skylight.

With EZ Snap skylight shades, you can get your house back.

Skylight Shade Temperature Difference

Here’s a customer review from Bob G. that shows the temperature difference EZ Snap made in their kitchen:

“Our kitchen has a number of southern facing windows plus skylights. When the outside temperature got more than 90 degrees – the kitchen would get into the high 80’s.

We ordered enough for two skylights and four windows with the EZ Snap system. Shipping was super fast and the packaging was well done.

The system was super simple to install. The install took about two hours, including going up and down on the roof.

After we installed, the temperature in the kitchen stayed in the 70’s even as it got to 90 degrees outside. Take a look at the picture – you can see the outside temp is 93 degrees, while it is a cool 76 degrees inside.”

With that kind of temperature swing, EZ Snap shades end paying for themselves through lower energy costs.

Follow this link if you would like more information about our line of shade products.

Don’t Replace Your Old Windows with Low-E Glass – Use Shade Screens

Don’t Replace Your Old Windows with Low-E Glass – Use Shade Screens

Window Shades
Skylight Shades
RV Skirting
RV Shades
Boat Shades

Imagine losing $1000 from your income every single year.

For most American households, that’s roughly how much it will cost to heat and cool their home for the year.

That adds up, especially when every dollar counts.

It’s no surprise that people are looking for ways to save on energy costs.

Typically, windows are the worst energy culprits on any given house.

Heat gain and heat loss through windows account for between 25%-30% of a home’s energy use for heating and cooling.

If a window has failing seals, it will perform even worse.

Even the type of the window frame can affect energy performance.

If the window frame is made from a material that is a poor insulator, such as aluminum, it can create what’s known as a thermal bridge and conduct heat from inside the house to outside. 

One inefficient window can lose as much heat as 10 to 20 times what an insulated wall would lose.

Even if your window is new and well sealed, it could still be the cause for a lot of energy use in your home.

Solar energy is still able to pass through glass, so even an insulated window can heat up a room quickly if it gets a lot of sun.

In the dead heat of summer, having even just one window or skylight that gets a lot of sun exposure can mean the AC is running all day just to cool the room off.

So What Can Be Done?

The most common recommendation to make old windows more energy efficient is to replace them entirely with new, low-e windows.

Low-e windows are windows that have been treated with a film that reflects solar heat while still letting natural light pass through.

With less solar heat entering the home, the AC no longer has to work as hard to keep the house cool.

The less energy the AC uses, the more savings there are for the homeowner.

Is replacing old windows with new ones worth the cost?

There will be energy savings from replacing old windows with new, low-e glass windows but it comes with a substantial upfront cost.

The National Association of Realtors estimates the cost of replacing every window in a 2,450 square foot house to be around $19,000.

For a household trying to save money in energy bills, that’s a very large investment with a slow return.

What are some more cost effective alternatives to replacing an old window?

The most important thing to do with old windows is stop any exchange of air between the inside and outside of your house.

For drafty windows, using a product like rope caulk to seal up any holes can make a major improvement.

Plastic film insulation is another popular and effective solution for sealing up older windows.

Both options are inexpensive and simple enough for anyone to apply.

For windows that get a lot of sun exposure, a quick and easy way to make them more energy efficient is to mount exterior shade mesh on them (also called shade screen or solar screen/mesh/fabric).

There are a lot of different kinds of shade mesh available, but they all work by the same principle.

It’s a mesh fabric, and like low-e glass, it works by blocking solar heat and light, while still letting natural light through.

Unlike low-e glass, which is a film that’s been applied to the glass, solar mesh is installed on the exterior of the window.

Applying the shade screen to the outside of a window is key for it’s ability to keep a room cool.

If it’s applied to the inside of a window it will still work but not nearly as well.

If it’s mounted on the inside the screen will still provide shade from the sun, but the energy savings will be significantly less because the heat will be trapped inside the house.

If you are considering shade screens for your home and don’t know which one to choose, the easiest and best option is EZ Snap.

They sell do-it-yourself kits that let you mount and cut your mesh to your window, no matter it’s size or shape.

EZ Snap is also a fraction of the cost of what you would pay to buy and install new windows.

You save on the price of the product, and because you are able to install it yourself, you save on labor as well.

EZ Snap shade screen is also better at blocking solar heat than low-e glass.

The effectiveness of heat blocking applications for windows is measured by the Solar Heat Gain Coefficient (SHGC).

The SHGC is the amount of solar radiation (heat) that transmits through a window.

It’s measured between 0 and 1, and the less solar heat that transmits through a window, the lower a window’s SHGC number is going to be.

There are a lot of low-e glass makes and models, but the range of SHGC for most of them from varies between 0.60 – 0.25. 

Shade mesh from EZ Snap has a SHGC of .18.

Something else to consider is that low-e windows are known to damage turf and siding.

In the right conditions, the solar heat that they reflect can focus into a hot spot creating a magnifying glass effect that melts anything in its path.

The problem is becoming so rampant with the rising popularity of low-e windows that one scientist is calling them, “the next asbestos.”

If you or your neighbor has a low-e window that is damaging property, EZ Snap is also the ideal solution.

Rather than replace the entire window, installing EZ Snap window shade over the problem window provides a fast and effective fix.

The solar heat is reflected off of the mesh before it ever reaches the window, preventing any chance of a hot spot forming.

The result is 100 percent effective and can be installed in as little as an afternoon.

An added benefit to an exterior shade product like EZ Snap is that it’s also removable. So, when the winter months come you can take it off and benefit from the natural heating you get with the sun.

It’s like getting free heat in the winter.

No matter which window option you choose to make your home more energy efficient, it’s important to do your research before making a final decision. 

You want to make sure that you are going to be getting the maximum return for your investment.

Replacing your windows might be worth the cost, or it might make more sense to invest in solutions that are able to make your existing windows more energy efficient.


How To Choose Between Foil Insulation and Shade Screen

How To Choose Between Foil Insulation and Shade Screen

If you have a window that gets a lot of sun you likely also have a room that gets so hot it could double as an oven.

For those who want to cut down the heat, using air conditioning can be expensive and loud. Black-out drapes usually block more light than heat, and fans can only do so much. The two most common choices for people who want a low cost A/C alternative are foil insulation and shade screens.

But which one to choose?

We’ve provided a quick breakdown of both to help you decide what will work best for you.

To insulate or not to insulate?

Foil Insulation

Foil Insulation

If you are considering going the foil insulation route it’s best to know how it works. Foil, or reflective, insulation essentially functions like a mirror that reflects light and heat out of a given space.

Typically, it’s used on windows that get a lot of sun exposure.

Having just one window that gets a lot of sun can cause the room temperature to soar on a sunny day. Foil insulation can be cut to size and placed over it as an effective heat blocking measure.

For it to work effectively it must be hung on the outside of the window and it has to completely cover it. Unfortunately, this also means covering up your view and finding a way to attach it to the outside of your house or RV (usually tape). 

If the foil is placed on the inside, it means that sunlight is hitting the window and heat will still be able to get into the room as a result. The key to keeping a room cool is making sure the heat stays on the outside of the glass because once heat gets in it’s hard to dissipate.

If you have double pane windows, placing foil insulation on the inside of the glass may cause the window seal to fail.

The reason for this is that the foil is reflecting heat back through the glass panes causing it to super heat. If there is a sudden change in temperature, like a cloud covering the sun, the stress from the metal expanding and contracting rapidly can cause the seal to fail.

RV with Foil Insulation

RV with foil insulation taped over windows

It’s the same principle for why applying tint on a window will void the manufacturers warranty.

Foil insulation can also be an eyesore. Having it attached to your window also means you are essentially hanging a big piece of tinfoil to your home or RV all summer.

Despite these drawbacks, foil insulation remains a popular choice because it’s cheap and effective.

If you are thinking of going with foil, Reflectix is generally considered one of the best brands in terms of value for quality.

What about Shade Screens?

Shade screen is a fabric that is designed to be placed over a window and provide shade. Just like the foil insulation it works best when attached to the outside of your window.

There’s a lot of different varieties of shade screens on the market, so if you’re planning on purchasing shade screen know that they are not all created equal.

There’s a lot of different brands out there and it can be hard to feel like you’re picking the right one. Some have irregular or uneven weaves, or some will give you shade but you also won’t be able to see through it.

DIY RV Window Shades

RV with EZ Snap Window Shades

The best shade screen is from EZ Snap. It’s a patented product made from a non-fray mesh that blocks 90% of the sun’s heat. It’s also been designed to allow you to see out of it so you only block the heat, not the view.

EZ Snap is attached with a stick-on stud, so there’s no drilling and no holes left behind. The mesh snaps onto the studs, so it can be taken on and off without much hassle. What’s also great is that a kit from EZ Snap comes with everything you need to install your shade mesh, so no frantic trips to Home Depot needed.

When the EZ Snap mesh is hung it looks natural over a window, and while a lot of the heat is blocked, you still get a good amount of natural light coming through. 

Choosing between foil insulation and shade screen comes down to a matter of preference and appearance. If you are in need of a quick fix then foil will get you through. If you are wanting a more permanent solution that looks good, but still retains your view, then a product like EZ Snap shades is the answer.

10 Best Ways to Keep Your RV Cool in Summer Heat

10 Best Ways to Keep Your RV Cool in Summer Heat

Nothing beats the summer for getting out and enjoying your RV.

However, keeping your rig cool in the midday heat can be a challenge for even the most experienced traveler.

You might have an AC unit that is too loud, or boondocking, or maybe you don’t have AC at all. Fear not, we’ve compiled the top ten inexpensive ways to keep your RV cool without an air conditioner this summer.

1. Parking is everything

Be sure to park smart this summer. Where you park is the number one way to keep the heat down. Sidling up beside a nice lush tree will help keep one side of your RV cool, plus it’s doesn’t cost a thing.

Be aware of what side your RV is facing as well. The hottest part of the day is typically around 3 pm, so you want to try and keep as few windows exposed as possible to the afternoon sun.

2. Clean and be cool

Having good airflow in your RV is a key part of keeping it cool. Something that gets overlooked a lot is the dust and grime buildup in the areas behind and around your fridge and stove. If the airflow is inefficient then you will have heat flowing back into the RV, making for unhappy campers. Before your set out on your adventure, make sure to give those places a thorough clean.

3. Swap out those bulbs

When you’re trying to keep the temperature down every little thing counts, and this is one that doesn’t take much of an effort to do. If you’re still using incandescent light bulbs, know that each one of those works like a tiny heat generator. For the power they consume, around 90% of it is expended as heat.

Switch those old bulbs over to LED light bulbs, they’ll give you the same amount of light but with a fraction of the heat.

4. Your biggest fan(s)

There are two ways to use your fans to cool down for those hot days and nights. During the day get those fans pointed right at you. Air that is moving feels cooler than air that is still, so you will at least get some relief with some fans blowing at you.

In the evening, when the air is cooler outside of your RV than inside, point your fans facing out the windows. This way you will be blowing the hot air out and at the same time drawing the cool air in. The more windows you can have open for an effective cross-breeze, the better.

5. Cook out

Try to cook the majority of your meals outside of your RV. Any time you fire up your oven you are generating a lot of heat that is hard to dissipate. Plus, who wants to cook in a sweltering hot room? Cook your meals outside, either over the fire or on a camp stove.

It may take a bit more work to haul your ingredients and cookware in and out of your RV, so try and make enough so you have leftovers and don’t have to cook every single meal.

6. Shade Screens are a dream

Usually the main heat culprit in your RV is your biggest window or windows. The sun’s rays come in through the glass and heat up the interior of your RV. Then, because the heat has nowhere to go, it just keeps getting hotter and hotter.

The key is to stop the sun from even getting through the glass, and EZ Snap Shade Screens are by far the easiest and best option for attaching shade to your RV. The best part is that they block the 90% of the heat but you can still see out of them, so you get to keep your view.

EZ Snap Exterior Blinds for RV Coach

RV with EZ Snap Shades

7. Tarp time

They may not be pretty but tarps are the Swiss Army Knife of any good RV’r. They’re inexpensive, they don’t take up a lot of space and they have a variety of uses. If there are any trees nearby you can try and attach your tarp across them to make some extra shade and cut down on the sun exposure to your RV.

8. Get on Google

Depending on the nature of your trip you may be planning your stops well in advance. Use Google Earth to scout your prospective stops to try and cherry pick the sites that will have the most shade. You will be glad you spent the extra time planning when the midday sun is out and you are relaxing in the shade from a nearby tree.

9. Night time is the right time (to cool down)

If your RV is like an oven during the day, the evening is the time to cool down not just yourselves, but your over-hot RV as well. Open up all those windows and turn those fans on.

Don’t forget to open your cupboards and storage bays, as those are places where heat can build up over the course of the day and can keep your RV uncomfortably hot if not aired out.

10. Skylight too bright

Your large windows may take all of the blame for the heat, but don’t forget about your skylight. They are notorious heat generators, and they can be a big reason why your RV is unbearable hot. Covering up your skylight is one of the best ways your can bring down the temperature in your RV this summer. Here’s a list of the top four ways to cover a hot skylight for under $100.

Top 4 Fixes Under $100 to Block Skylight Heat

Top 4 Fixes Under $100 to Block Skylight Heat

Window Shades
Skylight Shades
RV Skirting
RV Shades
Boat Shades

Need To Cover Your Hot Skylight?

Here’s How To Beat The Heat On A Budget

While they are known for keeping things bright, skylights also have a dark side.

With all the light they let in skylights can heat up a room to the point where it becomes an abandoned part of your home.

The cause of your hot house is called “the greenhouse effect”: light comes in, heats up your room, and then has nowhere else to go. Which would be fine if you were growing tomatoes in your living room, but chances are you’re not.

Even with the AC on max some rooms just can’t be cooled, and the sun’s rays can also cause your furniture and floors to fade.

We’ve compiled a list of the top four DIY ways to cool your skylight and get your house back.


1. Paint over your skylight

This one is as simple as it sounds. The key to cooling a hot skylight is to stop the sun before it gets through the glass.

If you can block the light, you can block the heat. Painting over your skylight will stop light from getting through and will keep your house much cooler for just the cost of a can of paint.

The main drawback with painting your skylight is that it is a fairly permanent fix. Scraping paint off is time-consuming and you will undoubtedly be left with more than a few scratches on your glass.

Depending on how hot your room is getting though, this may be a sacrifice you are willing to make.


2. Tarp it up

A quick and easy 
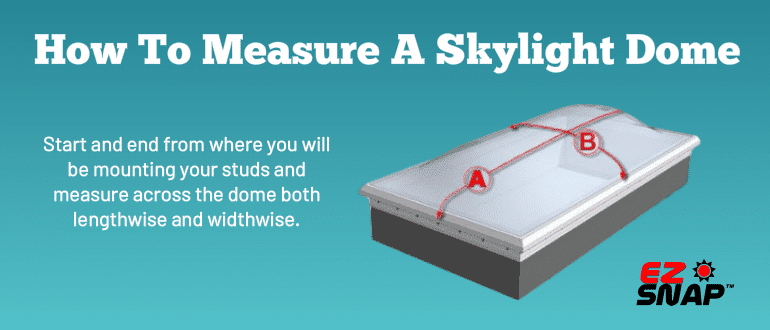
fix that is by far the cheapest of all your options. Simply buy a blue tarp that is several feet longer than your skylight. Lay it over top of the skylight so that it is completely covered and pin down the excess fabric using bricks. It’s a fast, cheap, and easy skylight cover.

You’ll still get some ambient light coming through and most of the heat will be stopped, but expect your room to have a blue tinge.

Depending on how visible your skylight is from the street, you may also have the neighborhood eyesore on your roof all season. Once summer’s over, it’s only a matter of picking up the bricks and rolling up your tarp and you get your skylight back without a whole lot of trouble.


3. Board it up

This method requires the most amount of skill, but it’s the only one that doesn’t involve a trip to the roof. You will need to buy and cut a piece of foam insulation board that will fit snugly into your skylight shaft opening.

Then, along the outside of the insulation board attach weather stripping. This will ensure a tight fit that you can push in or take out depending on the weather.

This one may take some trial and error as you will need to cut the foam board to just the right size so it is just big enough to squeeze into the opening and effectively pin itself in place.

The biggest drawback with this method is that you are now trapping all the heat between the skylight and the insulation. This heat can build up to the point that your seals could fail or your glass could crack, so proceed with caution.


4. EZ Snap Skylight Shades

EZ Snap Raised Skylight Exterior Blinds

EZ Snap is a solar mesh that attaches to the outside of your skylight that is proven to block up to 90 percent of the sun’s heat. It still lets in lots of natural light, plus it’s affordable and a breeze to install. 

First, measure the size of your skylight and then order the appropriate kit from https://ezsnapdirect.com/products/skylight-shades/.

Once the kit comes, no special tools are needed to install it. Simply attach your mounting studs to the frame and then attach the mesh to the studs using the pins and caps included in the kit. Once it’s on it can be left on all year round.

If you want some direct sun in those cooler months you can also easily unsnap the mesh and store it away until next year.

Whichever method you choose to combat your sizzling skylight, know that the US Department of Energy concluded that exterior blinds and shades are up to seven times more effective at stopping heat from entering the home than interior blinds or window tinting.

Shade “Product of the Year”

EZ Snap® Quick & Easy

The patented EZ Snap® fasteners & our proprietary non-fray fabrics make it easy for you to “cut to size” and install right on site. Our “NO DRILL” 3M™ adhesive snap studs also mean no holes in your skylights, windows or RV with professional-looking results, every time.

  • No Experience Needed
  • No Special Tools Required
  • No Drill 3M™ Adhesive Studs
  • Non-Fray EZ Snap™ Solar Shading Mesh